September 3, 2020
Hitched Eyelet
Learn how to sew a reinforced eyelet
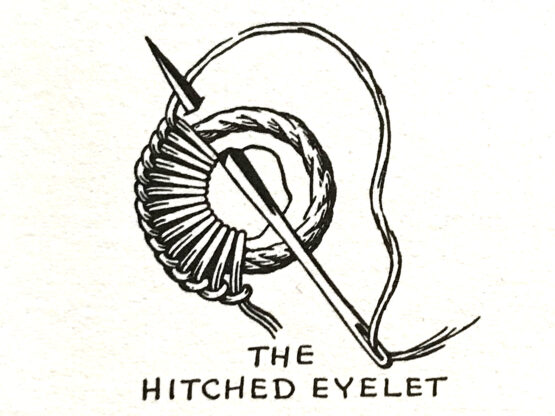
Hitched eyelets are a very useful thing to know how to make. When reinforced with a tiny grommet, they are speedy to sew and you can produce very neat results quickly once you get the hang of it. The eyelet you end up with will be quite strong, and will prevent the fabric around it from stretching or tearing if you want to run a line through. Follow the steps below to try it for yourself!
Supplies:
- canvas
- a heavy needle
- about 6' of waxed thread
- thicker cord
- a quarter for tracing
- scissors
- a pen or marker
You can swap out any small round thing for the quarter; whatever you use to trace your circle will end up being the outside diameter of your grommet. The thicker cord is for the grommet itself; see our previous tutorial on making rope grommets if you want more detailed instructions.

Here you can see the size difference between the cord we used for our grommet and three different kinds of thread that would all work for the hitches. Exact sizes don't matter too much. Experiment with what you have to see what works for you!
Instructions:

Step 1: Start with a piece of heavier cord that is about three and a half times the diameter of your quarter. The ring should be just smaller than the quarter (or other item you are tracing)
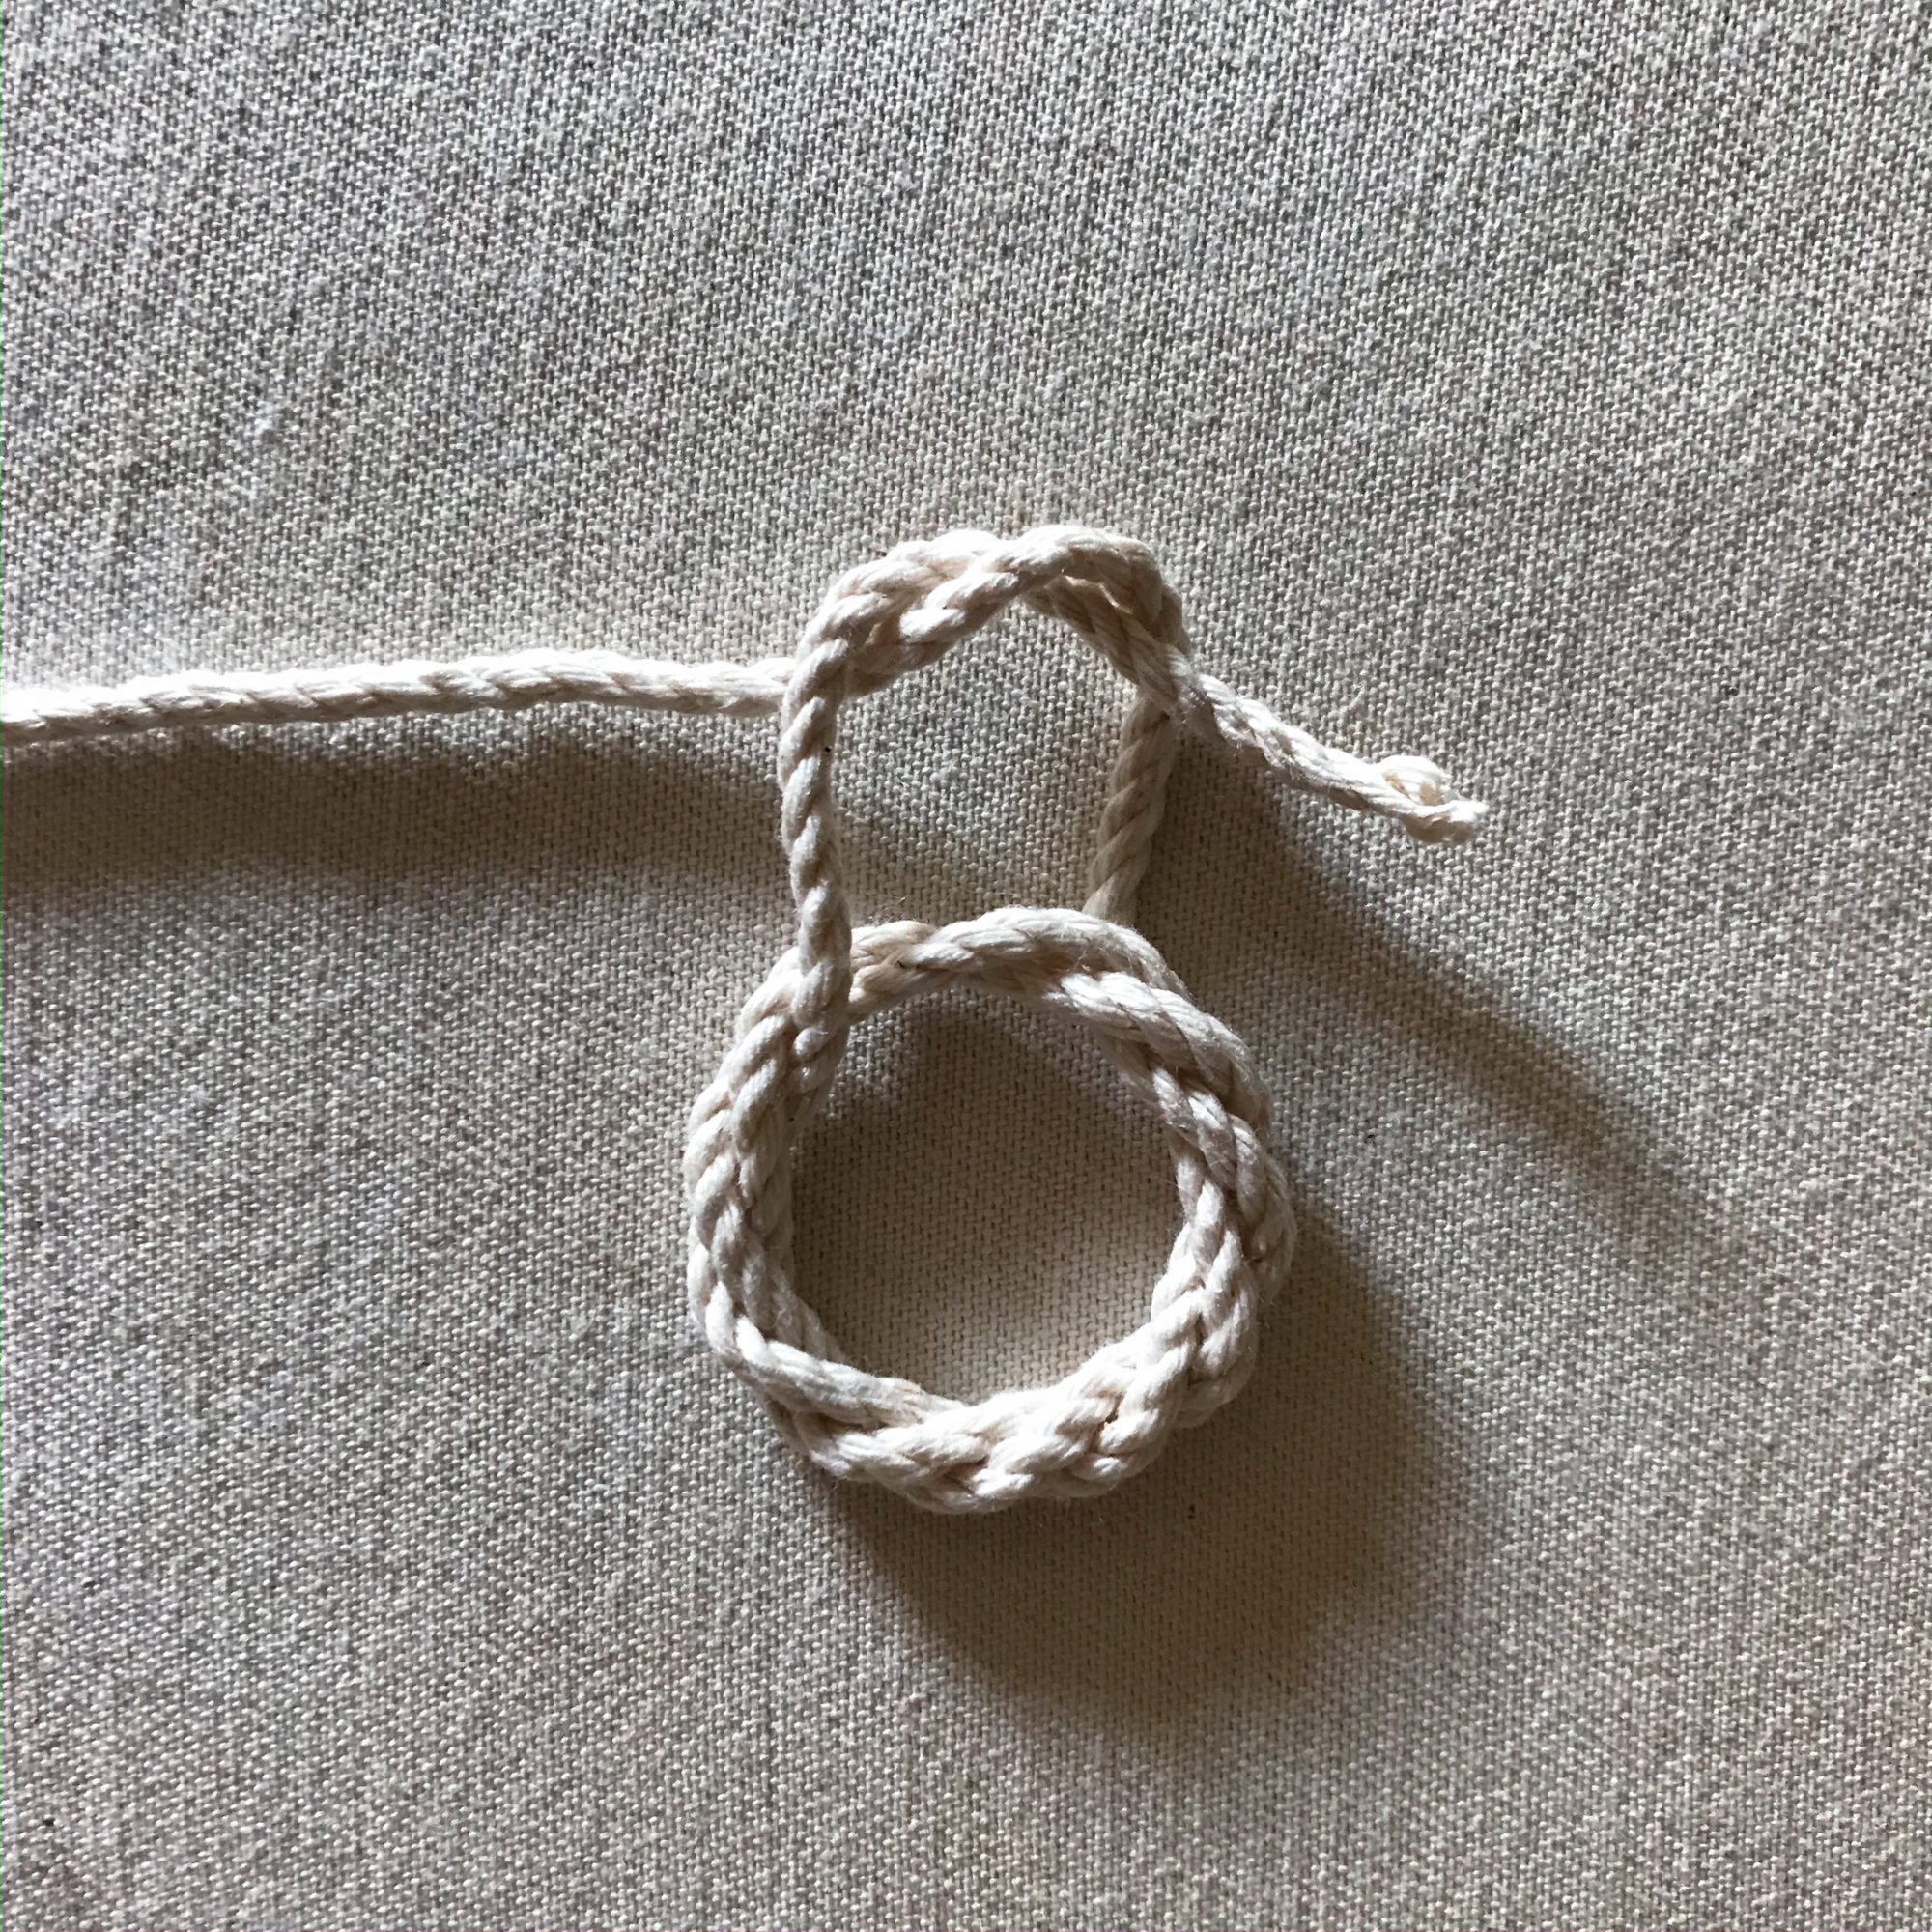
Step 2: Keep weaving the cord around itself until you have a three-strand ring. Tie an overhand knot when you get to the end
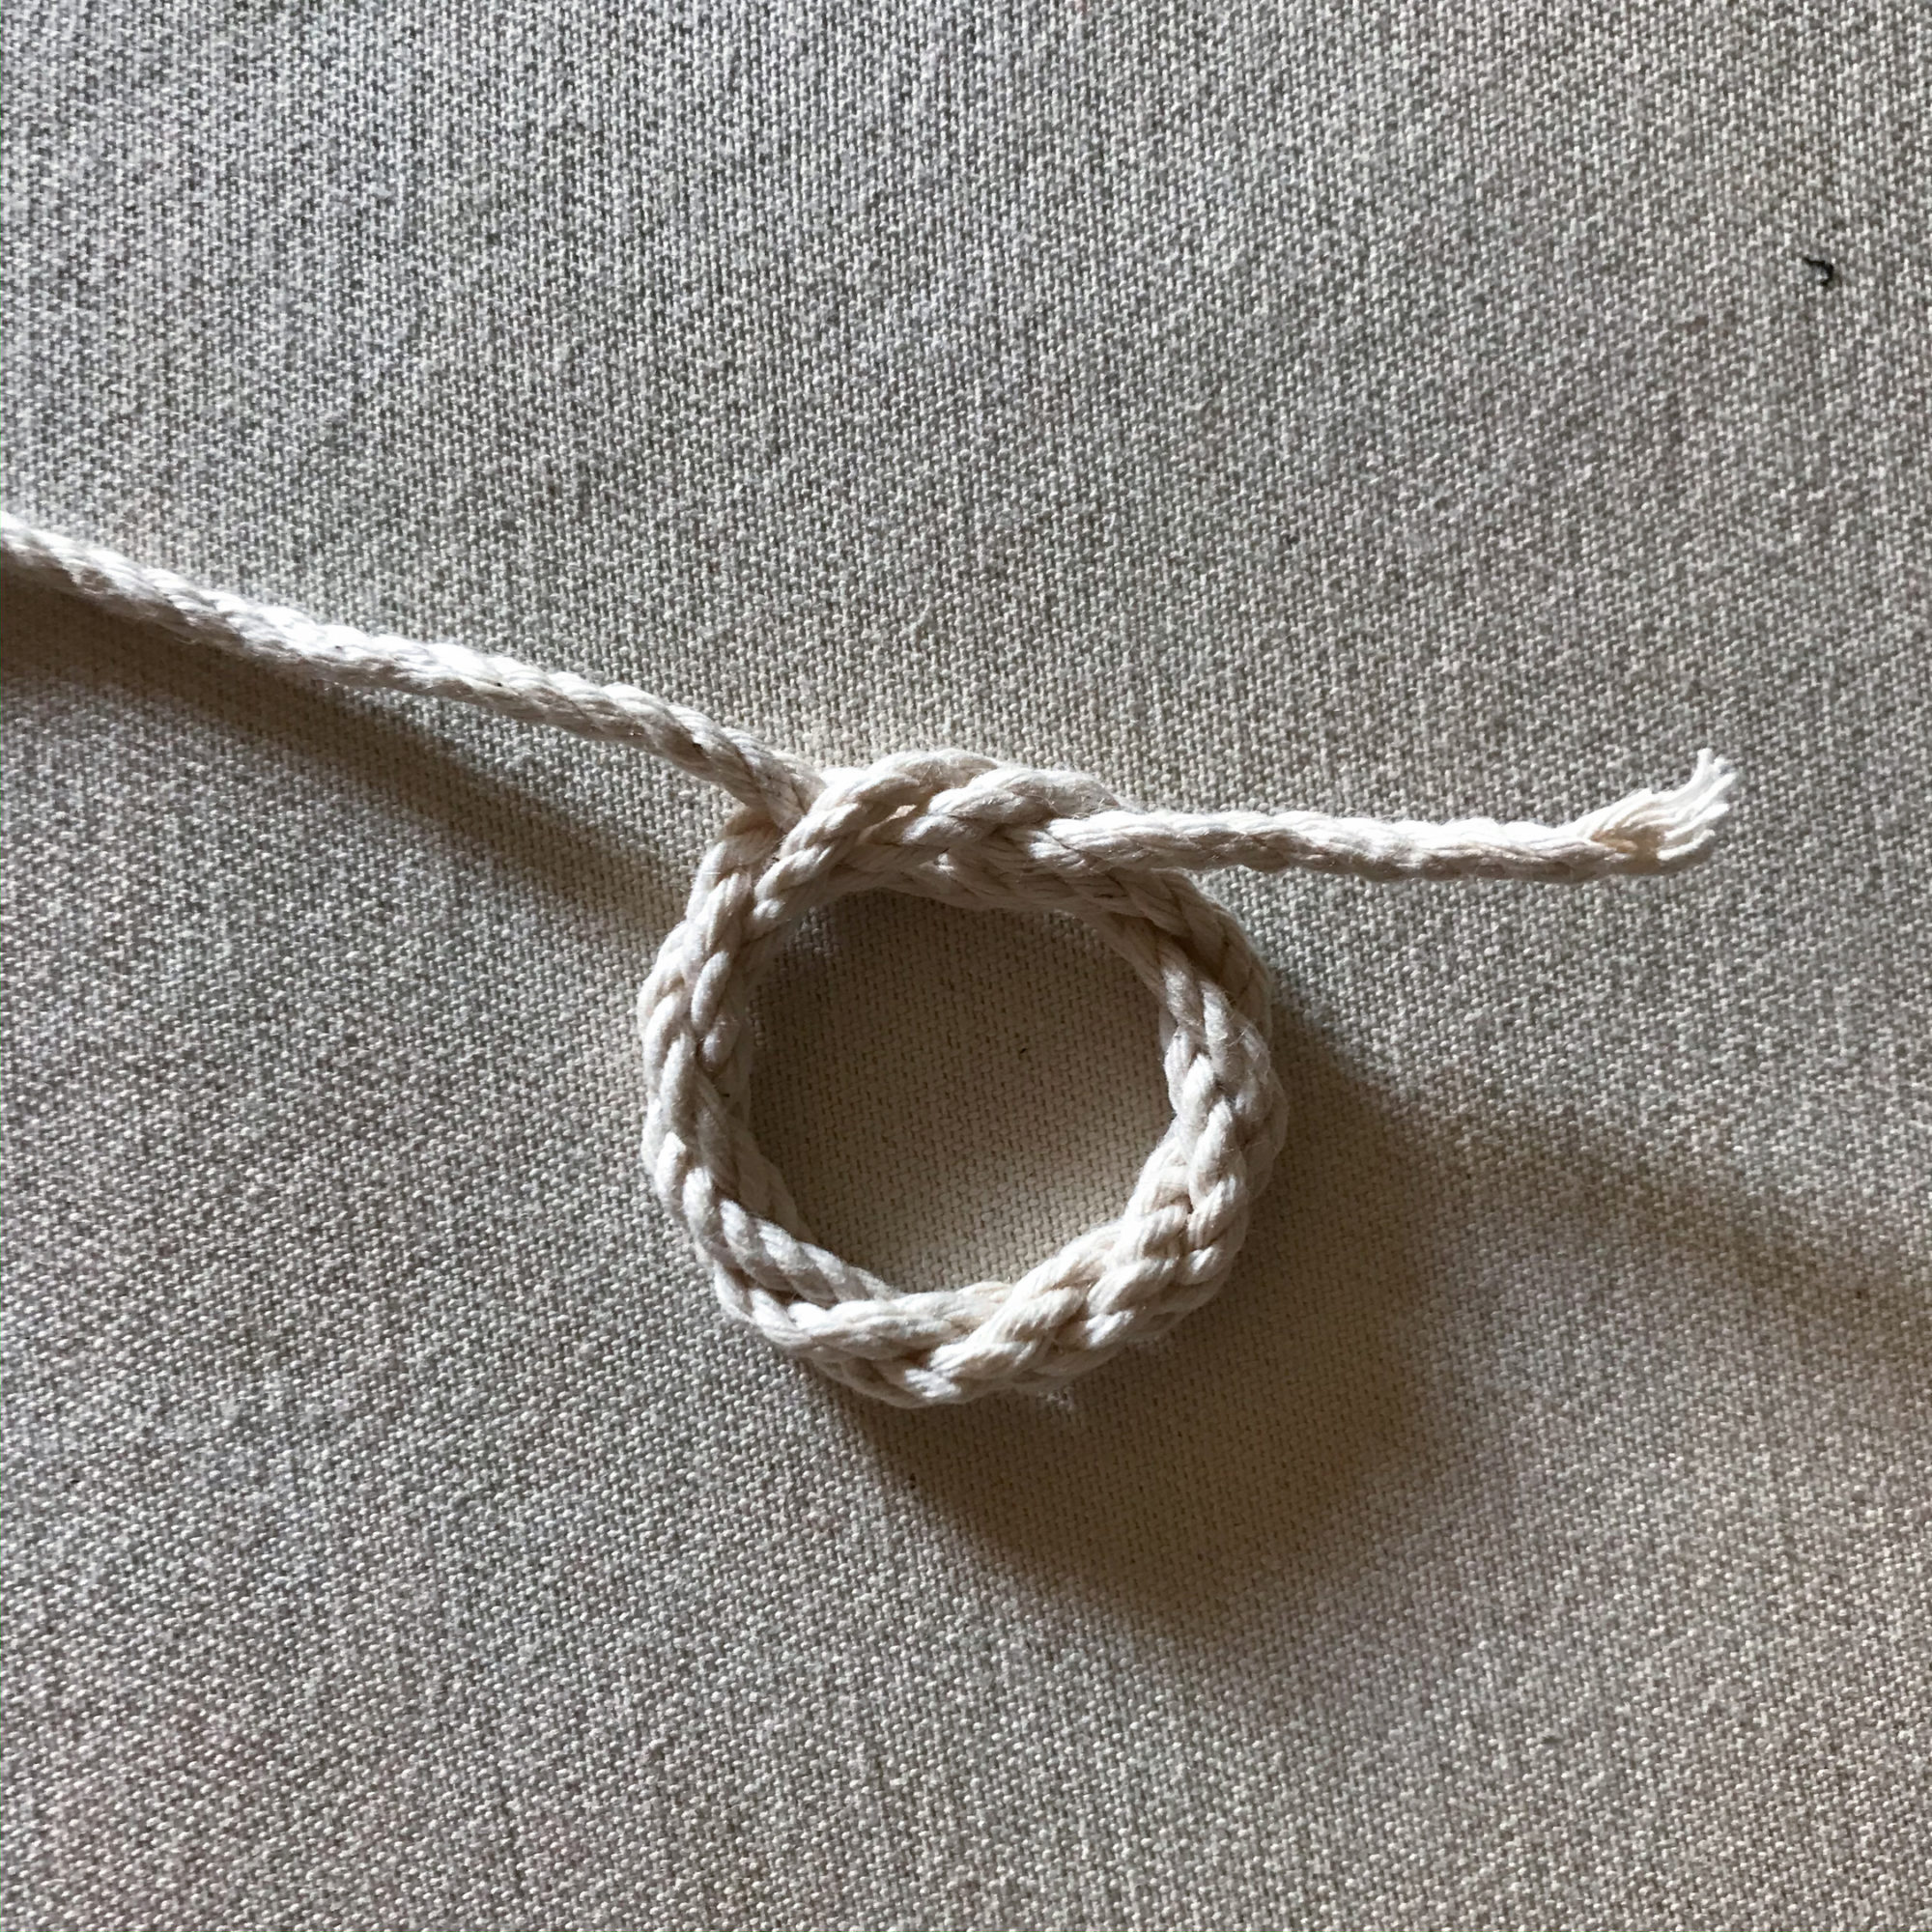
Step 3: Gently snug the overhand knot into your grommet. Be careful not to pull too hard or you will make the ring collapse!
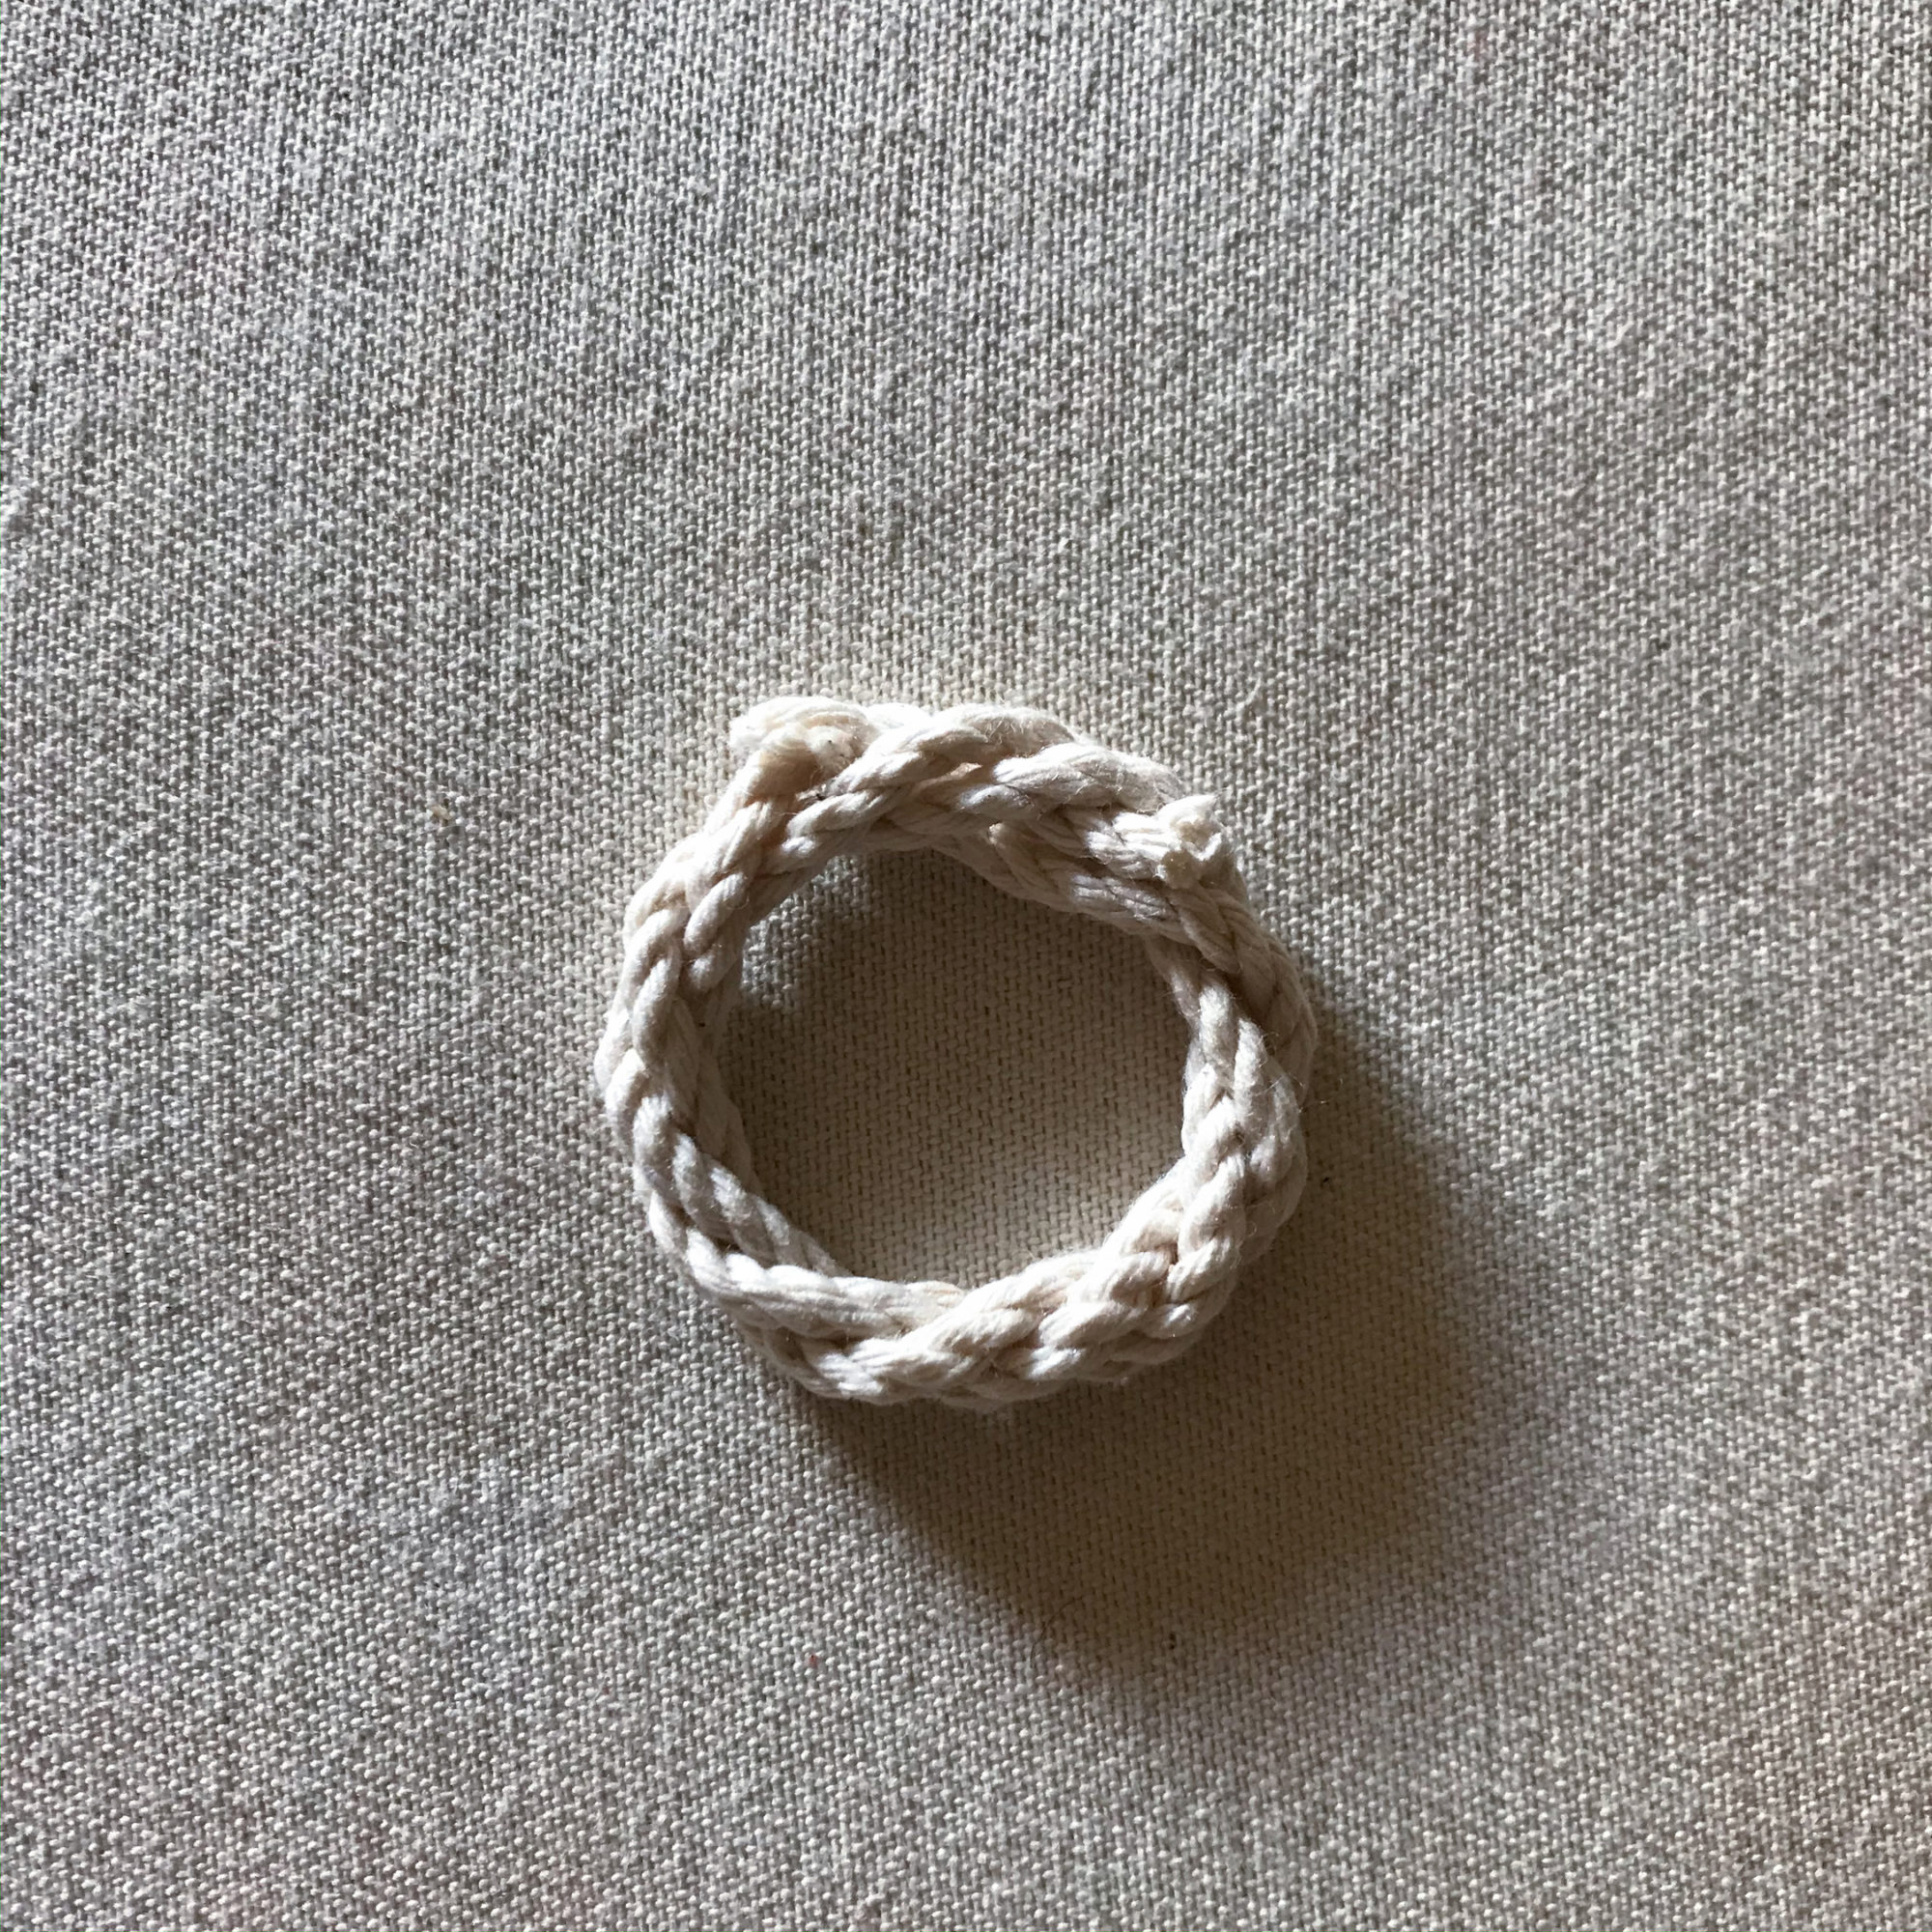
Step 4: Trim the ends of your grommet
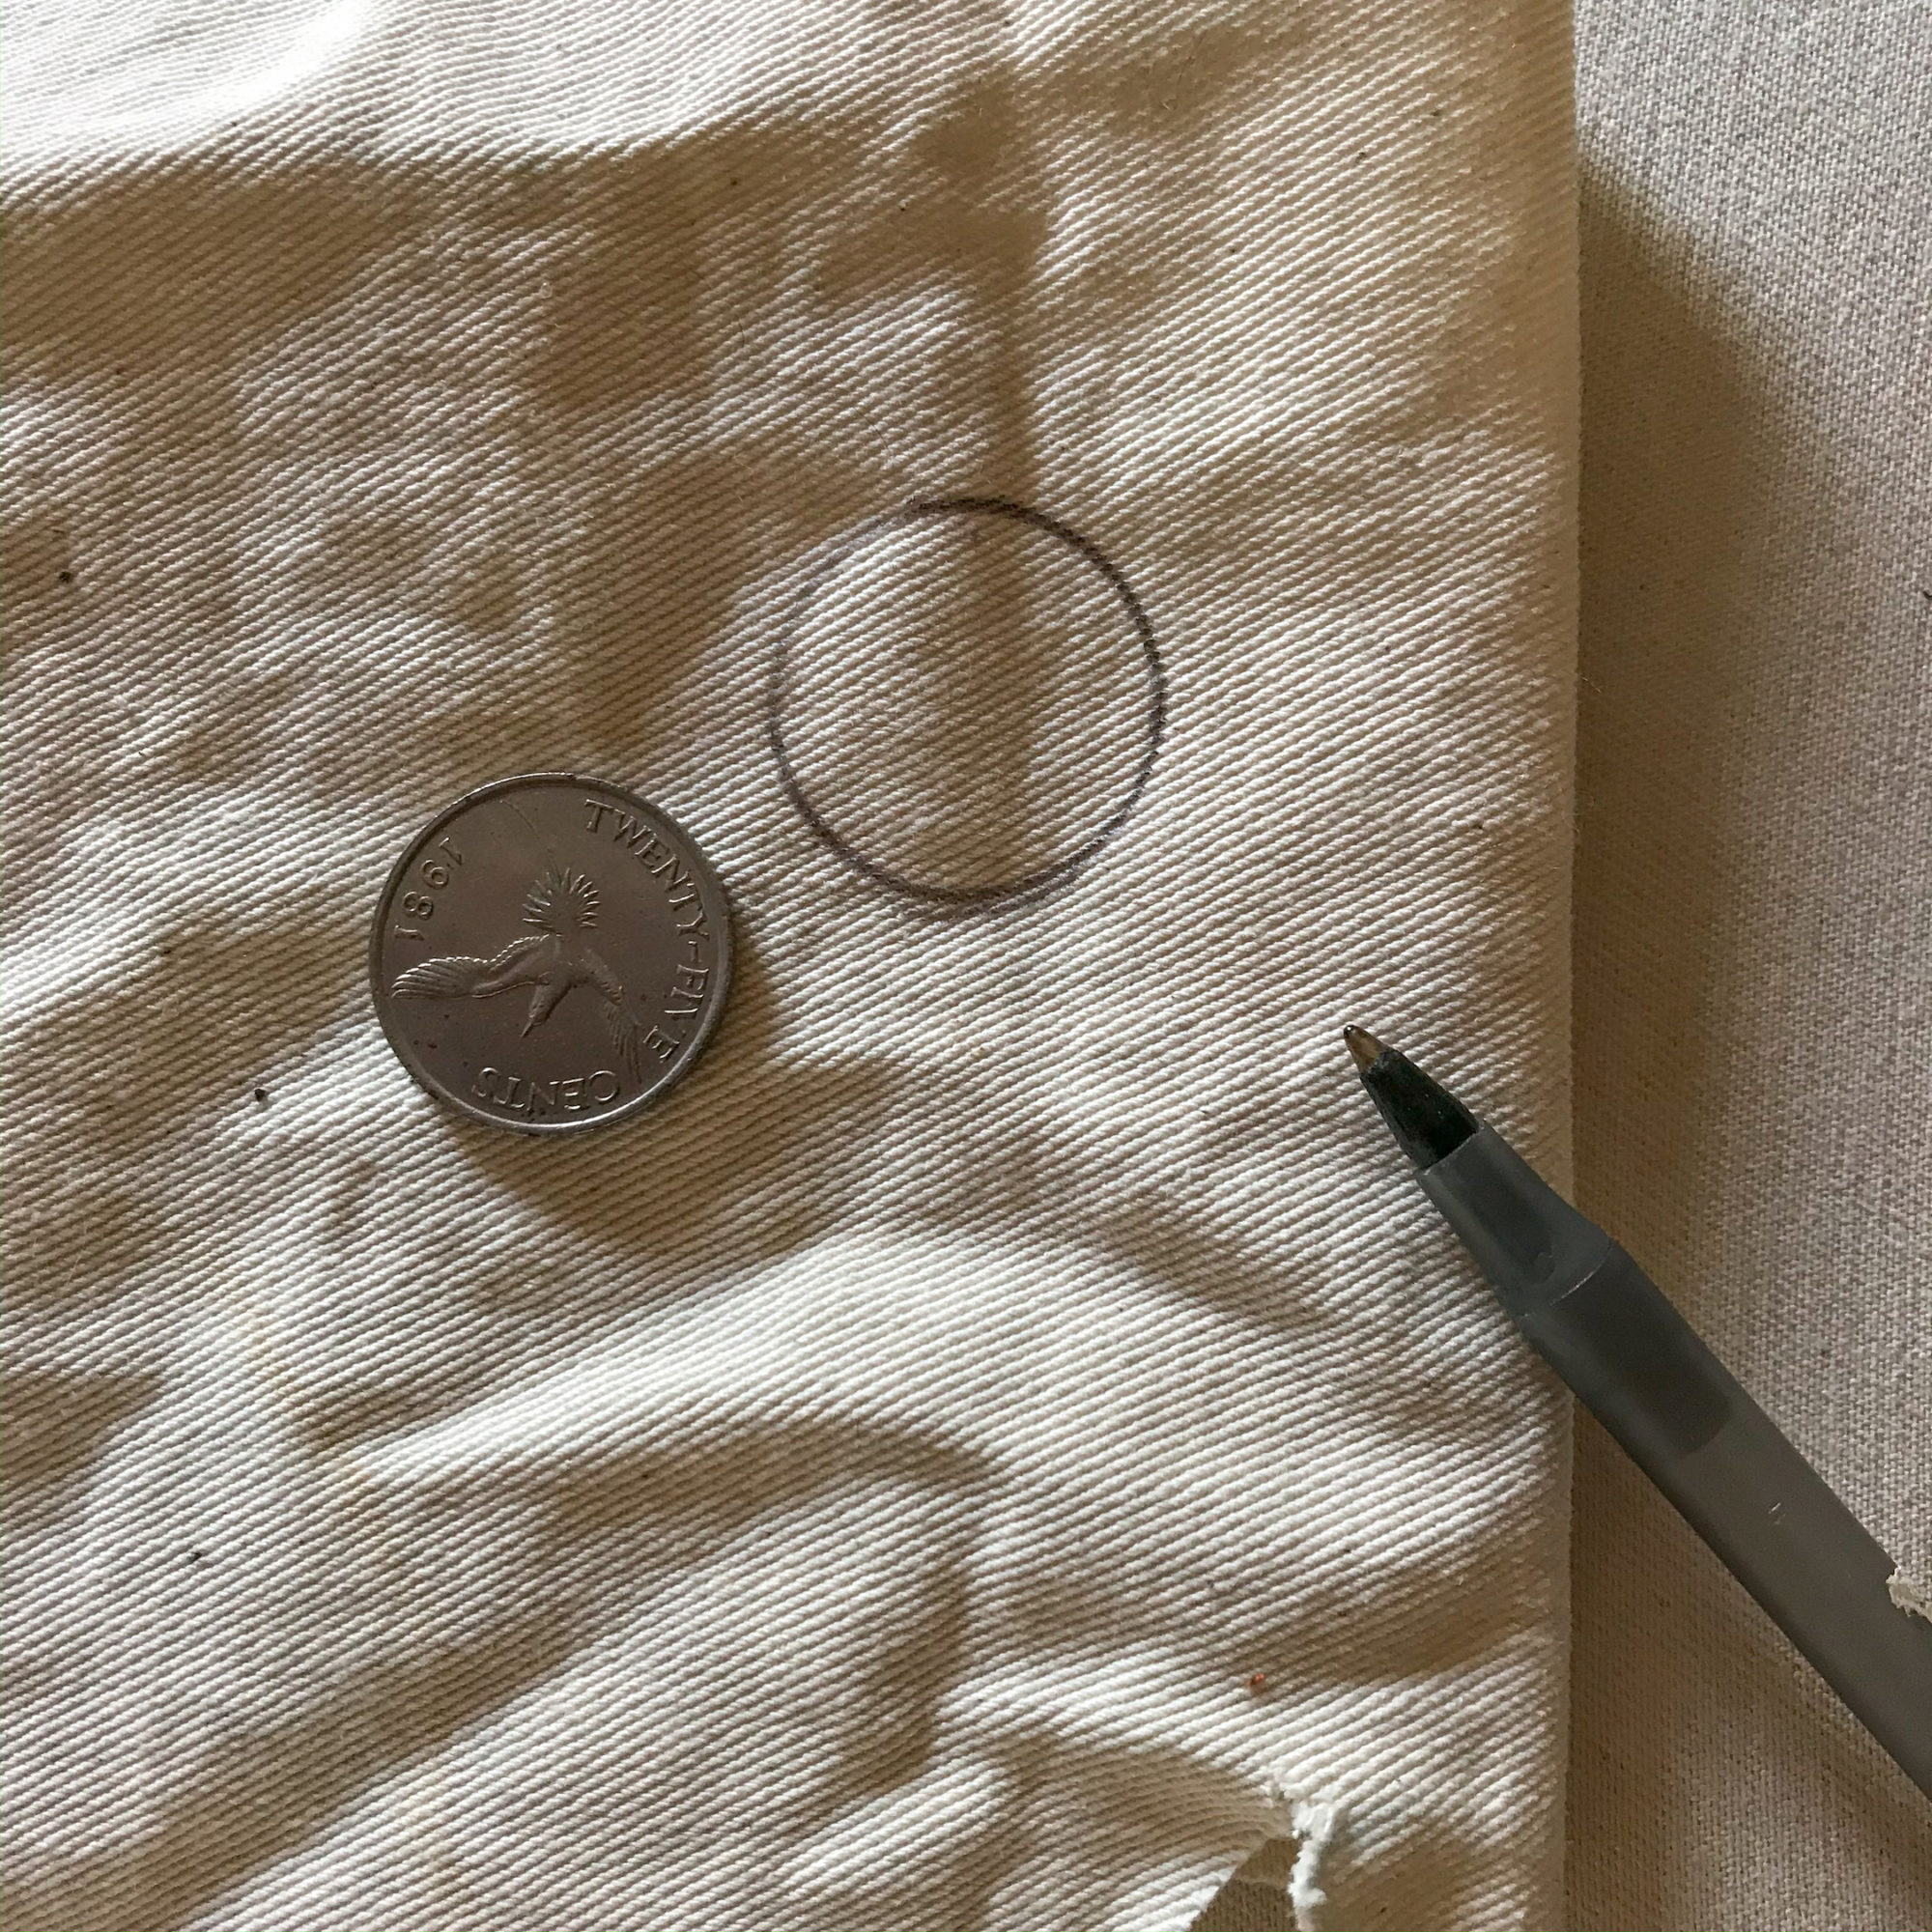
Step 5: Trace your quarter (or other round object the same size as your grommet) onto your canvas

Step 6: Cut out the center of canvas. The thickness of the canvas left inside the ring should be about as thick as your grommet. (Note! Our grommet is a little too big in this photo - we went back and made it a little smaller so it fit just inside the pen marks!)
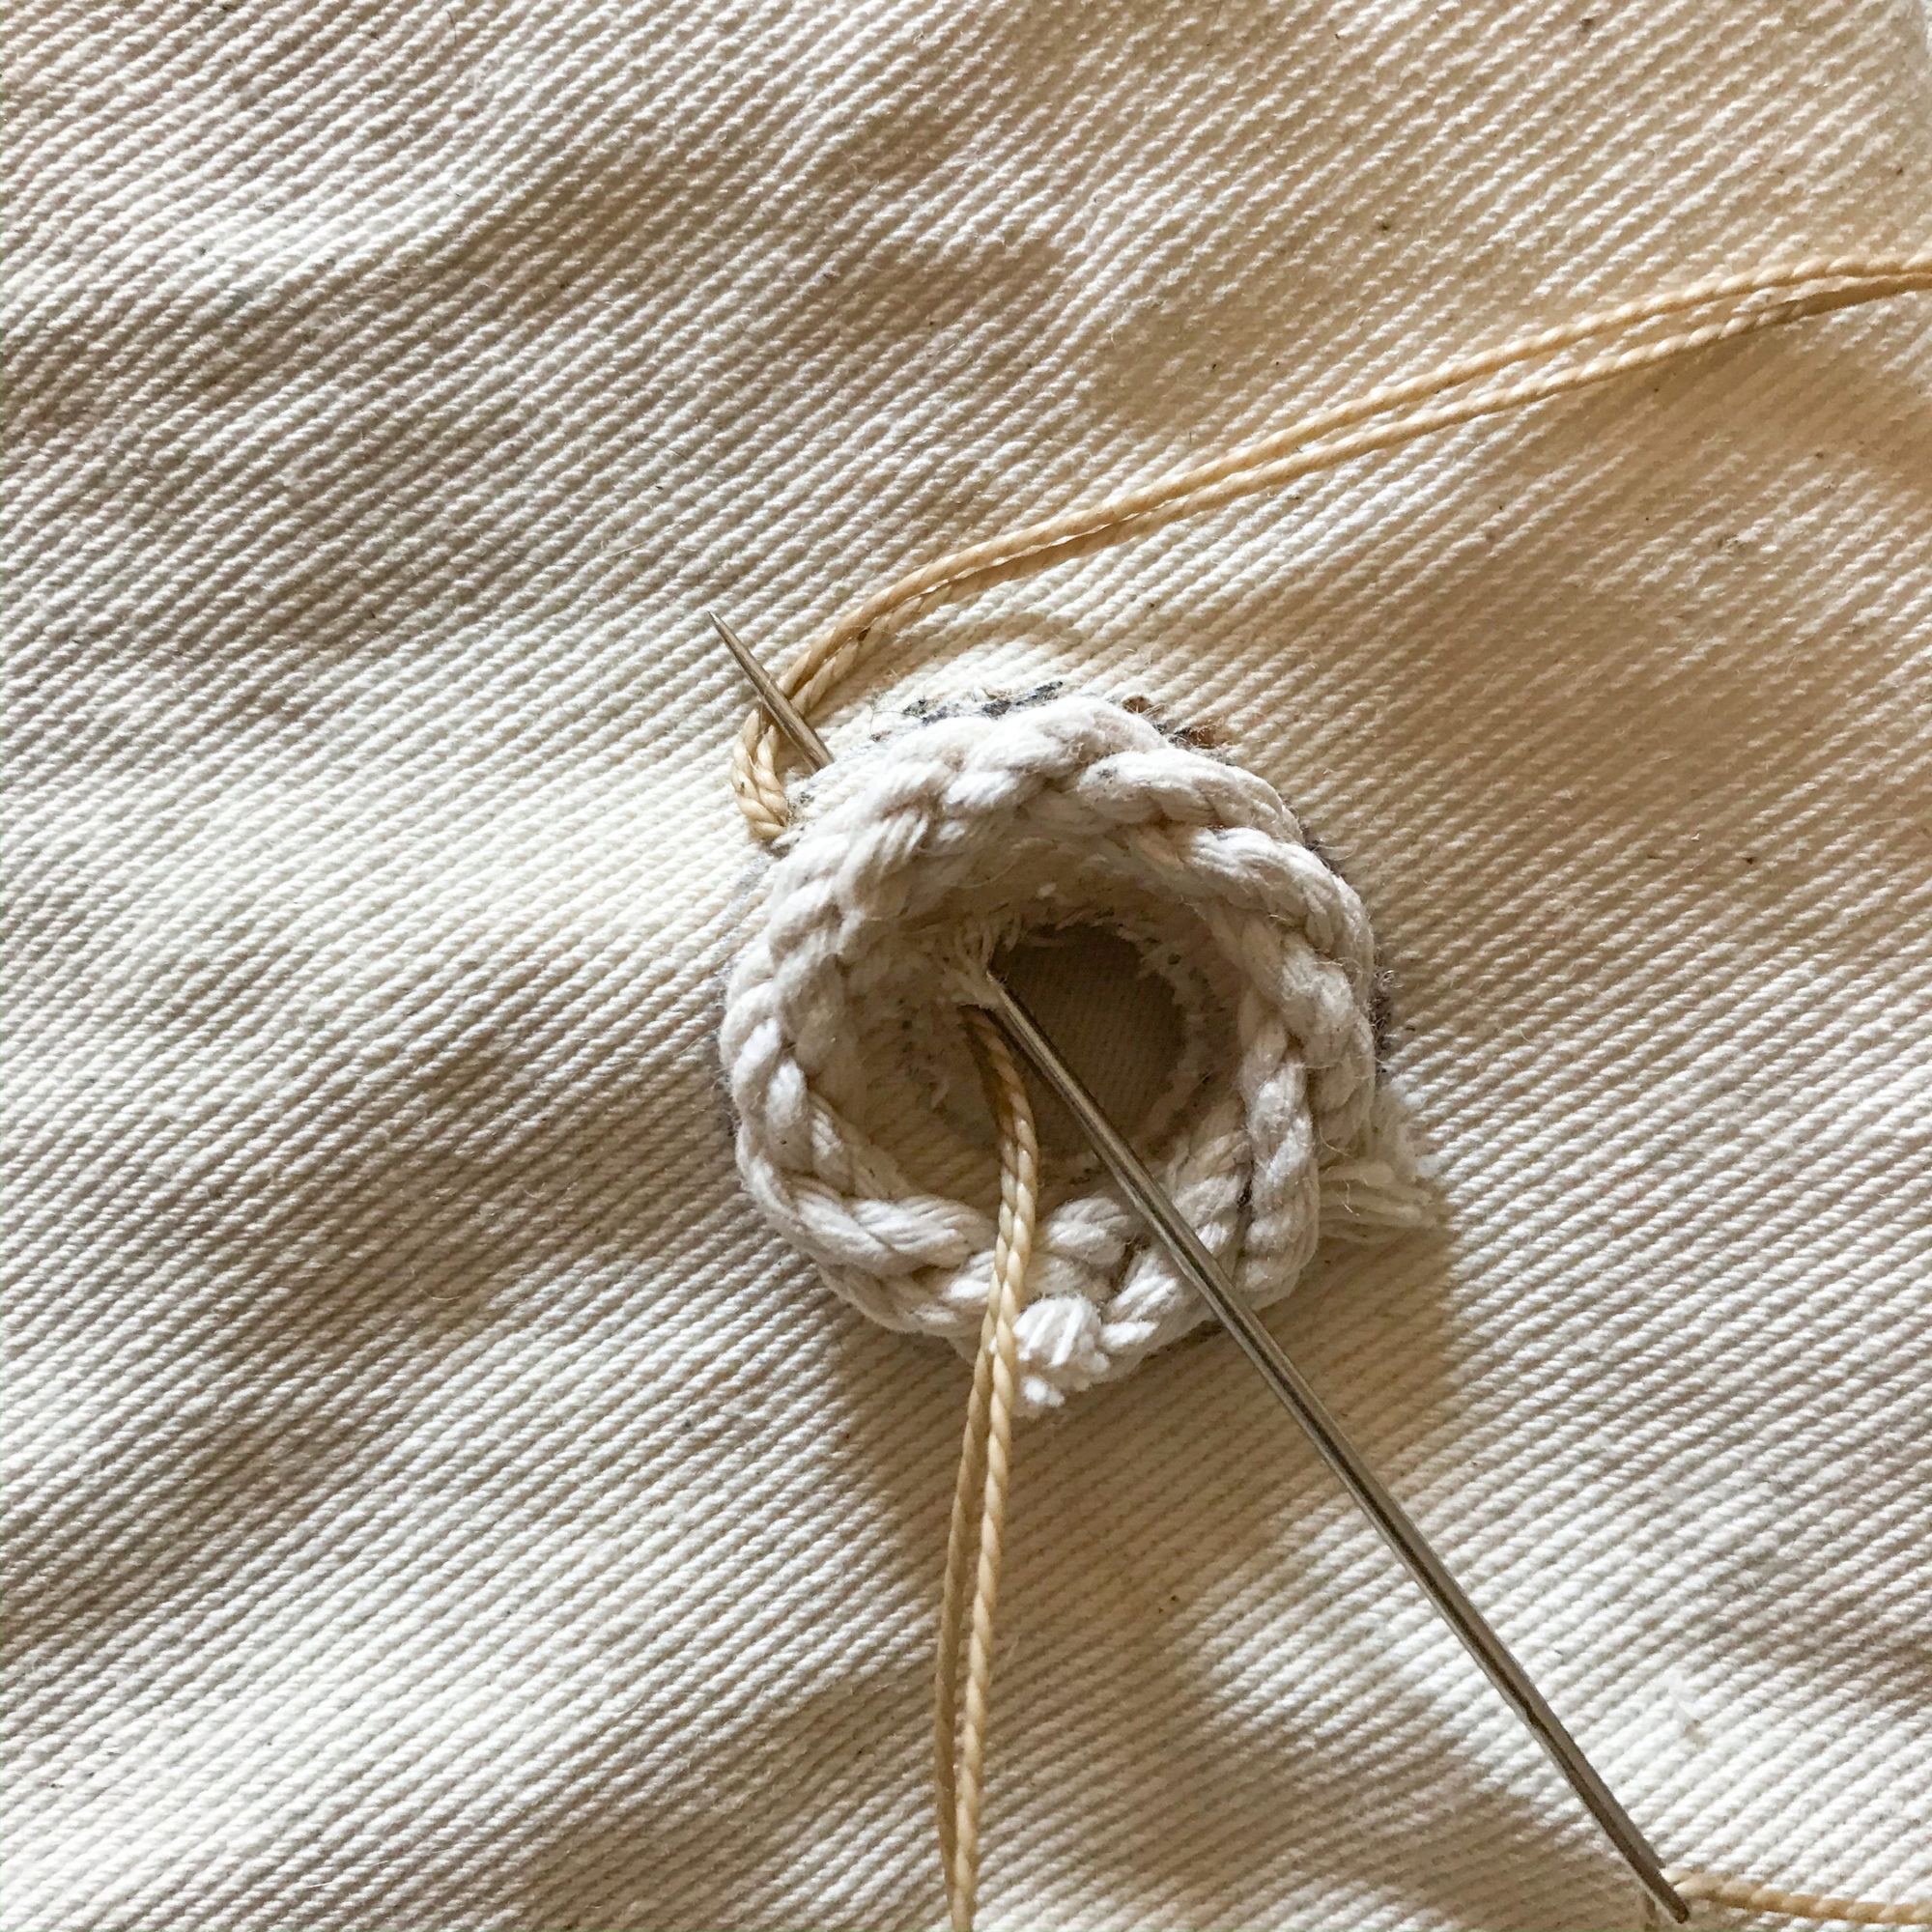
Step 7: cut a length of about 6' of waxed thread and thread your needle. Double it up and tie an overhand knot at the end. Lay your grommet on the canvas. Start your needle from underneath, and come out in the traced circle
Step 8: now take your needle down through the middle, and back up through the pen mark outside the grommet, being careful to catch the thread under your needle as you go and pull tight when the thread is all the way through!
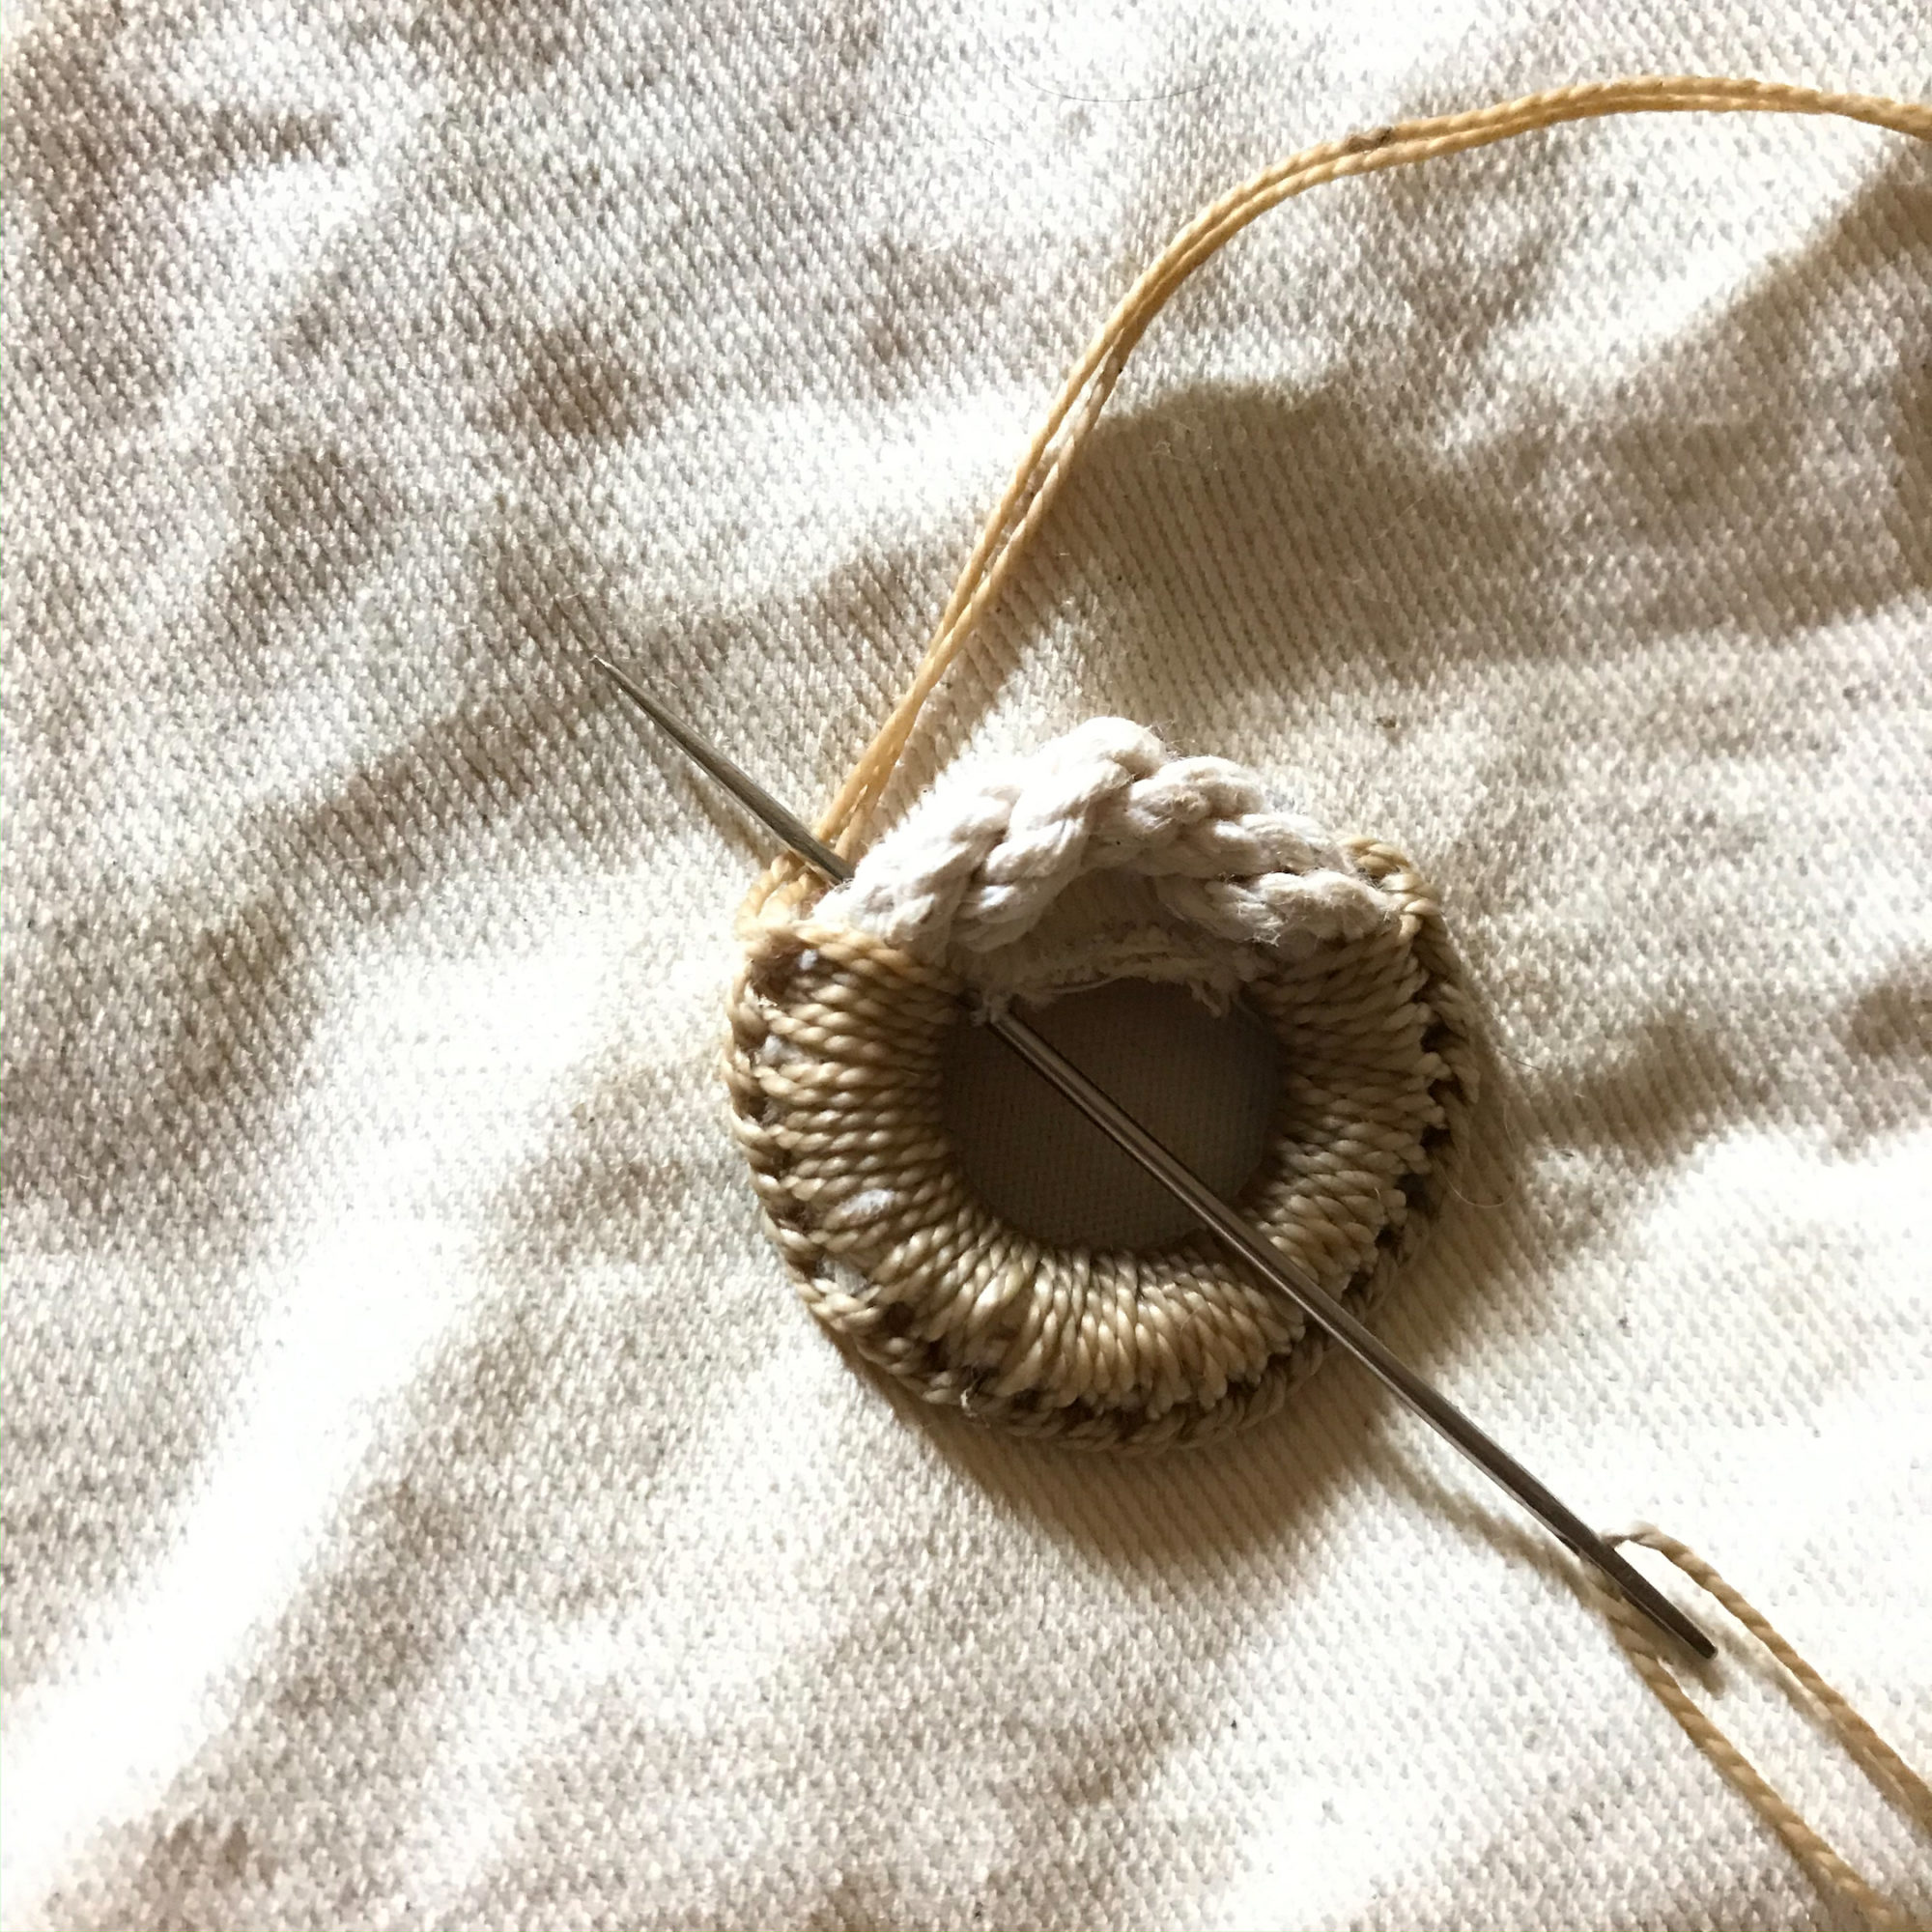
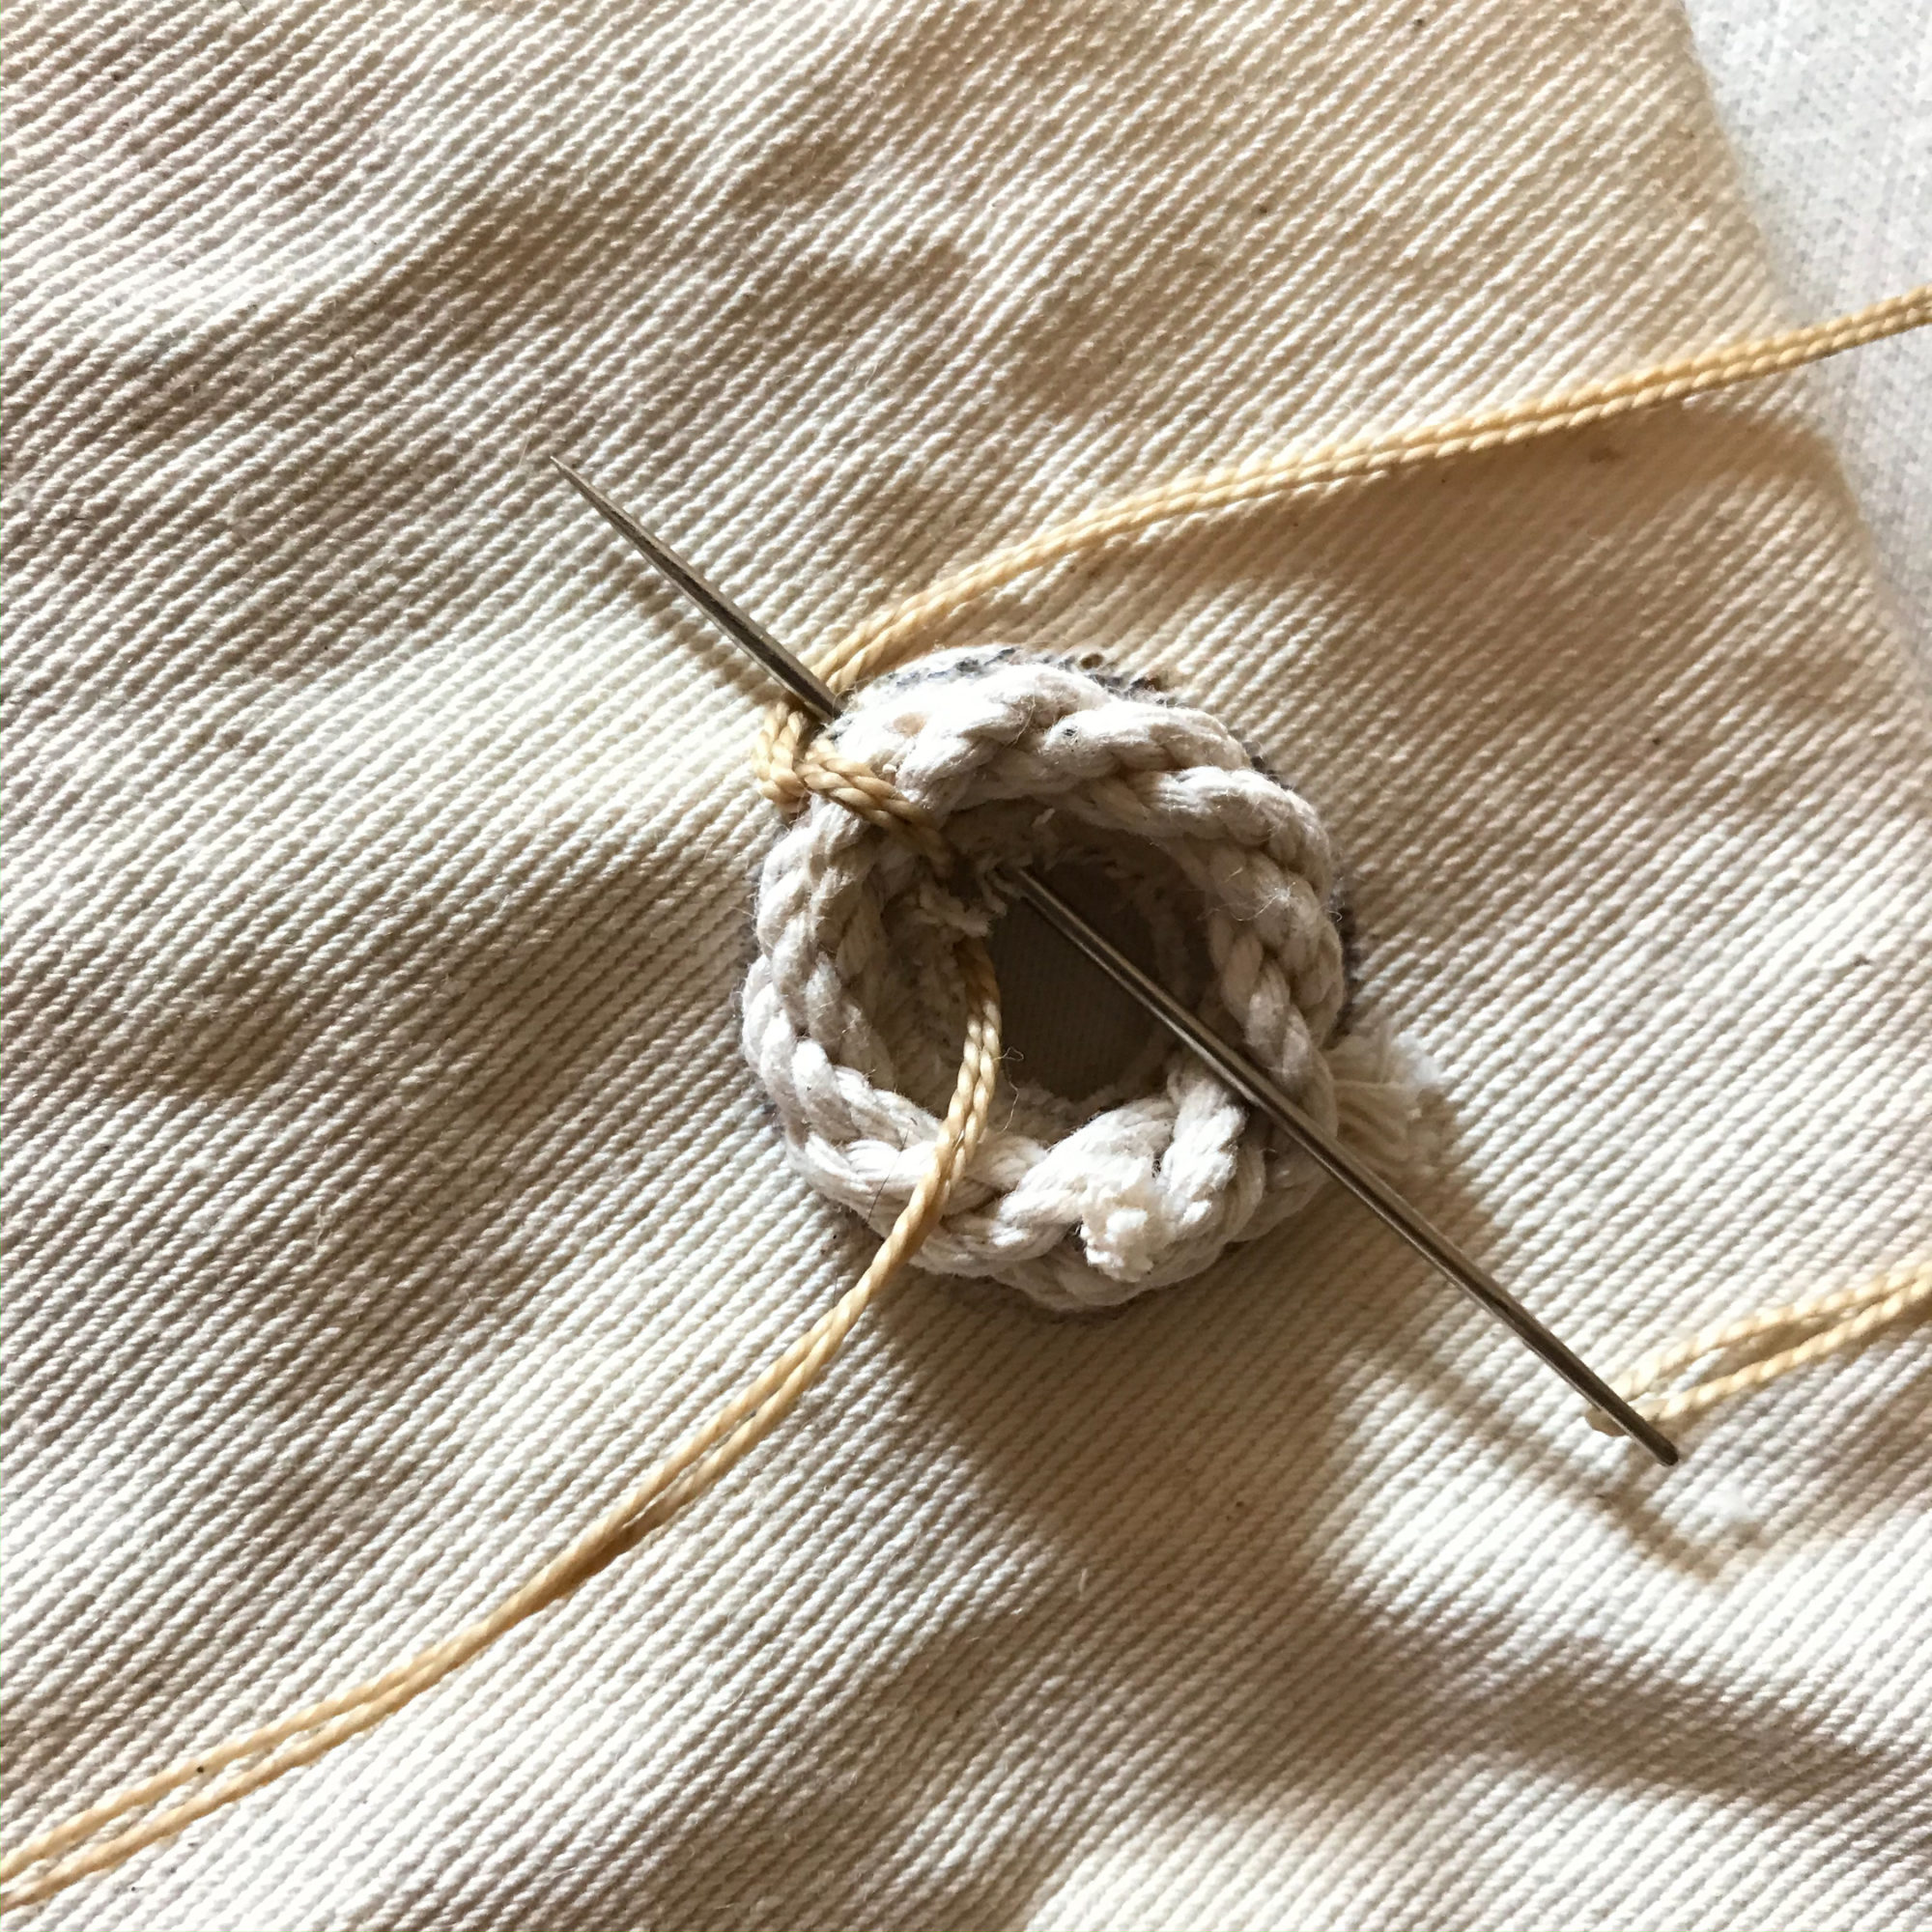
Step 9: continue in this manner all the way around the ring, bringing the needle out just next to your last stitch and being careful to capture the end of your thread under the needle each time
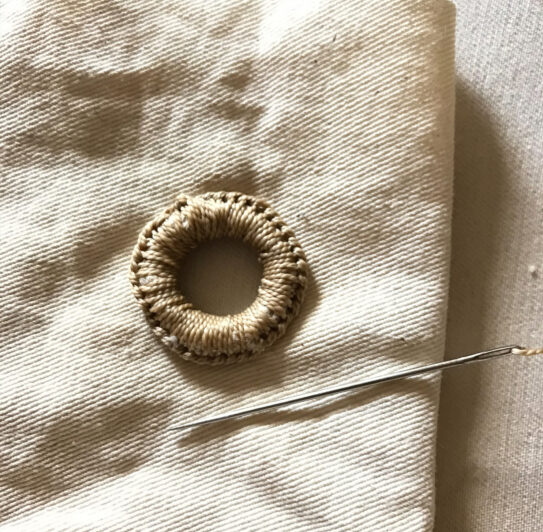
Step 10: when you get to the end of the circle, tie an overhand knot close to the edge or use the remaining thread to tie a few tiny hitches through the fabric
If you find it a little easier to learn from watching videos, check out this great tutorial below! As with all our At Home Activities, we would love to hear what you thought of this project. Share your photos with us by emailing us at [email protected], posting on our Facebook page or tagging us on Instagram @herreshoff #HerreshoffFromHome.
Great instructional video
Thank you for these wonderful tutorials. Clear and real. We were blessed at Mystic Seaport Museum’s Boathouse with excellent marlinspike seamanship skills shared by Rob, Bryan, Peter, and Steve, but only one, a teenager, tackled the fine work, like that of rowlock lanyards matched to each rowing station. Thanks again to Evie!
love it