August 6, 2020
Splicing
Our kids activity this week is a step-by-step tutorial for tying eye splices with three strand rope. We've also included links to a few great video tutorials for extra assistance.
Splicing is a method for joining rope into a loop or joining two lengths of line by weaving the strands together rather than tying a knot. It is a very useful thing to know how to do, and once you get the hang of it you can use it for all sorts of things at home and on the water. With these instructions you can use any kind of three-strand rope or line. Some three strand string will also work if you are patient and have small fingers! If you're trying to splice something really heavy, you may need a fid for a little extra help. Masking tape will also help keep your ends orderly, and help you in threading them through. You can also use a highlighter to color the masking tape if you find you're having a hard time keeping your strands straight.
Supplies: Three strand line, masking tape, fid (optional)
Instructions:
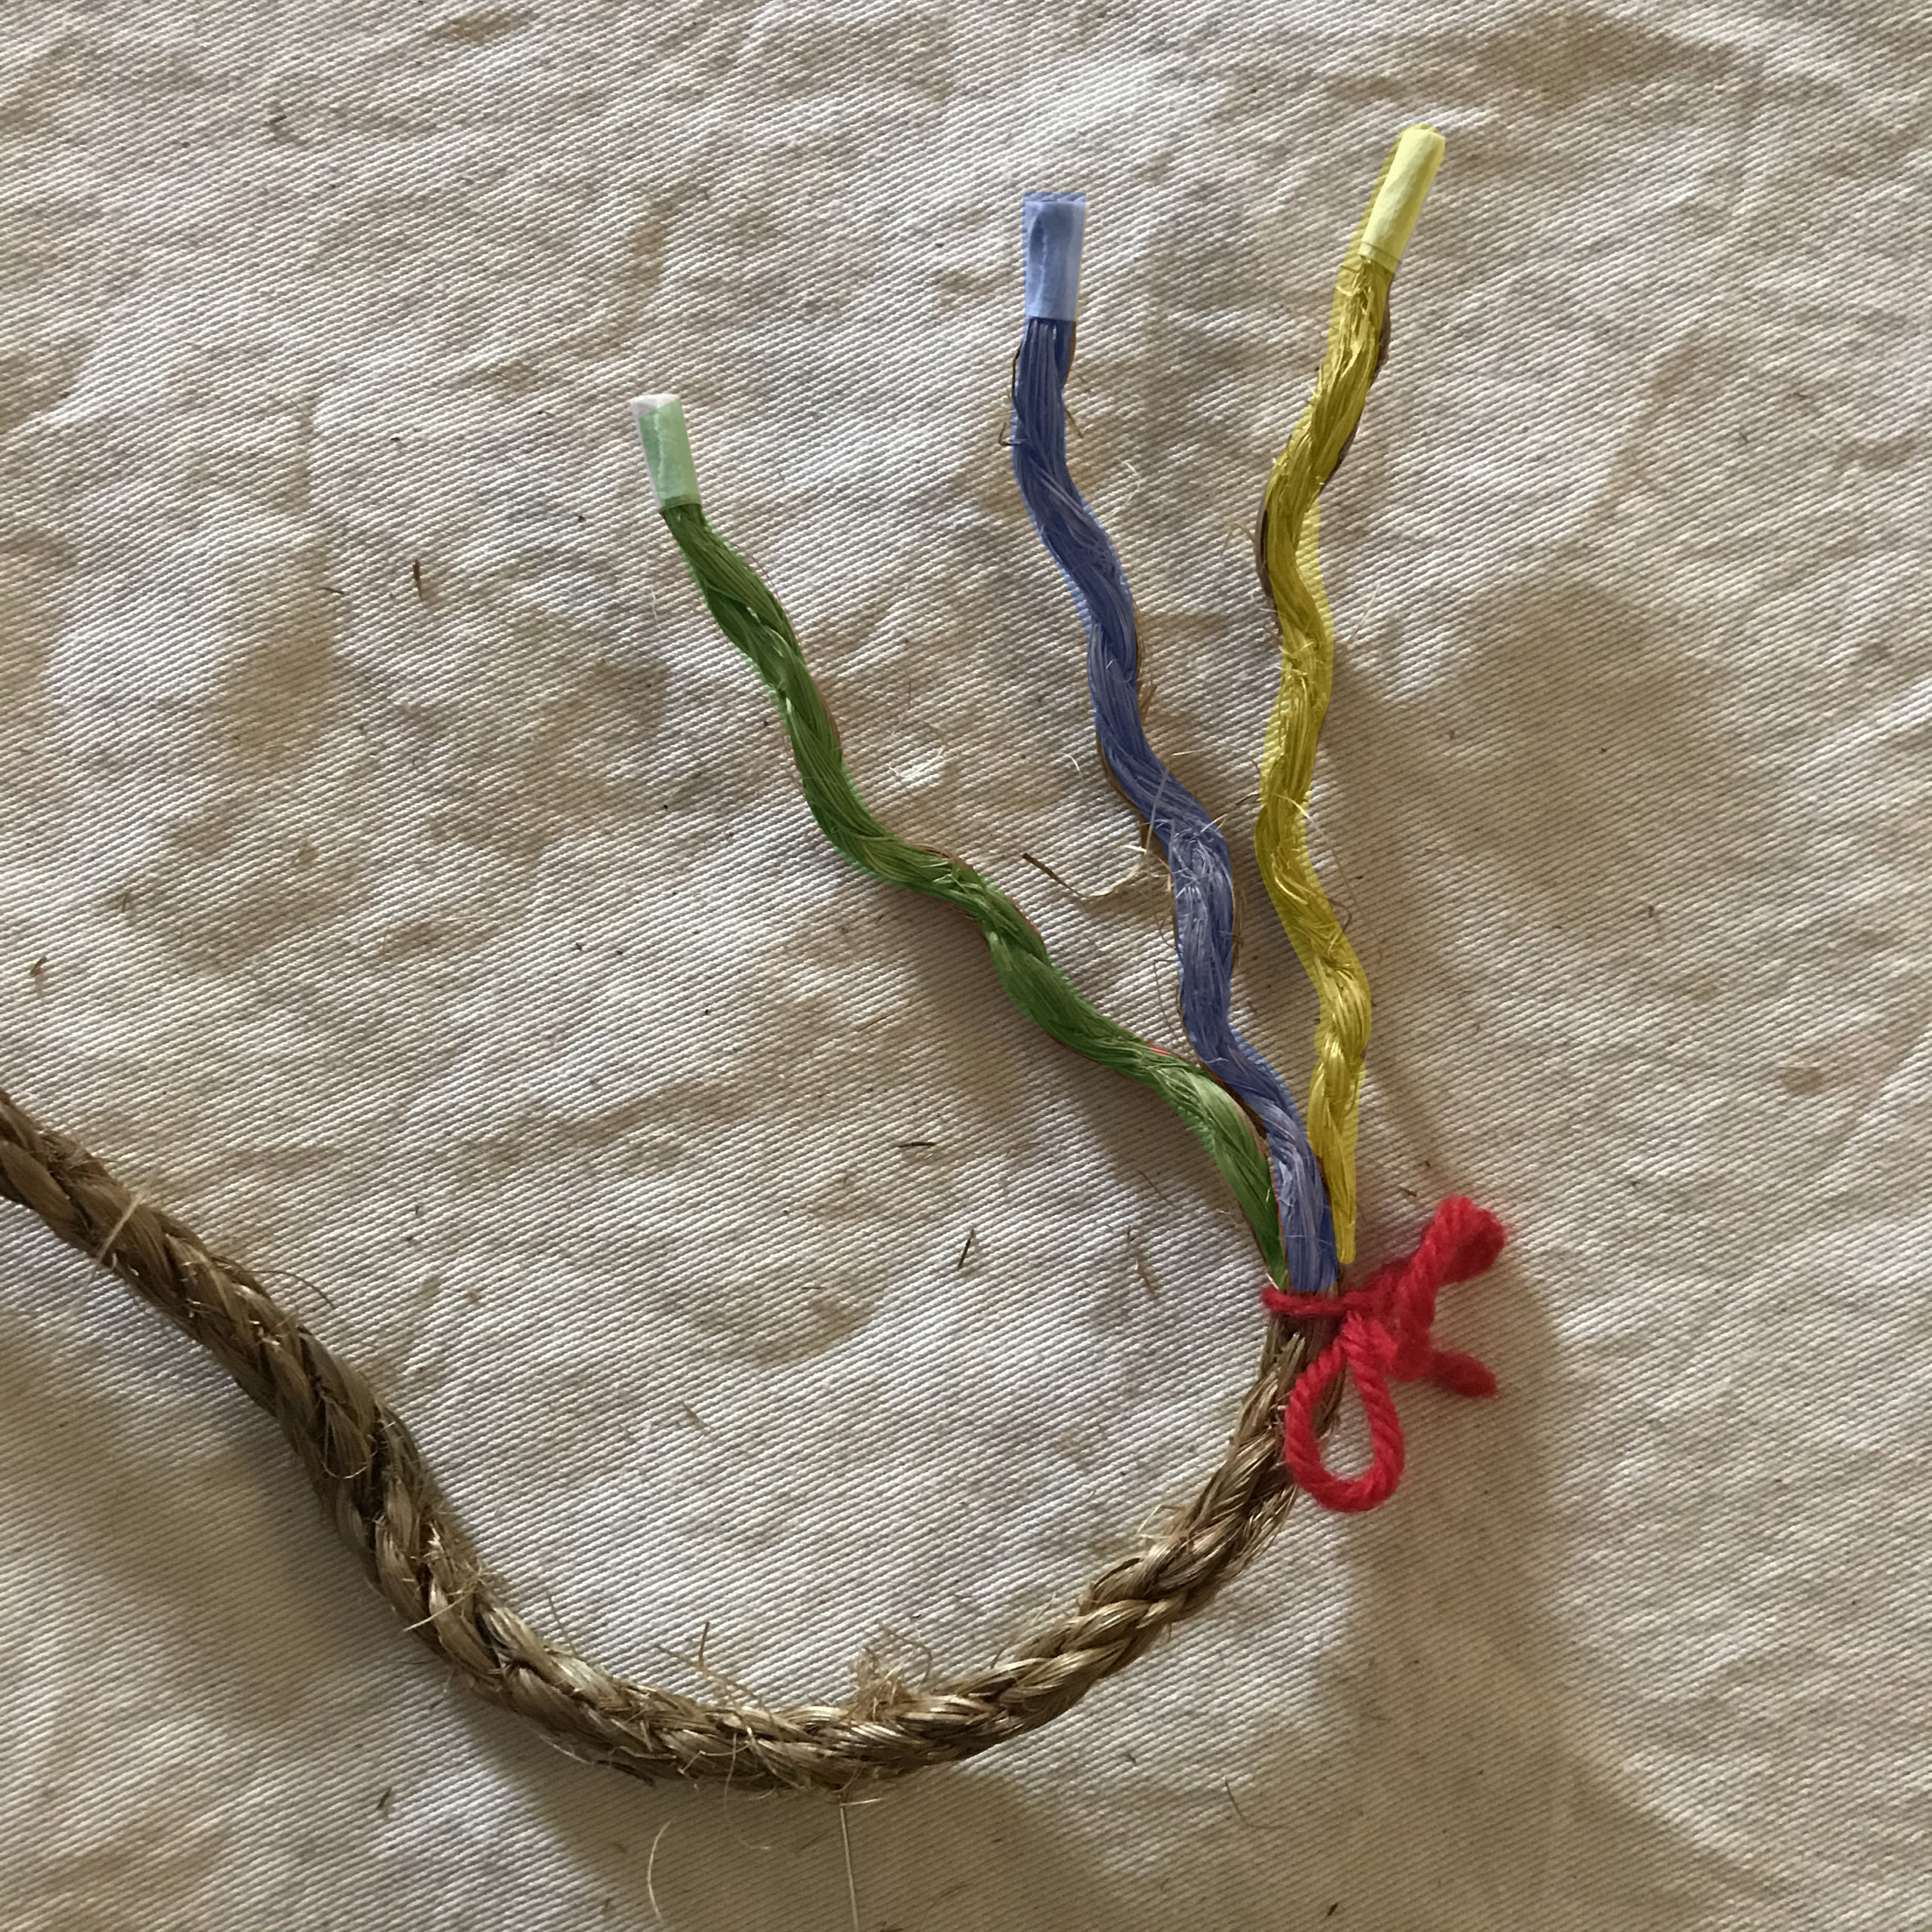
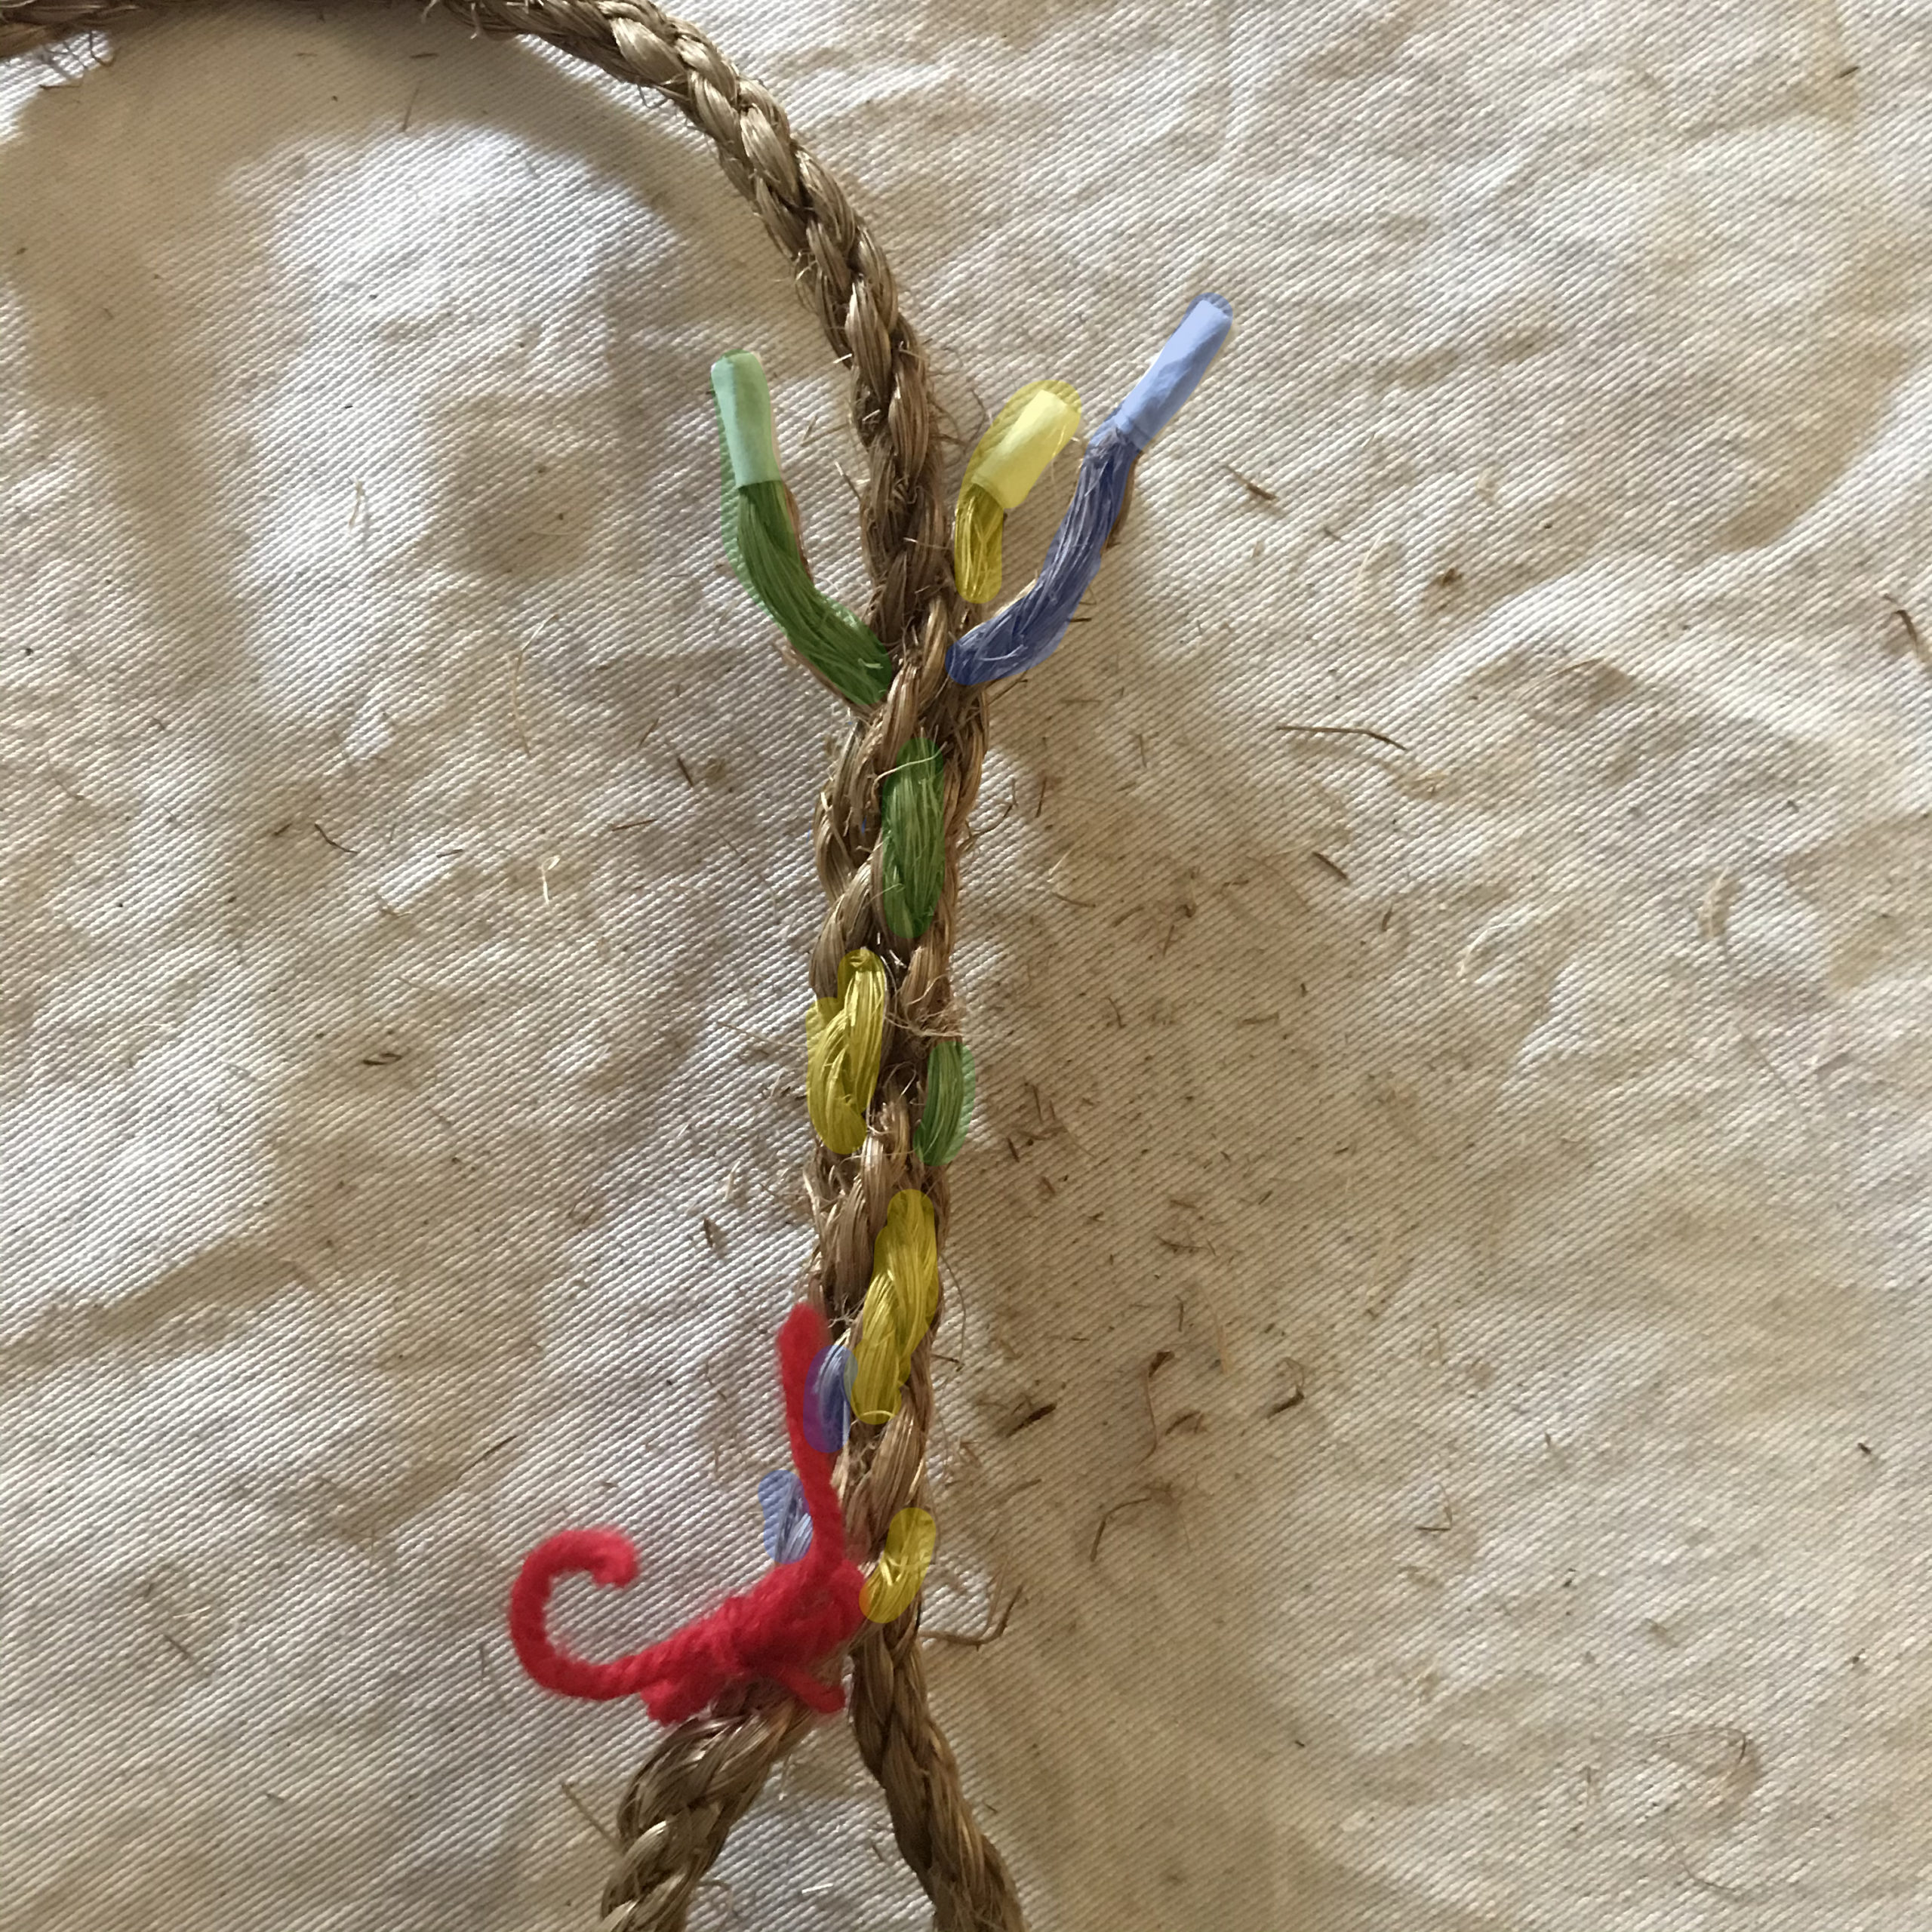
Step 1: Start by separating your line into its three strands for about 6 - 8" by untwisting from the end. You might want to wrap masking tape around the ends of the strands to keep them from unraveling further. You can also use a piece of scrap string or masking tape to tie 6 - 8" down to keep your line from unraveling further if you'd like.
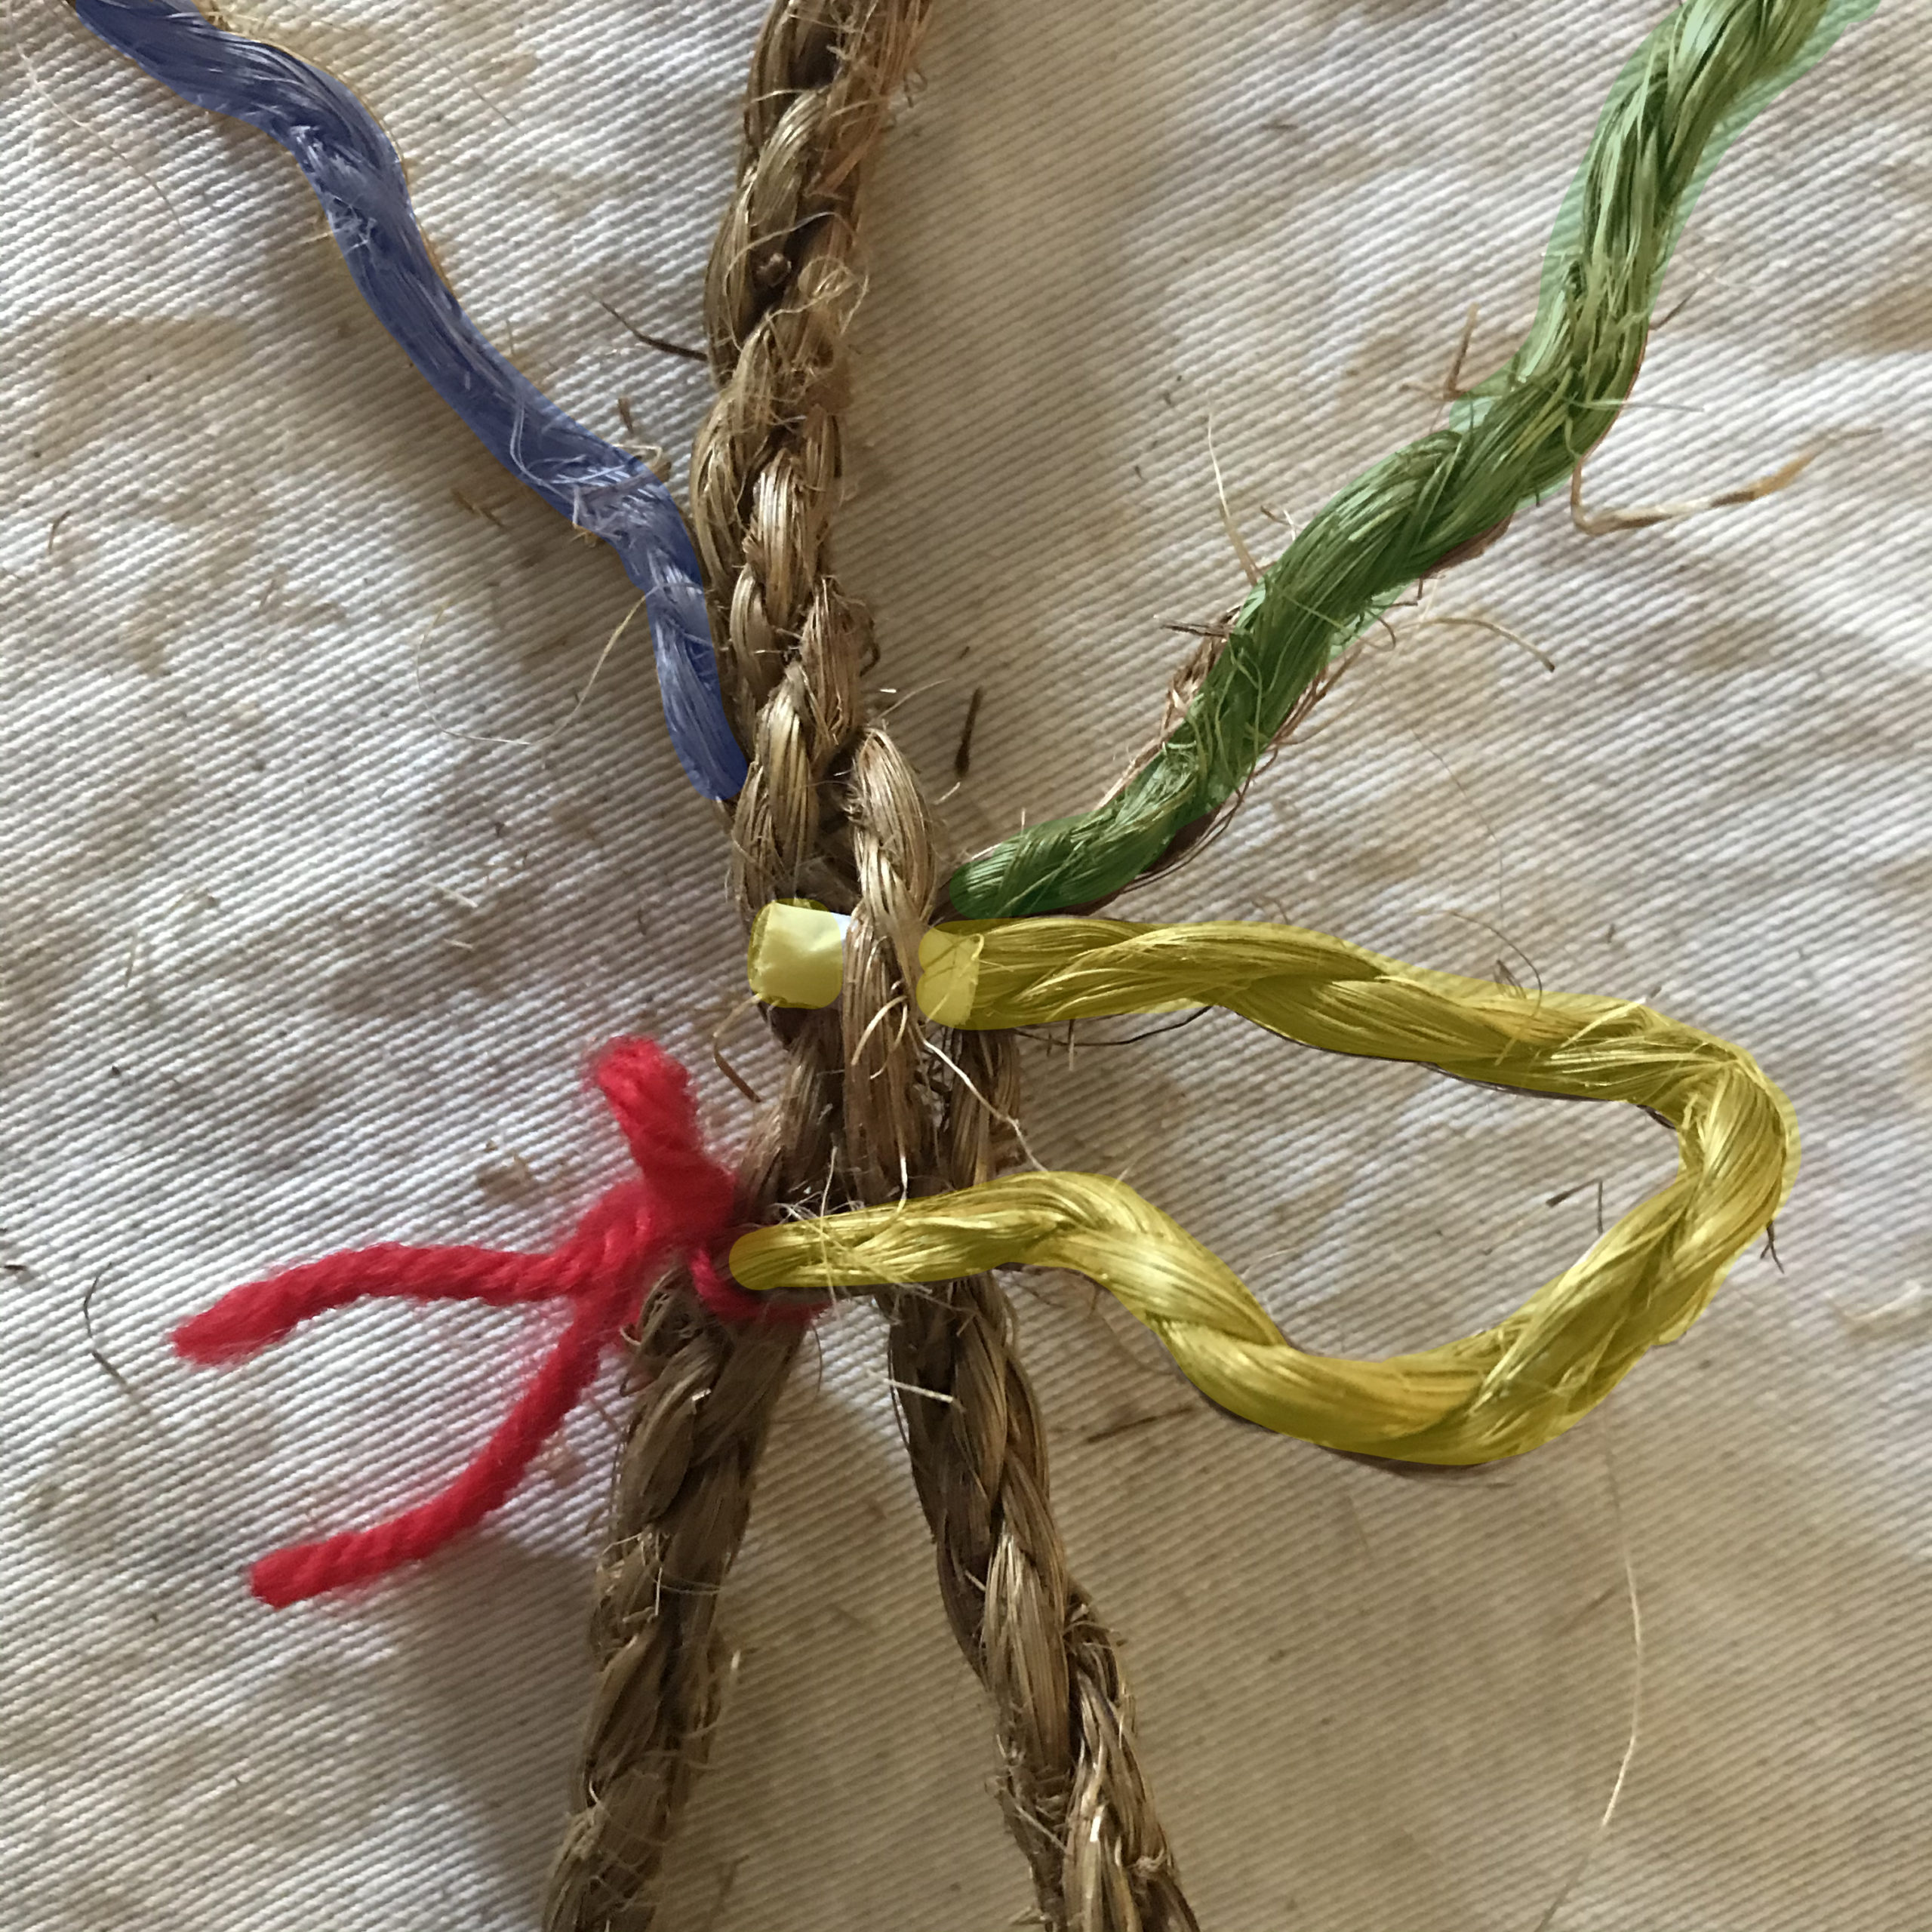
Step 2: Lay the unraveled strands on top of the standing part of the line to make a loop however large you'd like. The middle strand should be sitting on top, and the other two strands should go to either side.
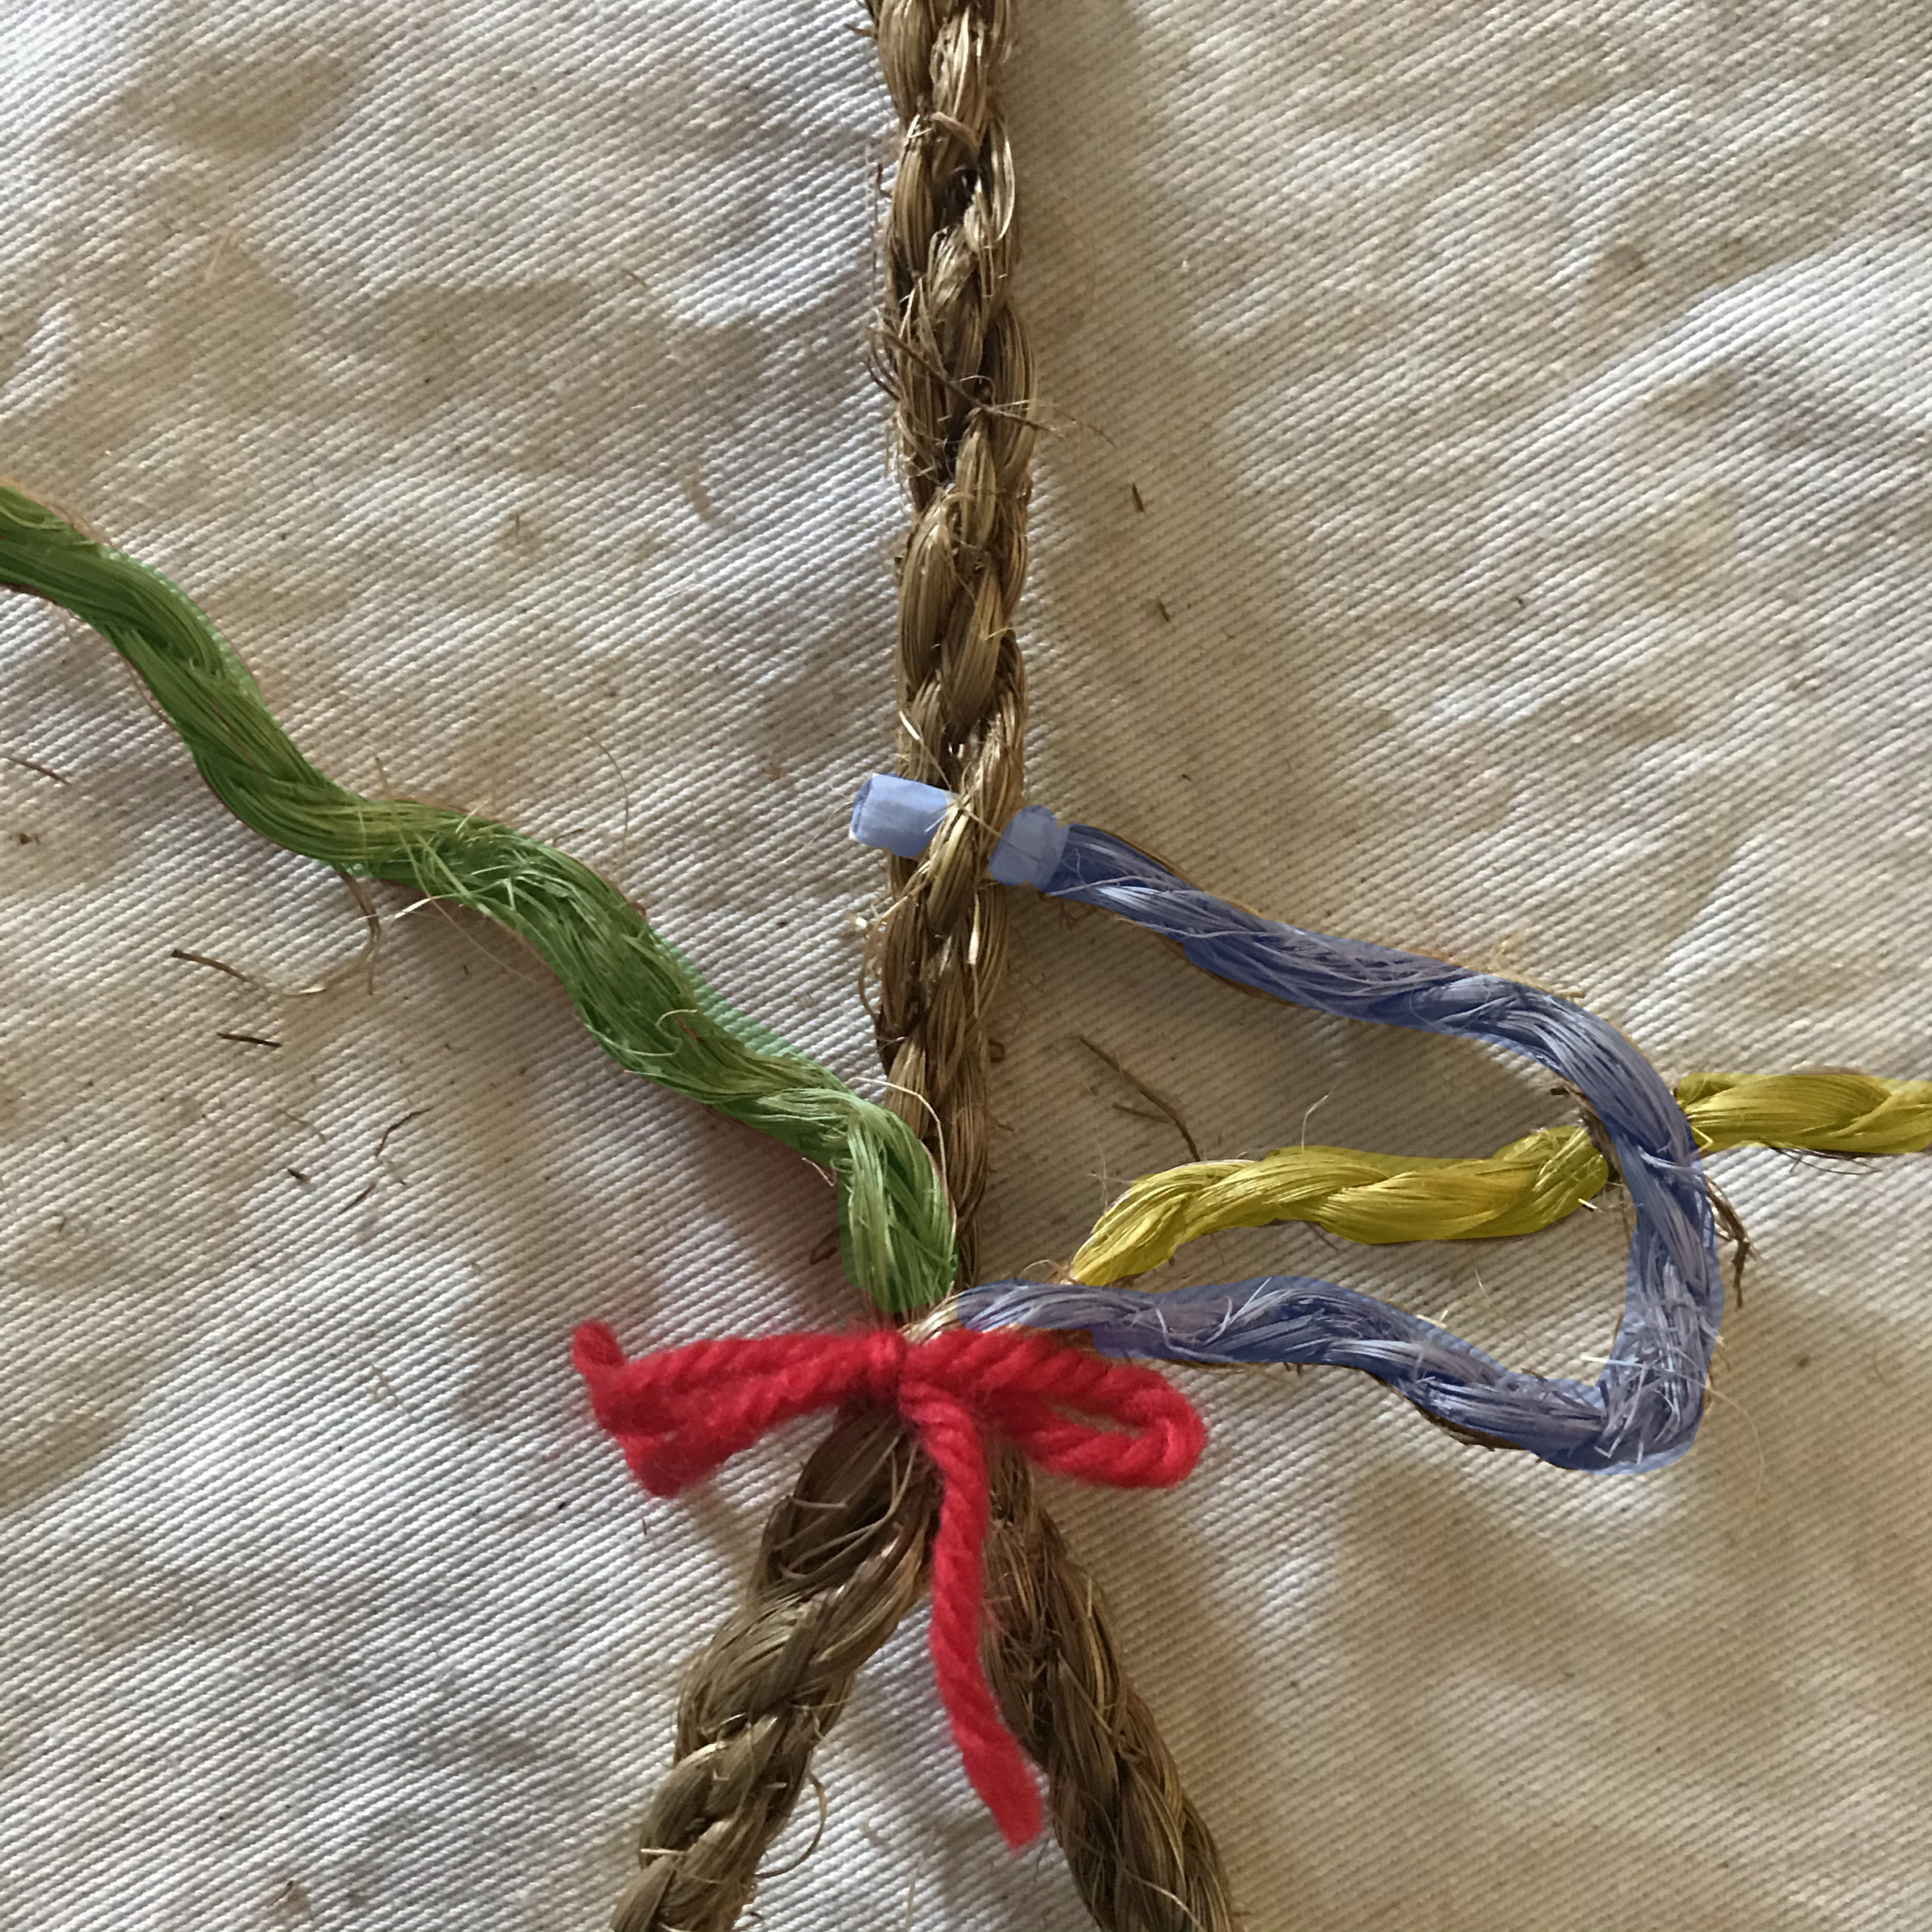
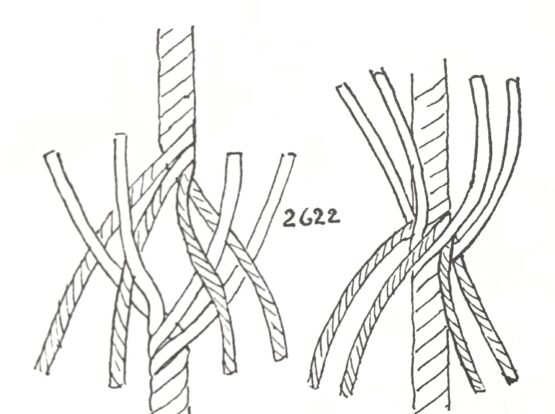
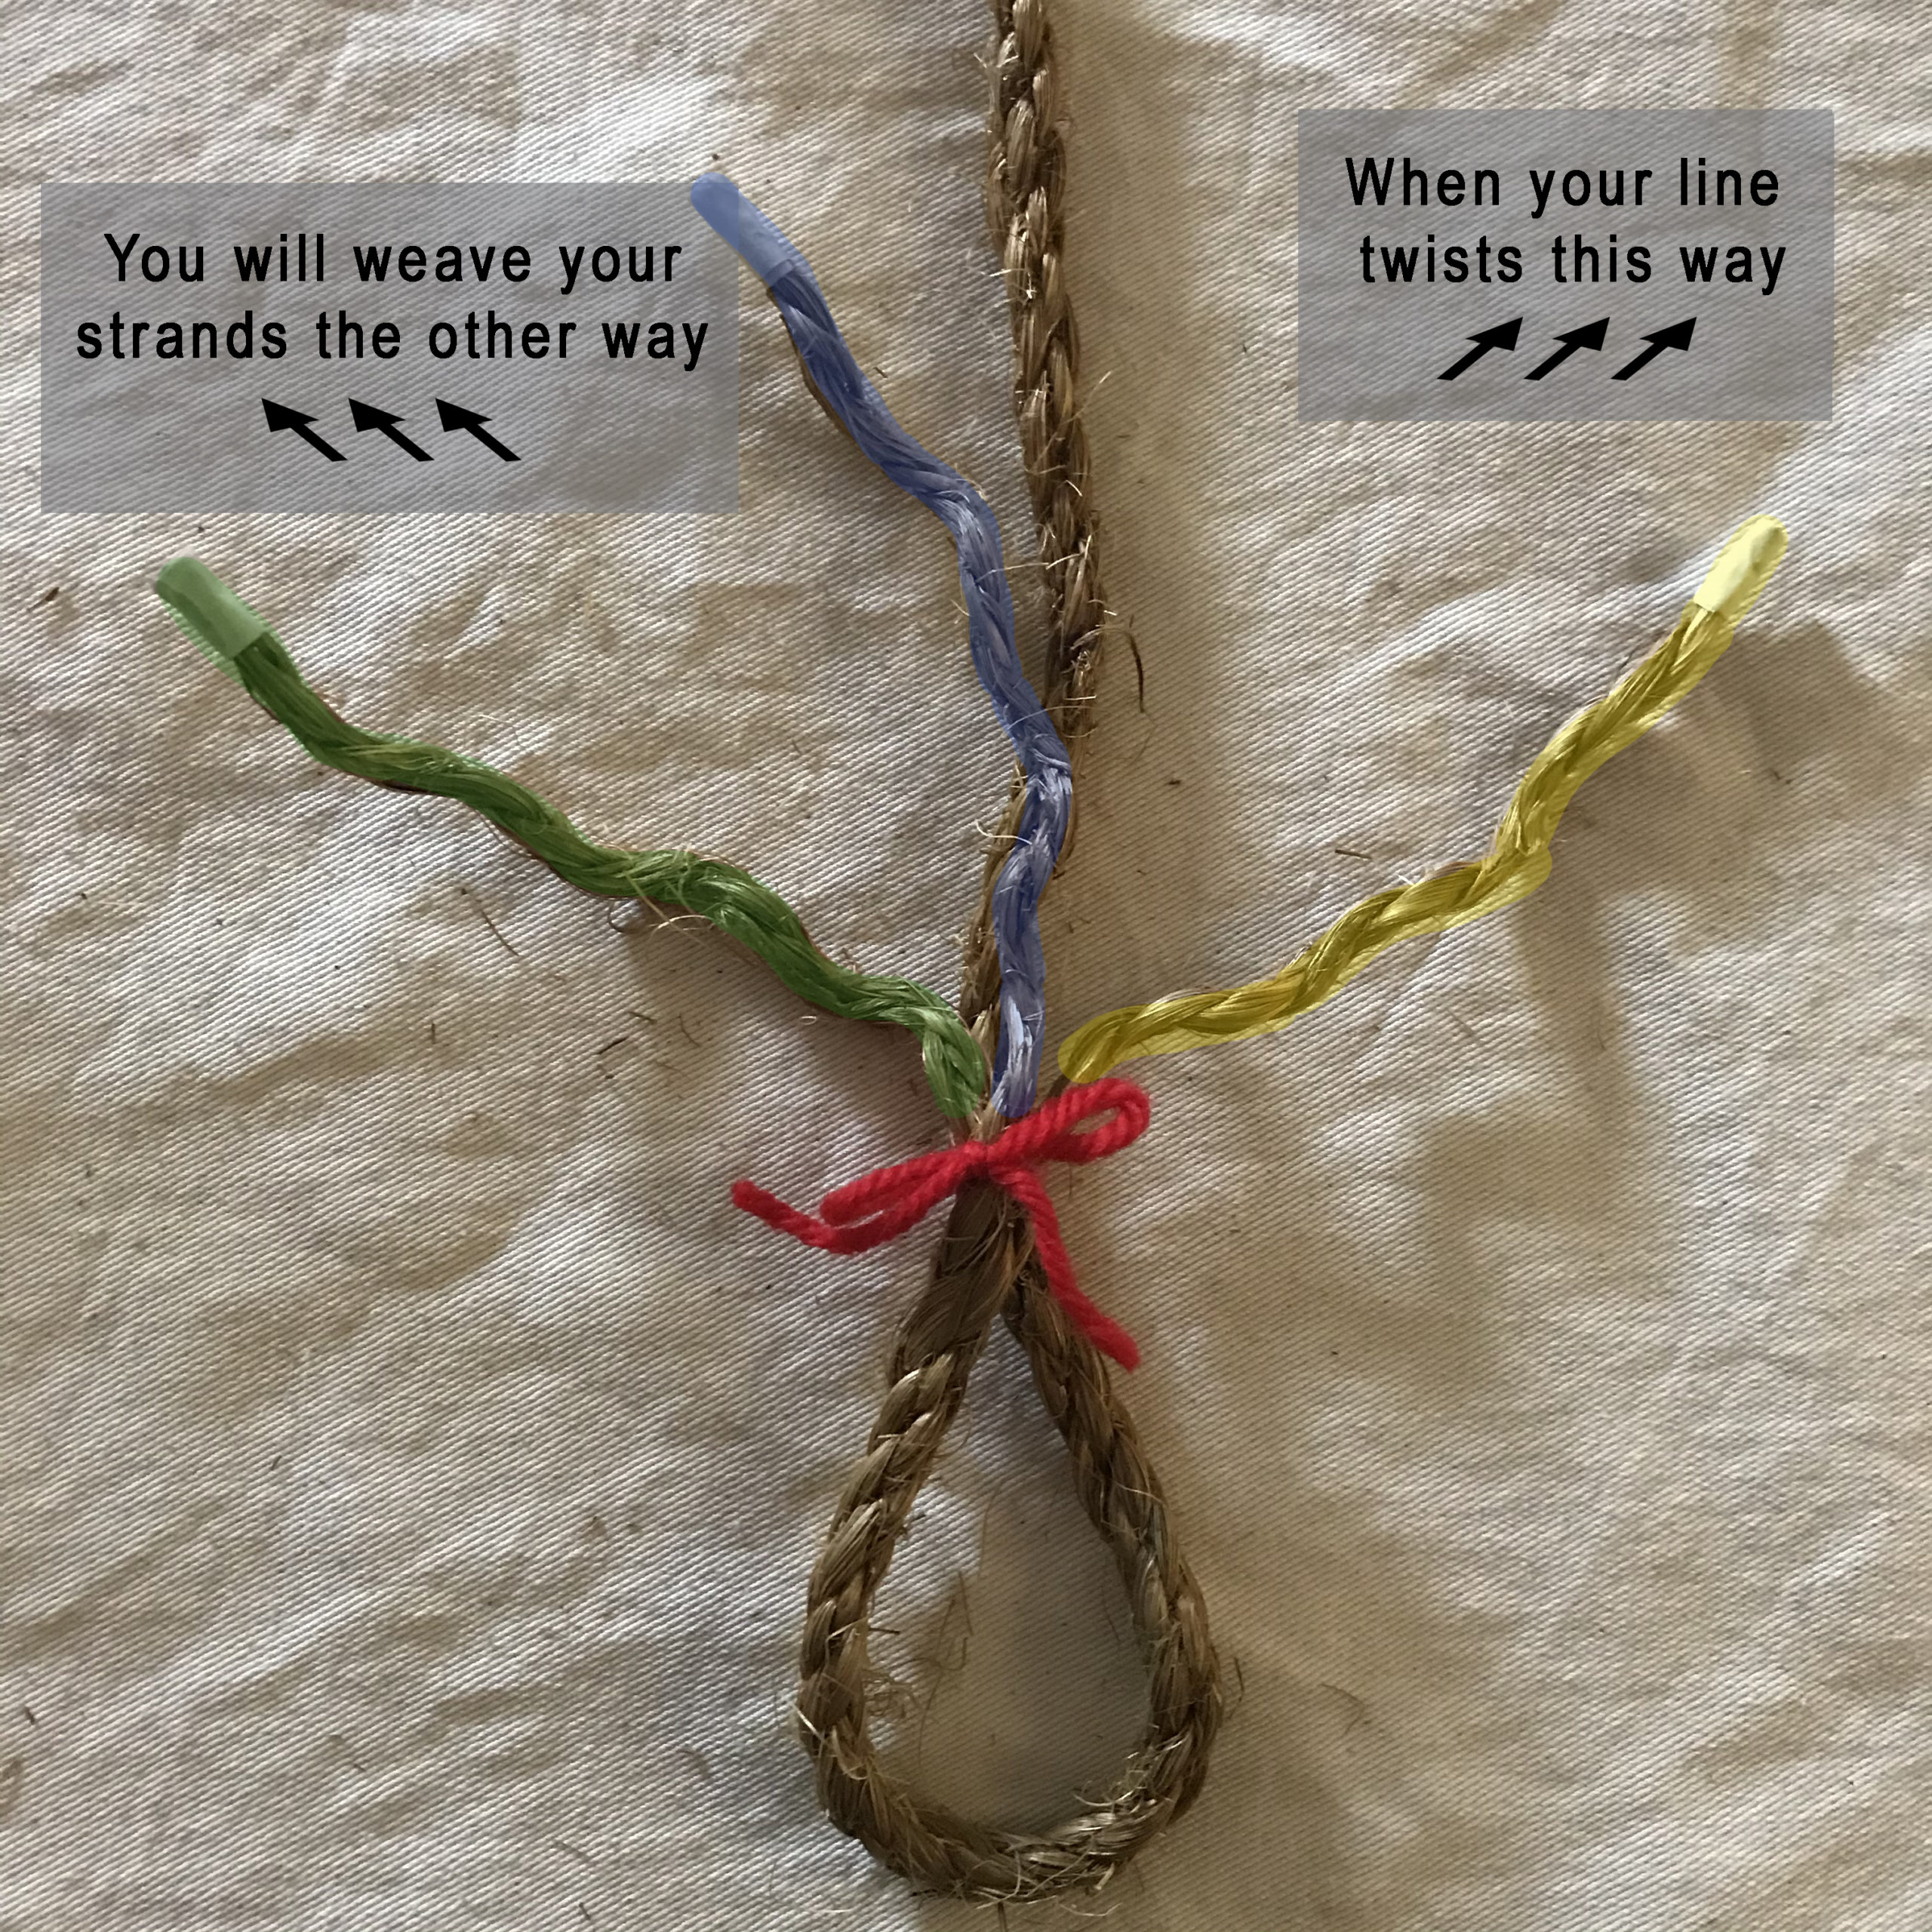
Step 3: Start with the center strand. Twist the standing part of the line a tiny bit in the opposite direction of the lay to get it to open up a little, and feed the center strand underneath the top strand in the standing part of the line. It should look like an "x" !
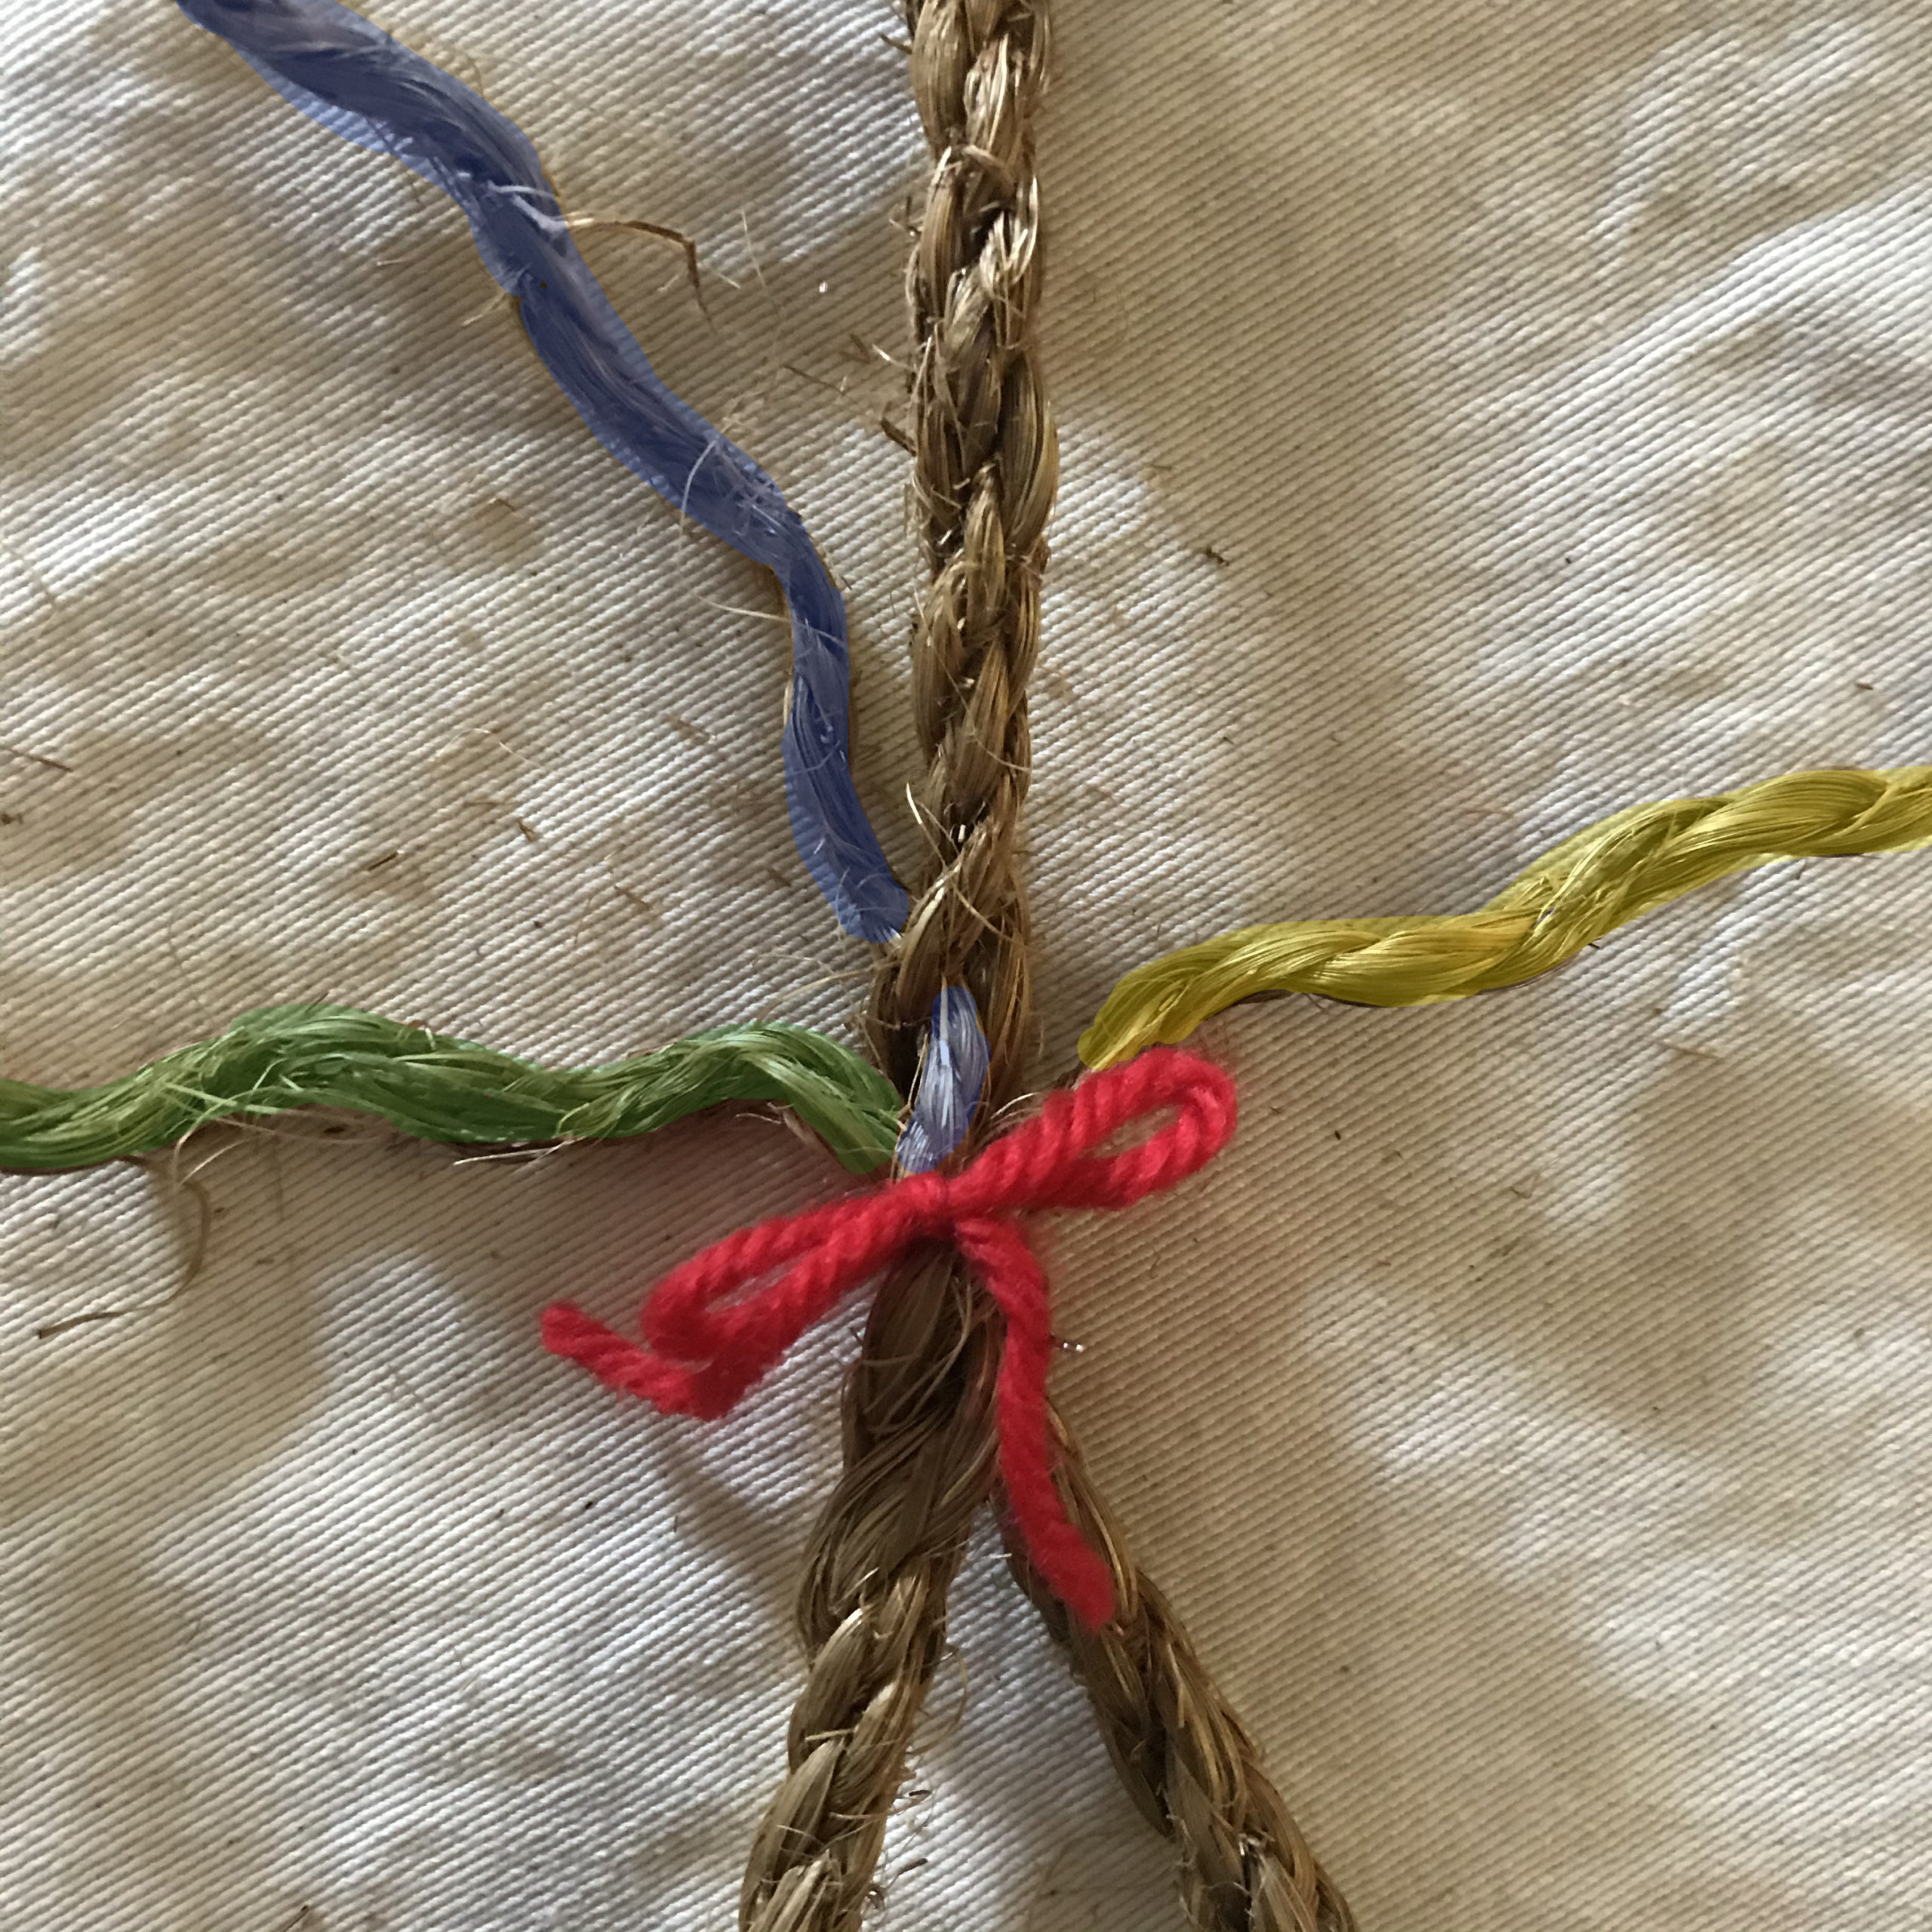
Step 4: Pull the center strand through (in this case with rope twisted in this direction, from right to left) until it sits nicely, snug against your tie
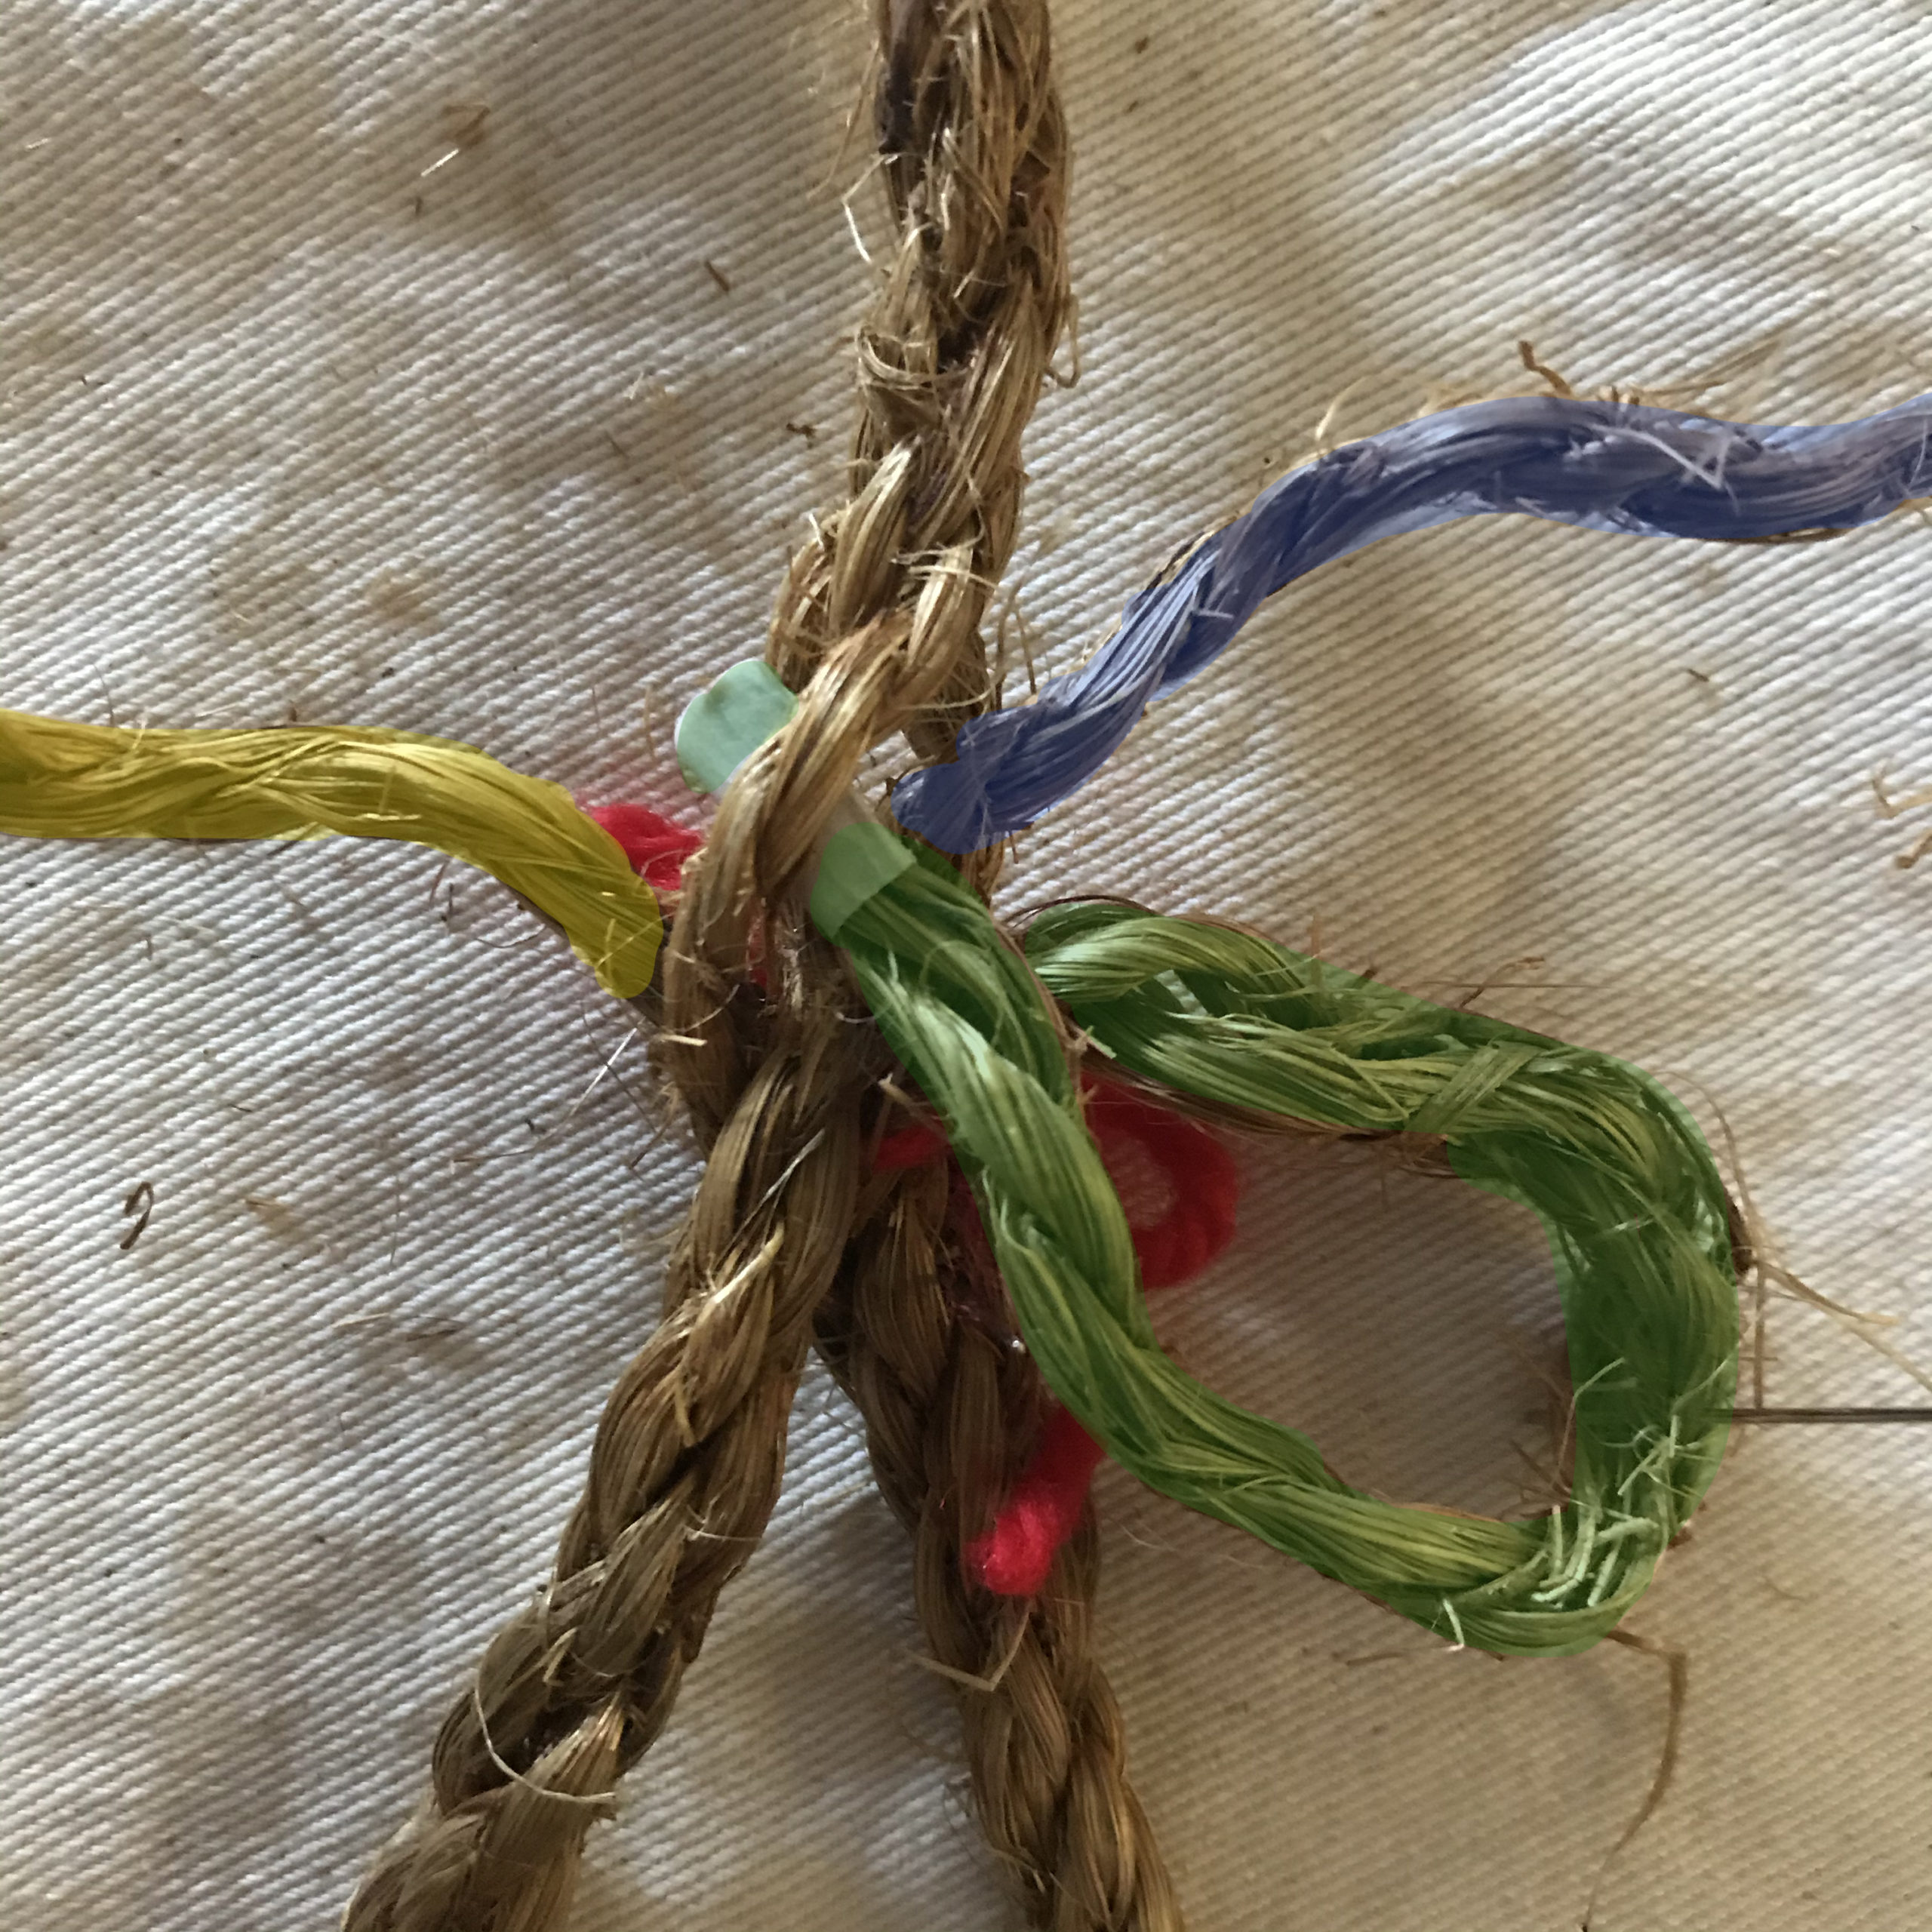
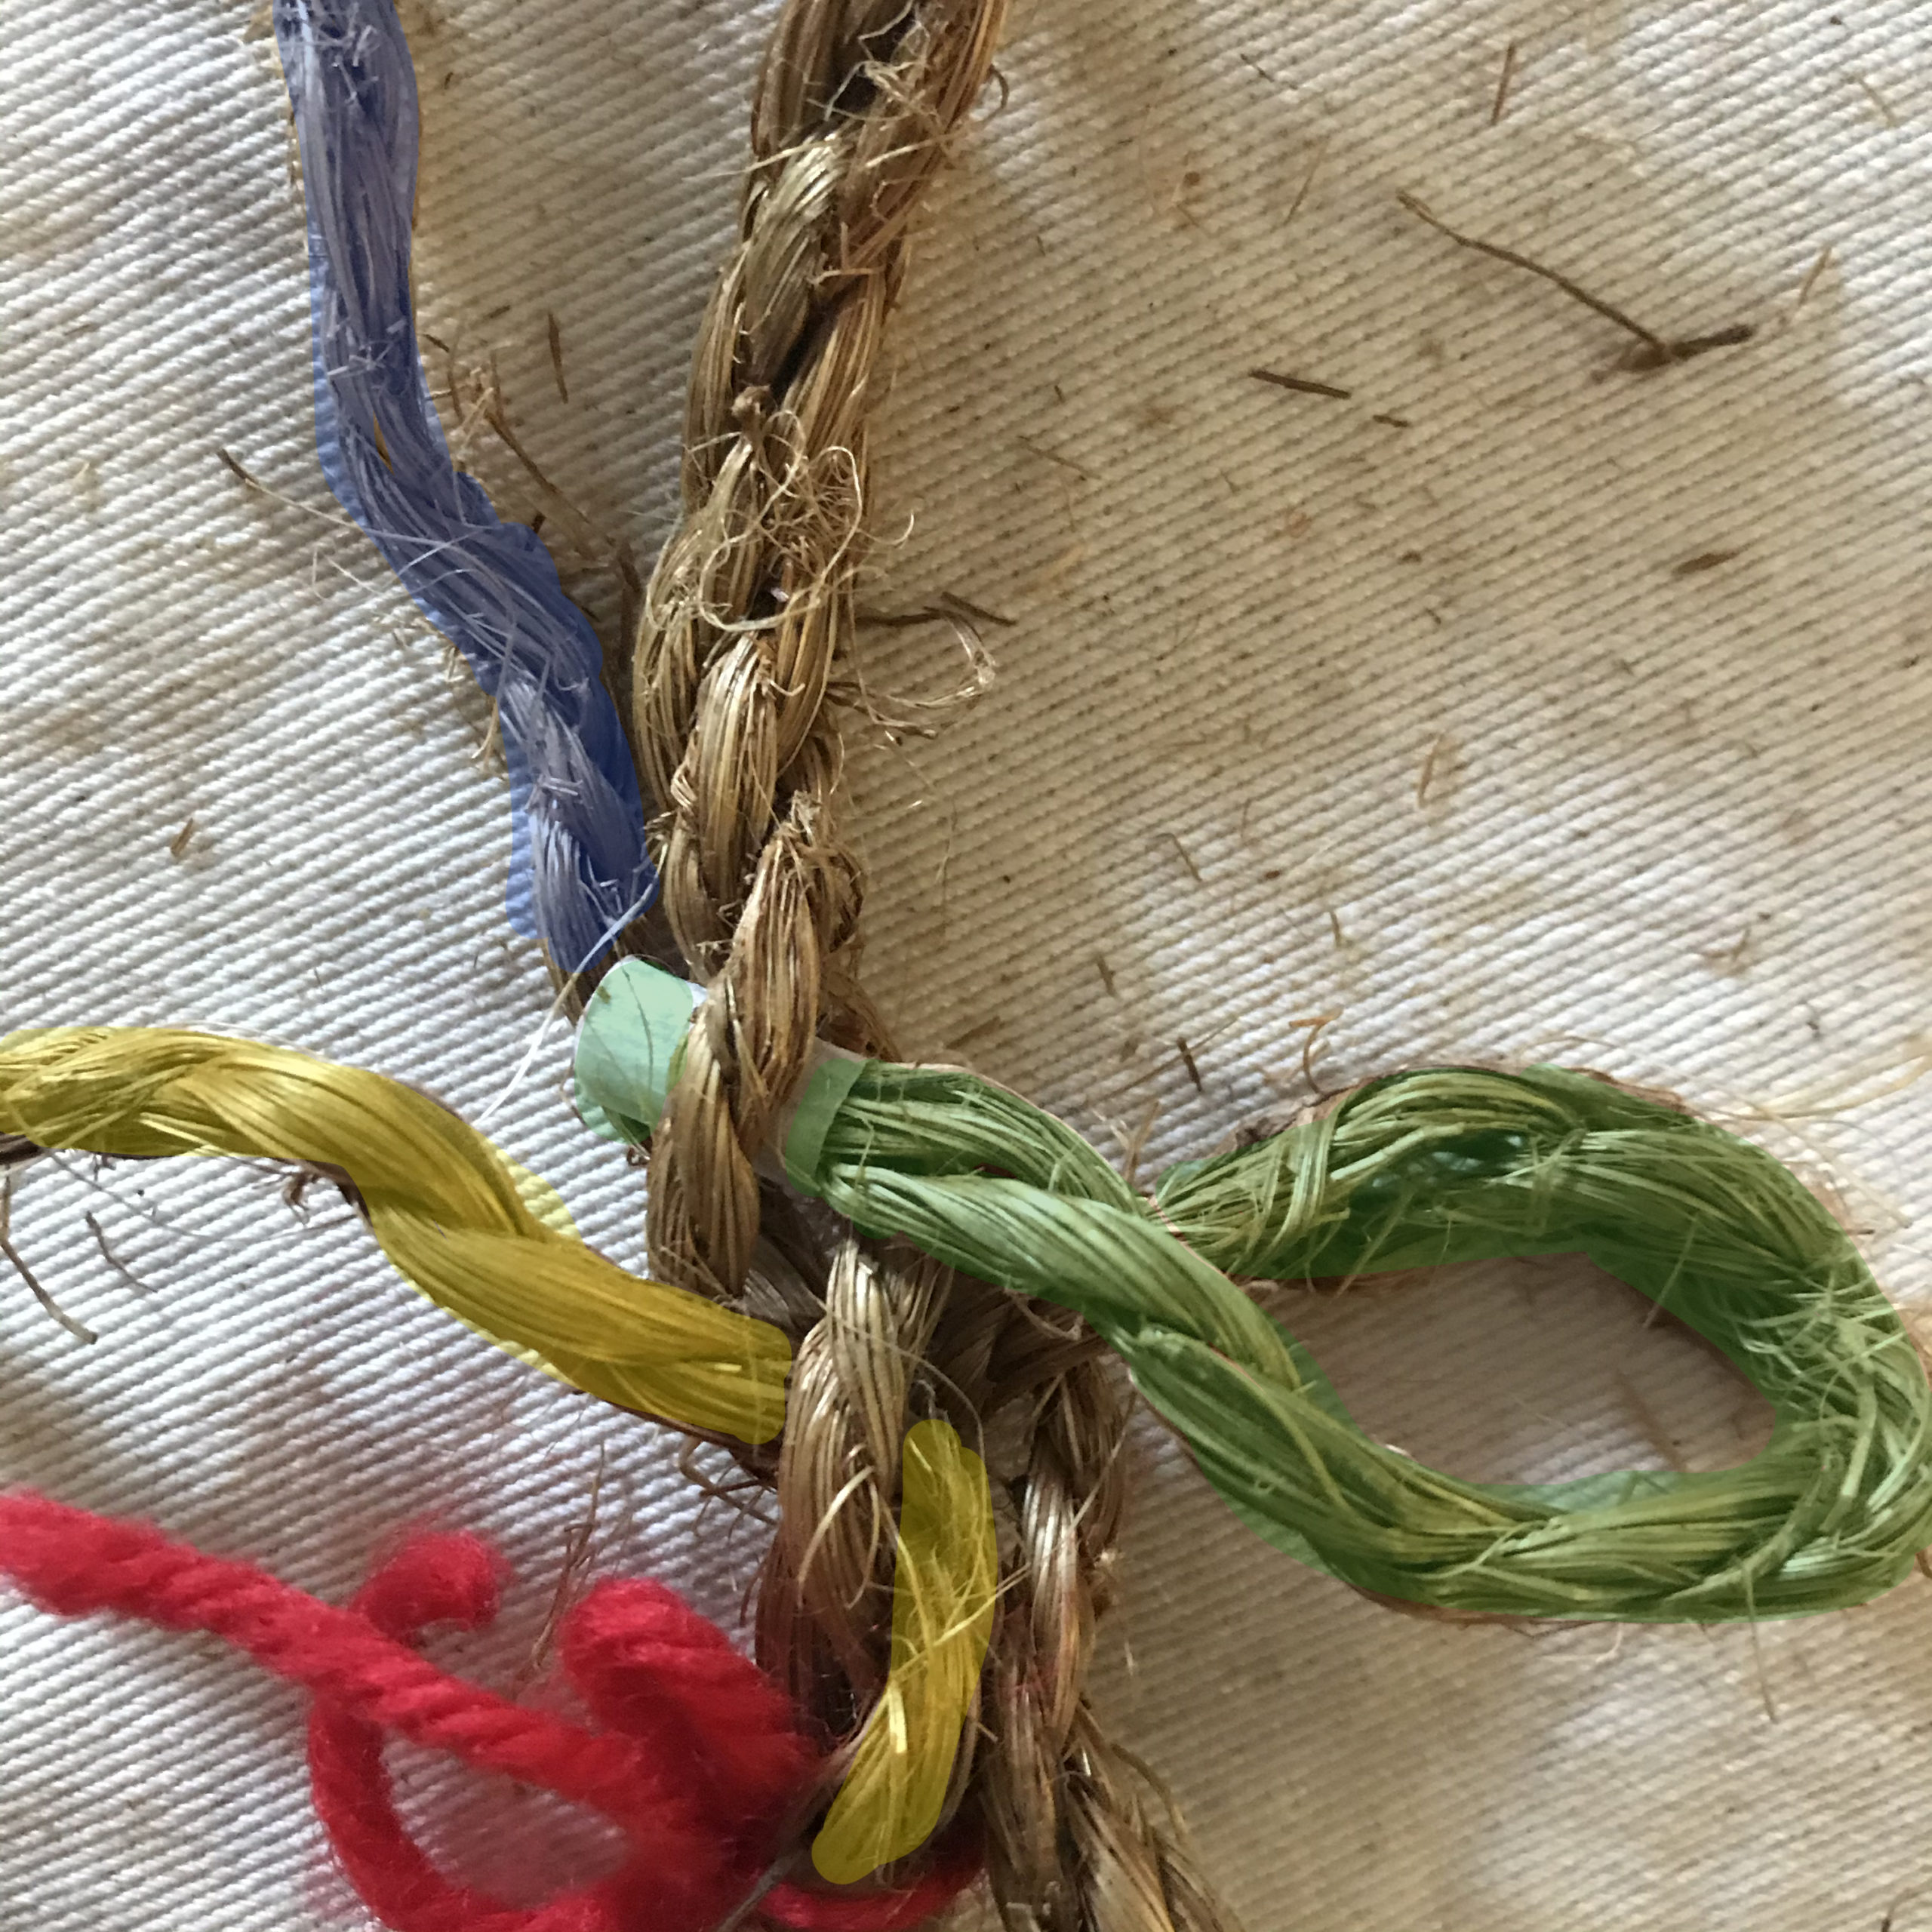
Step 5: Rotate your splice to the right so that the green strand is now on top. Gently untwist the standing part again, and thread your second strand through. It should NOT be coming out the same opening as the first strand.
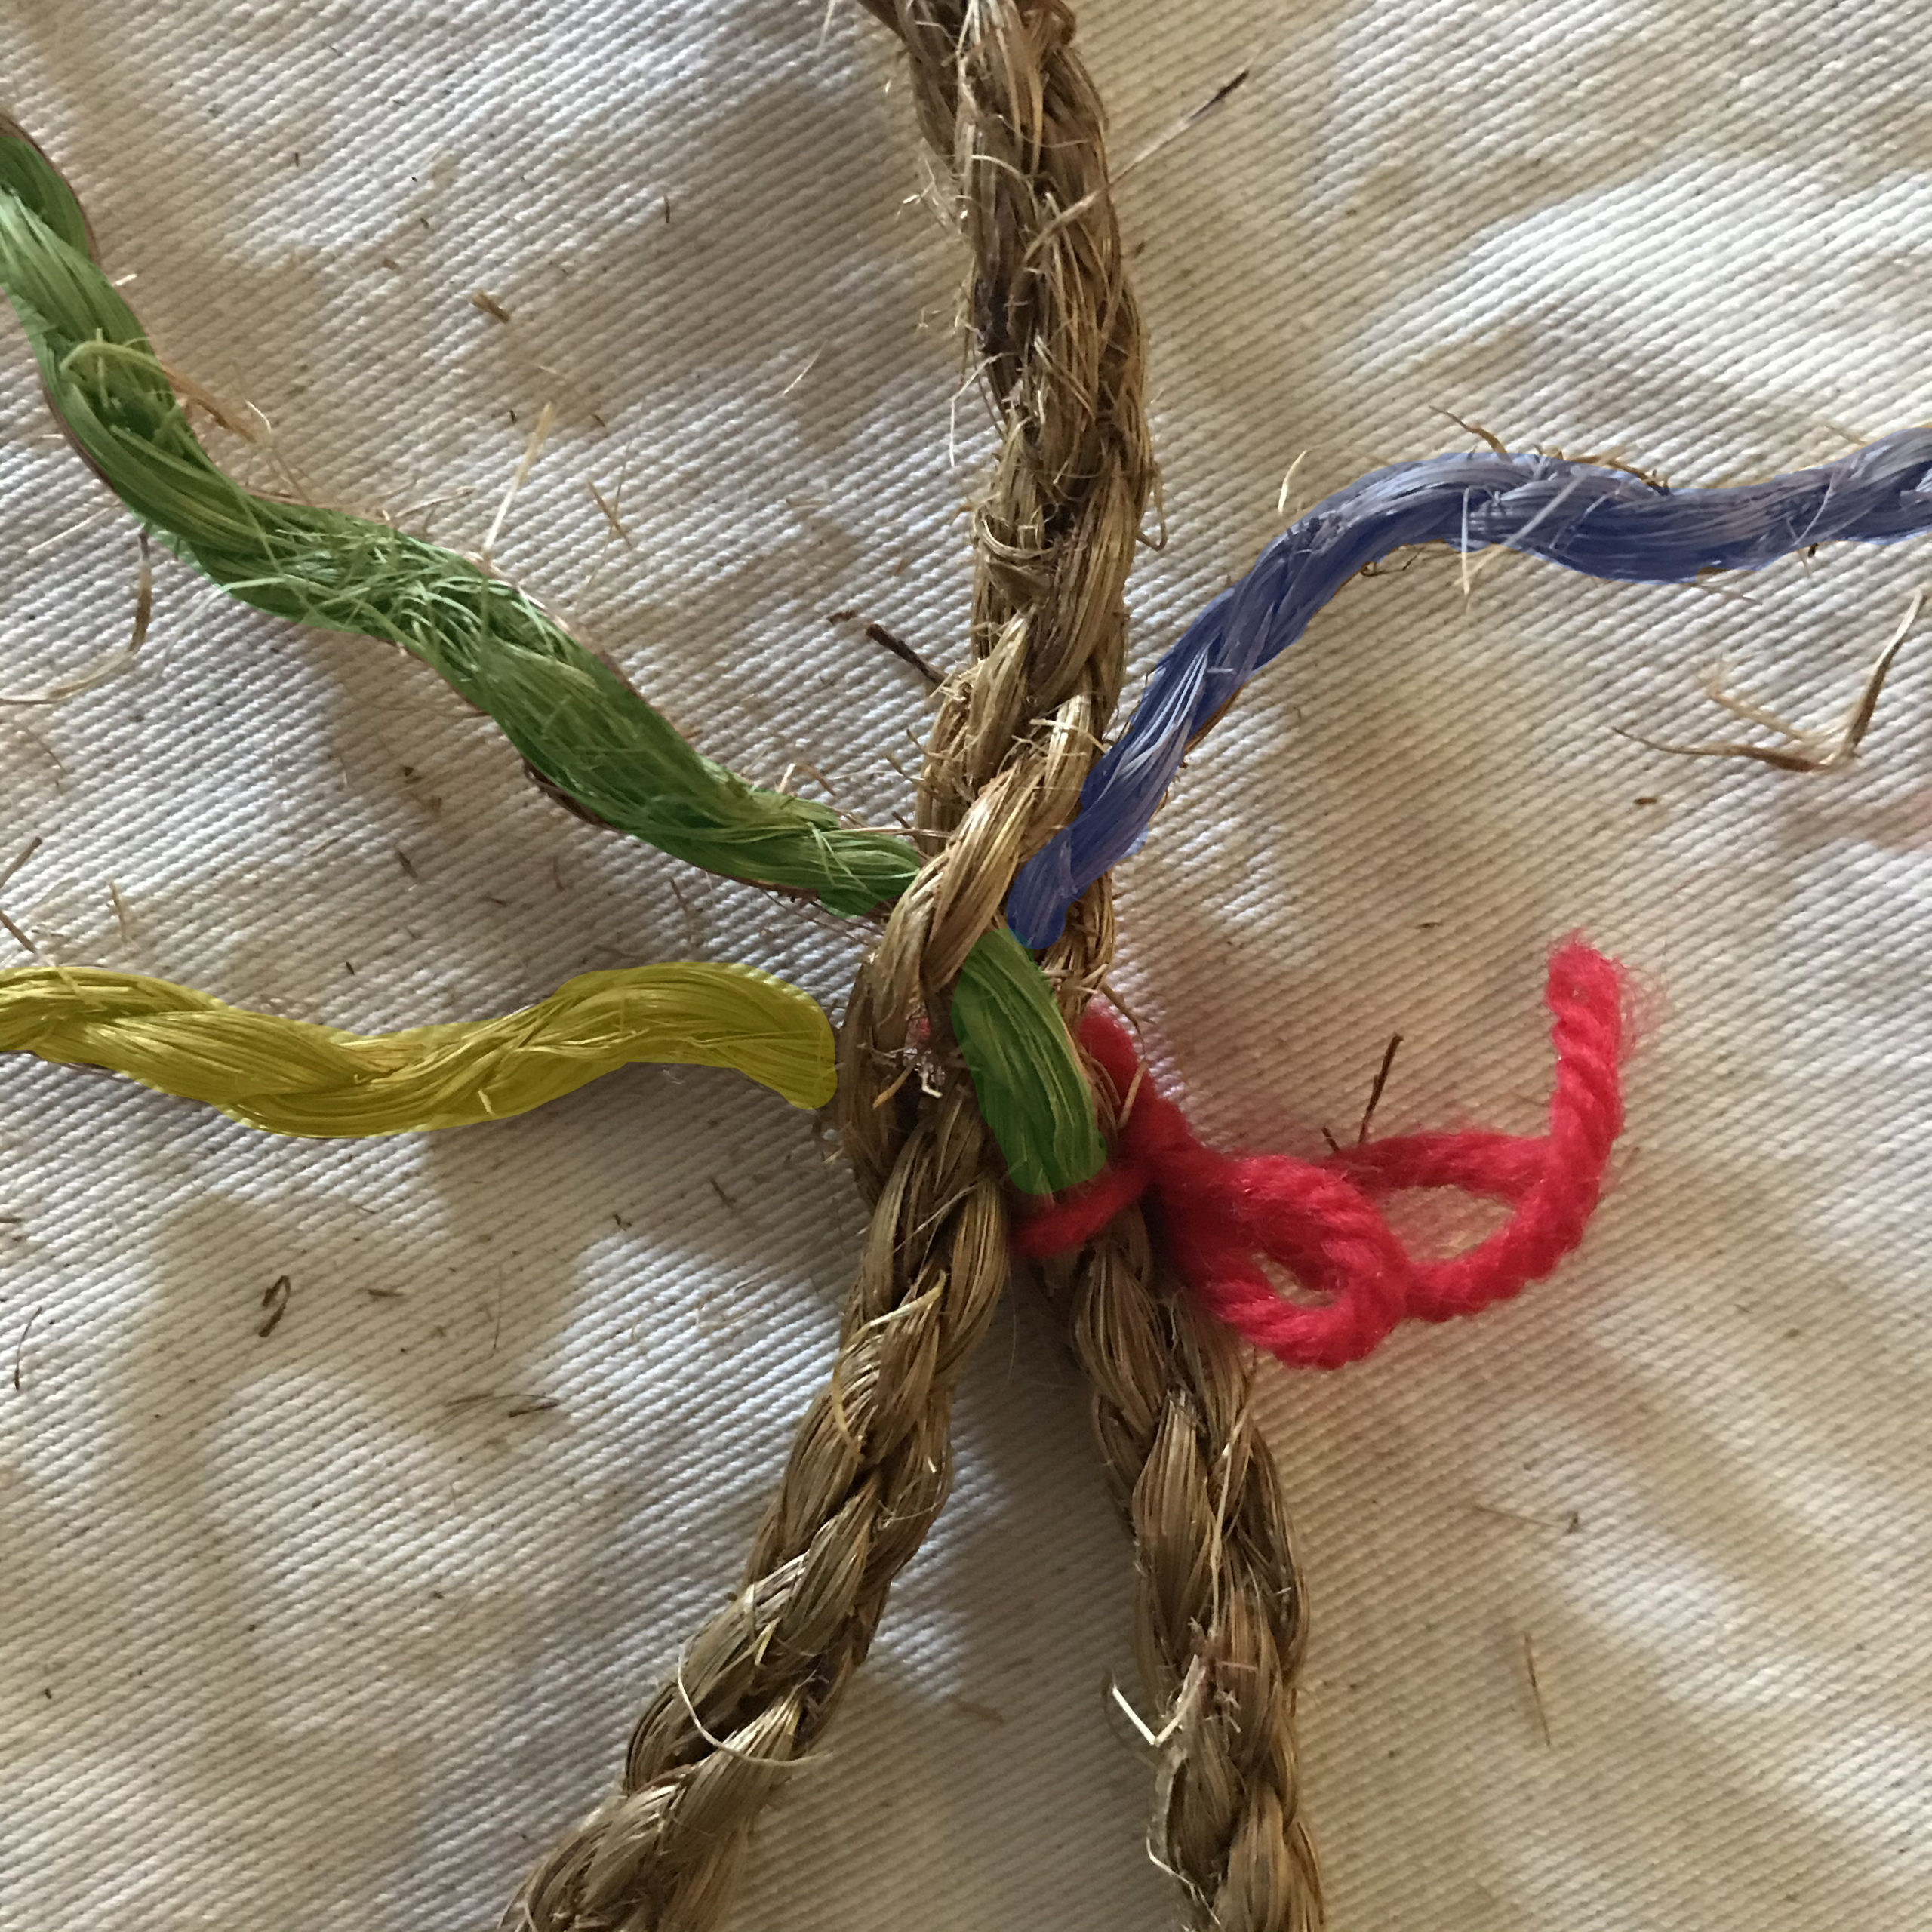
Step 6: Again, pull that second strand through right to left until it sits snug.
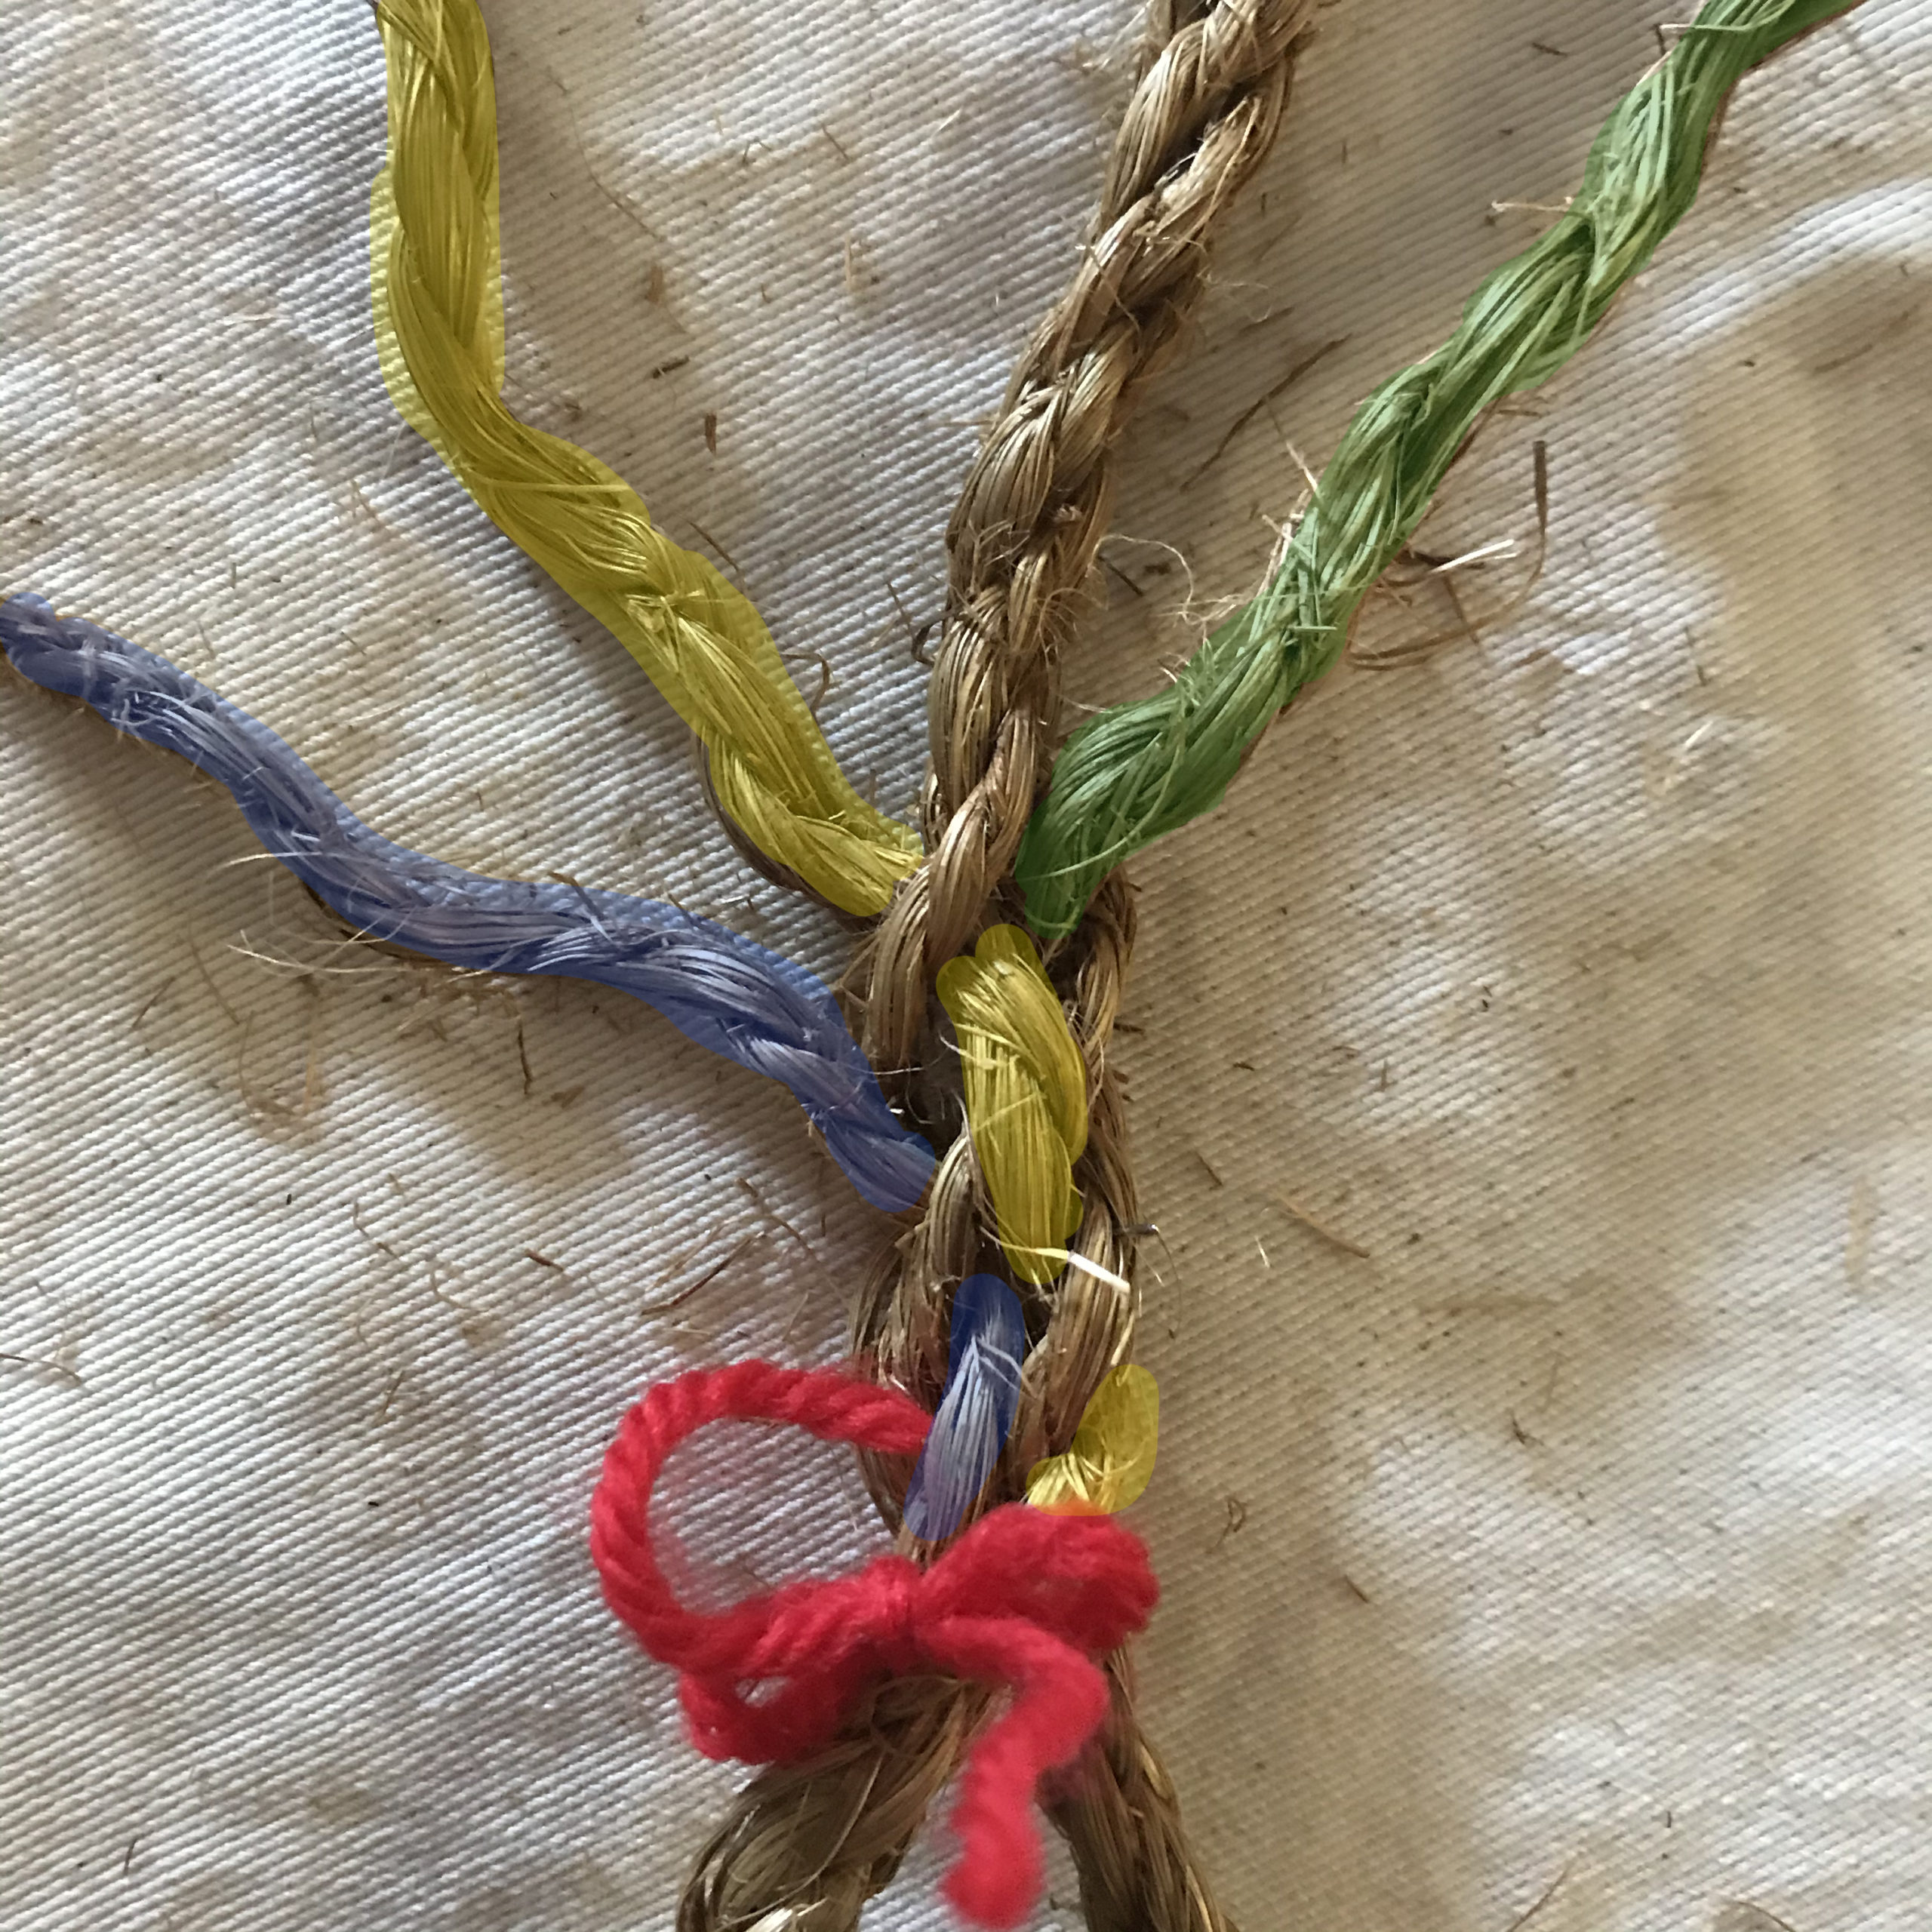
Step 7: This is the trickiest one at the start! Rotate your splice again so that the last strand is on top. (this strand was on the right at the start). Feed the strand from right to left through the last remaining strand of the laid part of the line. Again, each unraveled strand should be separated by a strand in the laid part of the line.
Step 8: Once you've snugged that last strand up, you're ready to start weaving! Now continue to weave in your ends by hopping over the next laid strand, and under the following one.
Step 9: Alternate each strand around in a circle so that they stay level with one another as you work your way, under and over, up the standing part of the line
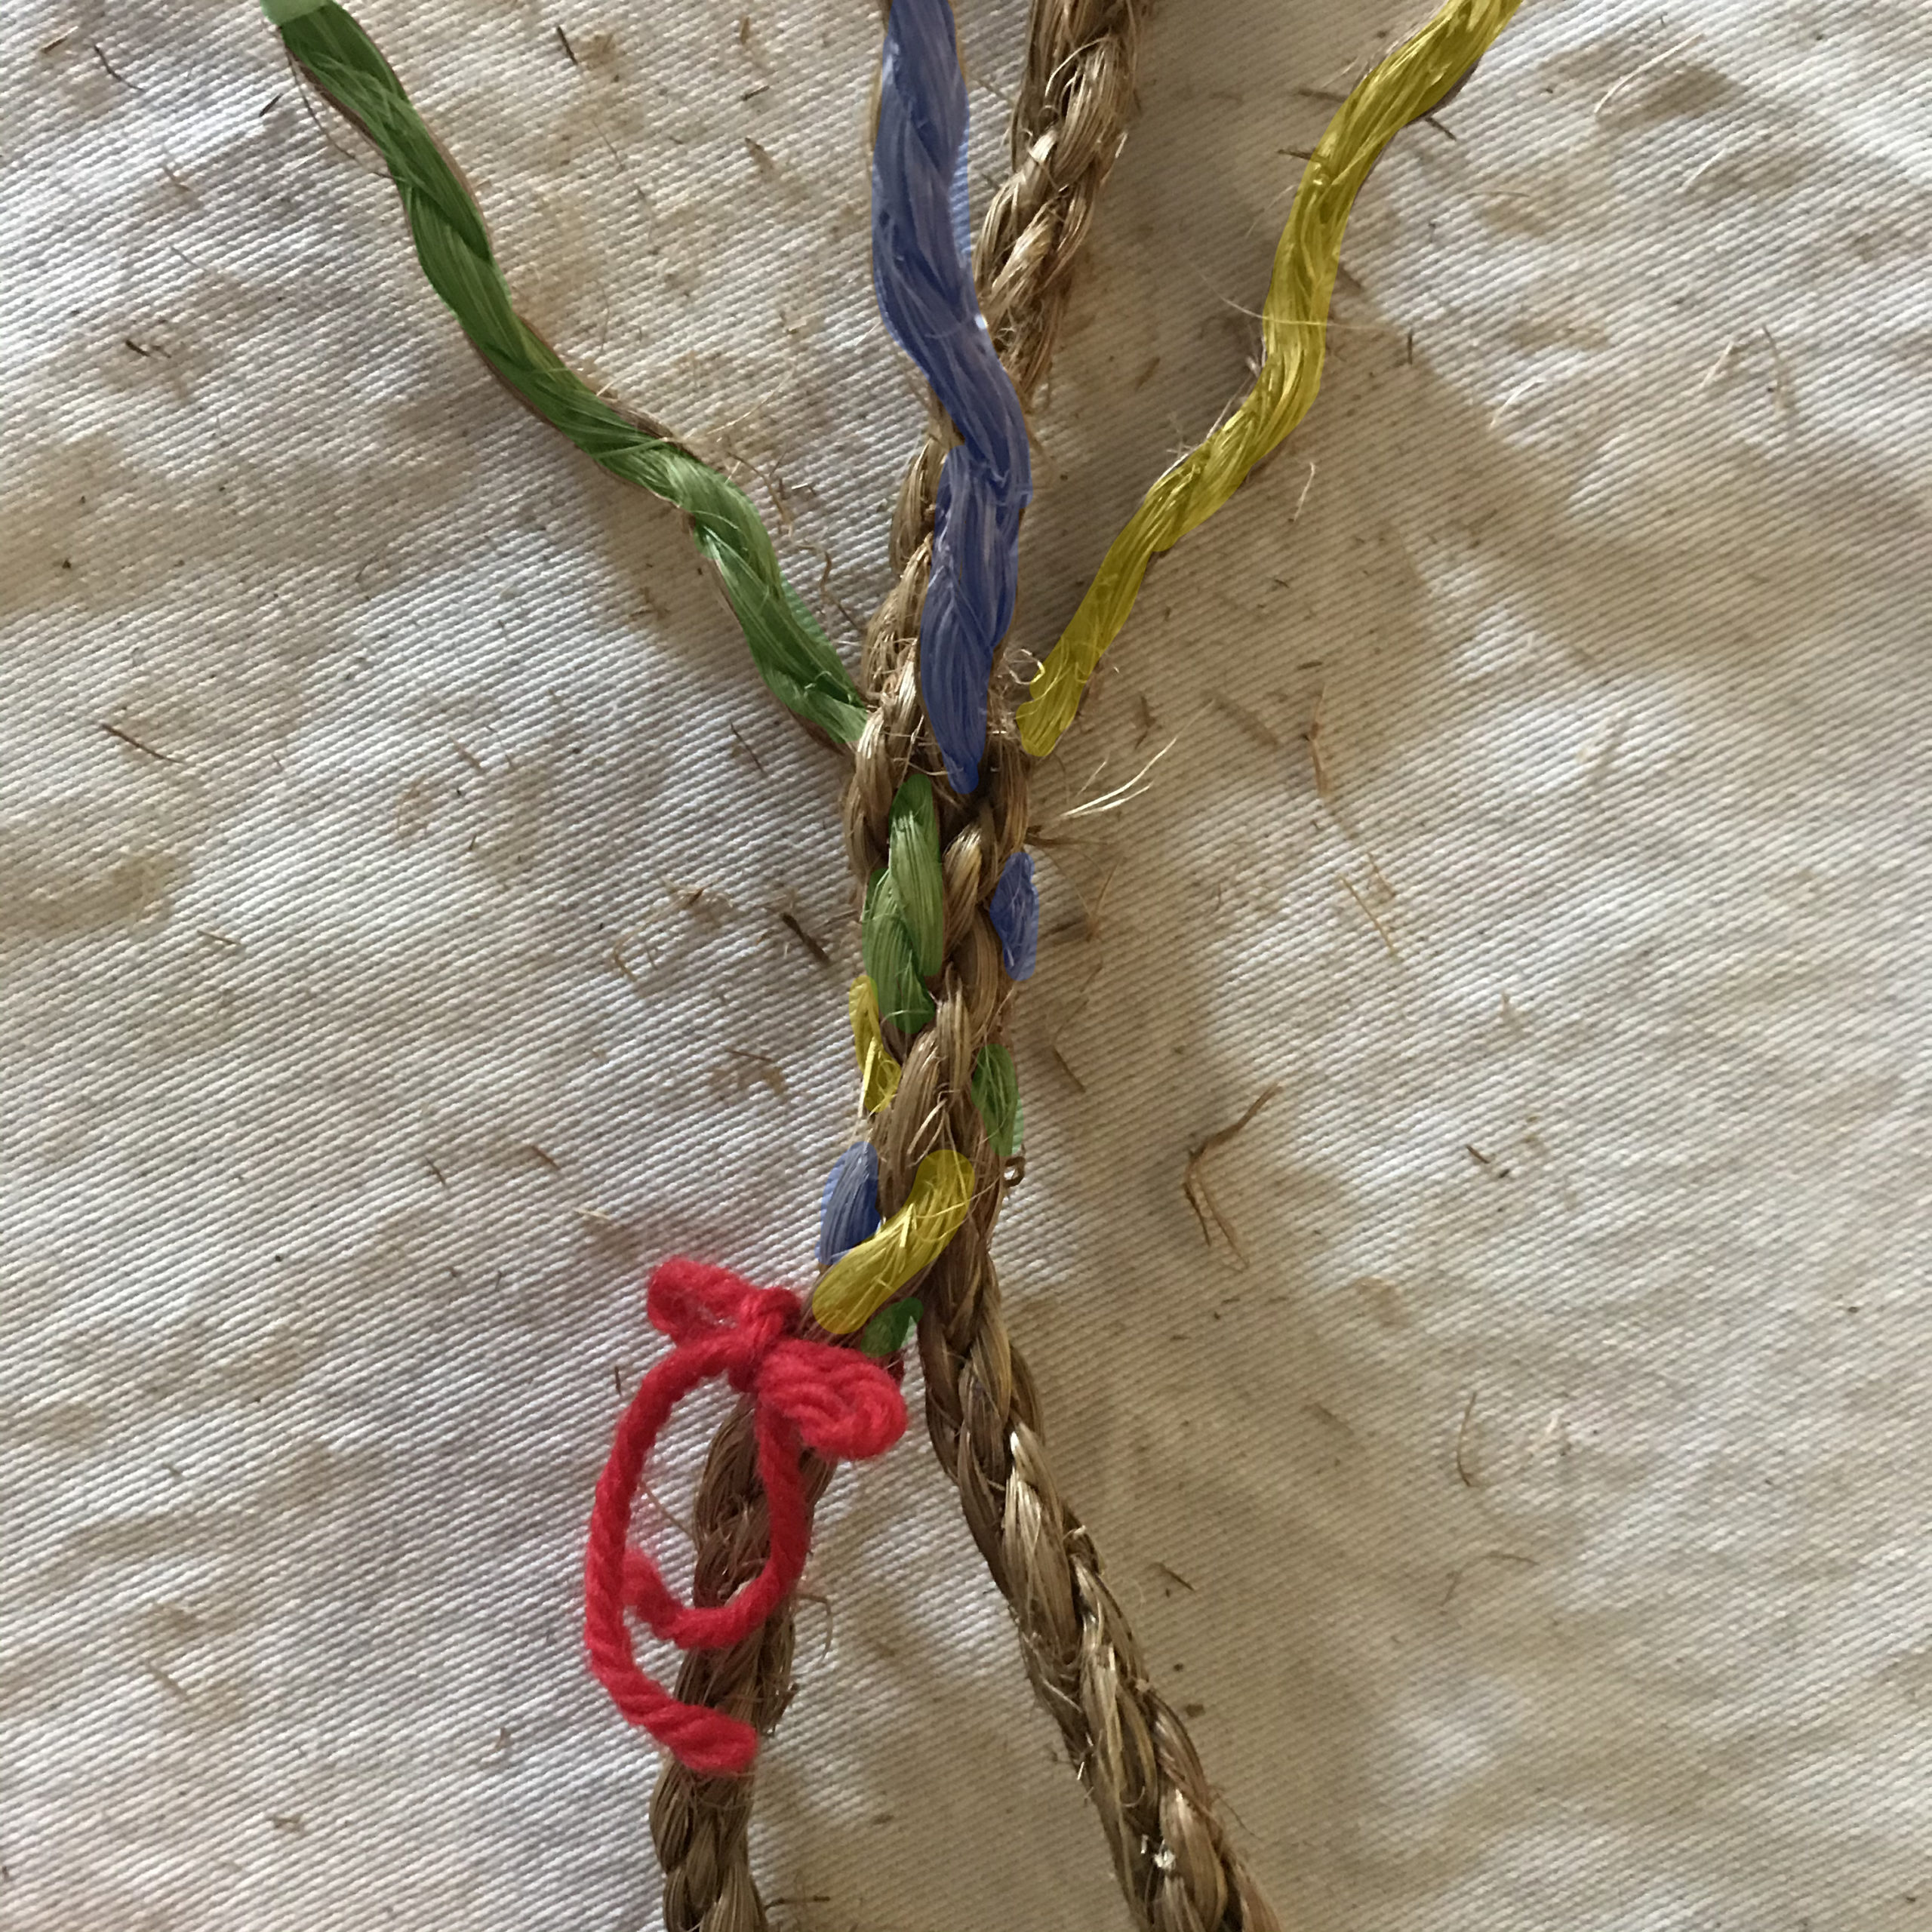
Step 10: As you keep going, the strands will spiral around the standing part of the line in the opposite direction of the twist.
Step 11: Once you get close to the end of your strands, you can either cut the ends all in a row now, or continue to taper the splice.

Step 12: To taper, leave one strand alone. Tuck the next strand once, and tuck the last strand twice, so that your ends are all coming out in a row and the splice tapers. Trim all close to the end
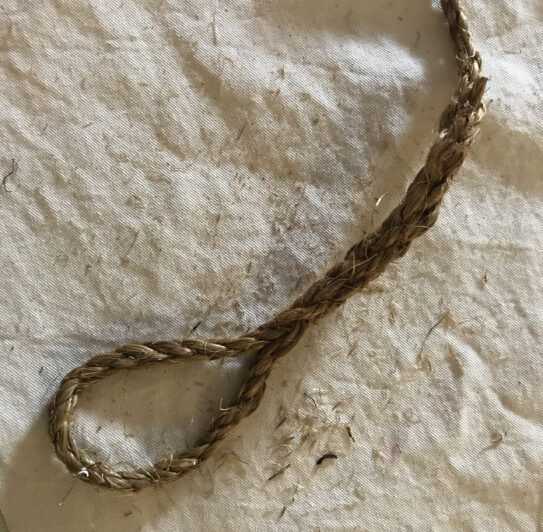
Step 13: Take off your starting string, and you're done! Give your splice a few rolls under your palm or even under your shoe on the floor to work out any lumps. Hopefully you have some nicer line at home than we do and yours won't make as much of a mess!
If you have an easier time with videos than pictures, check out the detailed eye splice how-to video below, as well as two other splicing techniques you might want to try at home! If you enjoy knot tying want to try another similar project, check out our previous At Home Activity posts on making sailors bracelets or macrame. As with all our At Home Activities we would love to hear what you thought of this project! Share your photos with us by emailing us at [email protected], posting on our Facebook page or tagging us on Instagram @herreshoff #HerreshoffFromHome.
How do you splice a 4 strand rope together with another length?