April 6, 2020
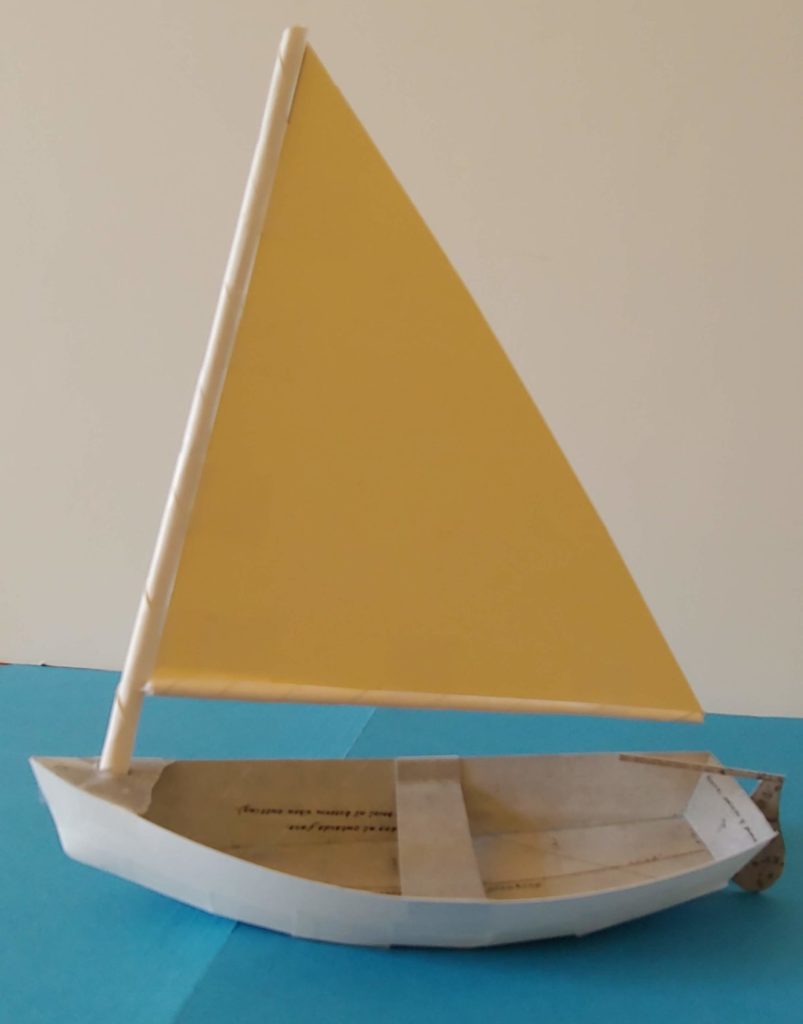
The Herreshoff 10 ft. Paper Skiff
Build a miniature model of an already miniature Herreshoff skiff, straight from the original plans
Did you build the Bevin’s skiff last week? We would love to see pictures if you did! Check out the Bevin's Skiff post on our Facebook page and upload a photo to the comments or tag us @herreshoff with your photos on Instagram and #HerreshoffFromHome .
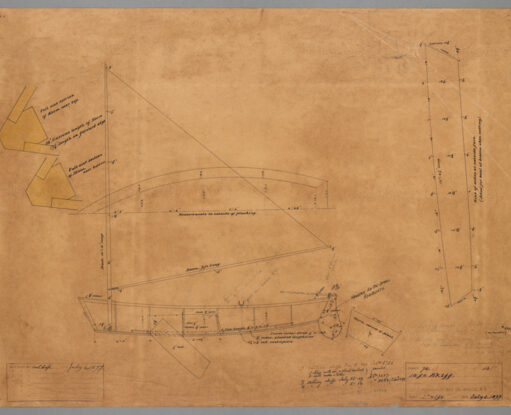
Today we have another paper boat building challenge for you: a 10-foot skiff designed by Captain Nat in 1899. You can see the original plan in MIT’s collection. High school students built a full-size replica in the Museum’s New Pathways Boat Shop in 2018, and once we're open again you can stop by and take a look.

This paper model goes together in same way as the Bevin's skiff. All you need is a printer, tape and scissors. If you have access to card stock it will be more durable and if you cover the paper with packing tape before you cut out the shapes it will even be waterproof for a little while. Consider giving it a paint job, adding a name to the transom, a tiny figurehead, trailboards, a burgee, sails, a battering ram... get creative!
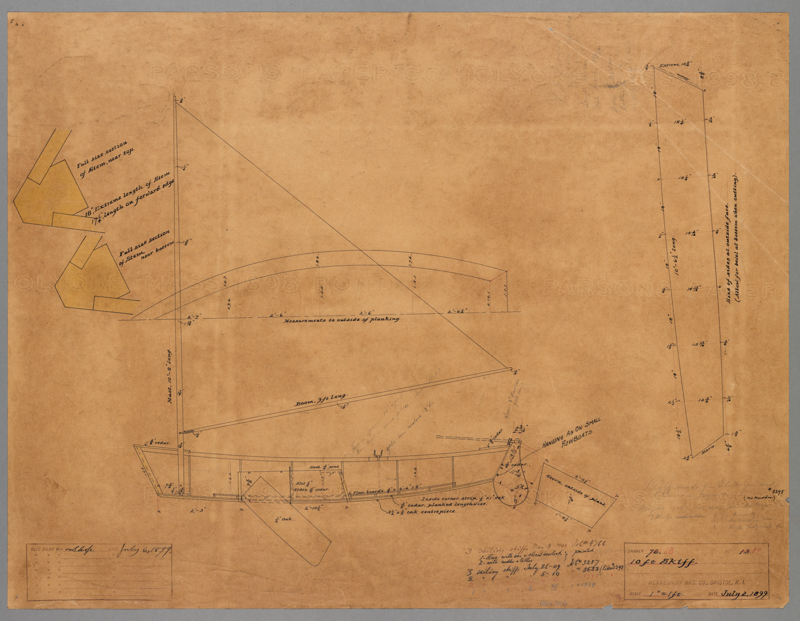
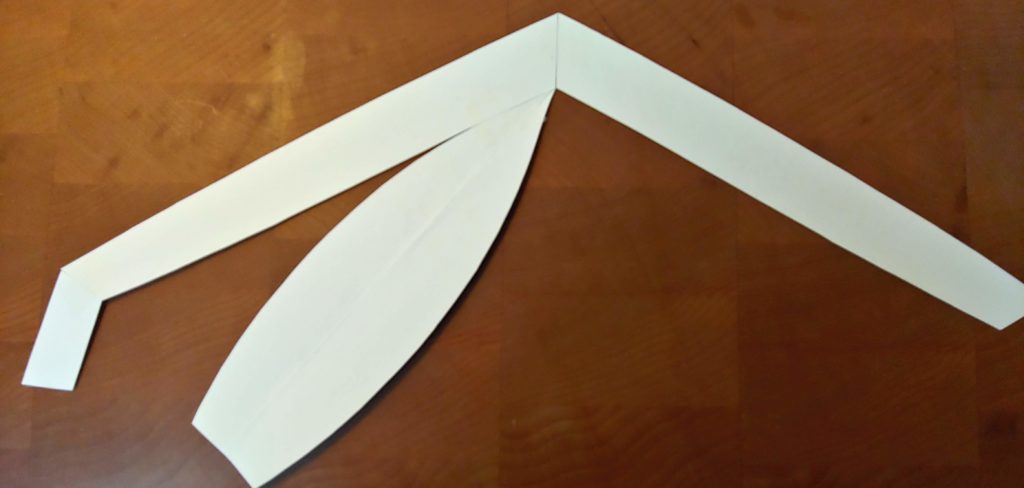
Step two: cut out the sides of the skiff (printed pages 2 - 3 of the pdf). Tape them together at the end labeled "stem" on the drawing. Note the printed writing will be on the inside of your boat on port, and on the outside on the starboard side - make sure you don't tape one of the planks upside down!
Step three: cut out the transom and bottom of the boat from page 1
Step four: tape the transom sides to ends of the side planks labeled "stern" on the drawing.
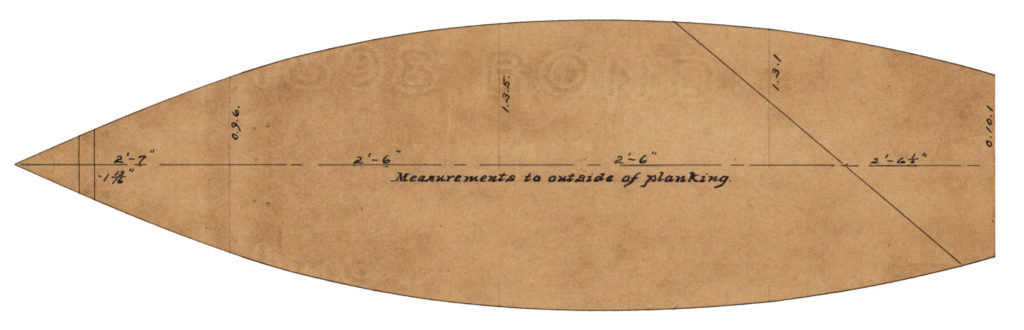
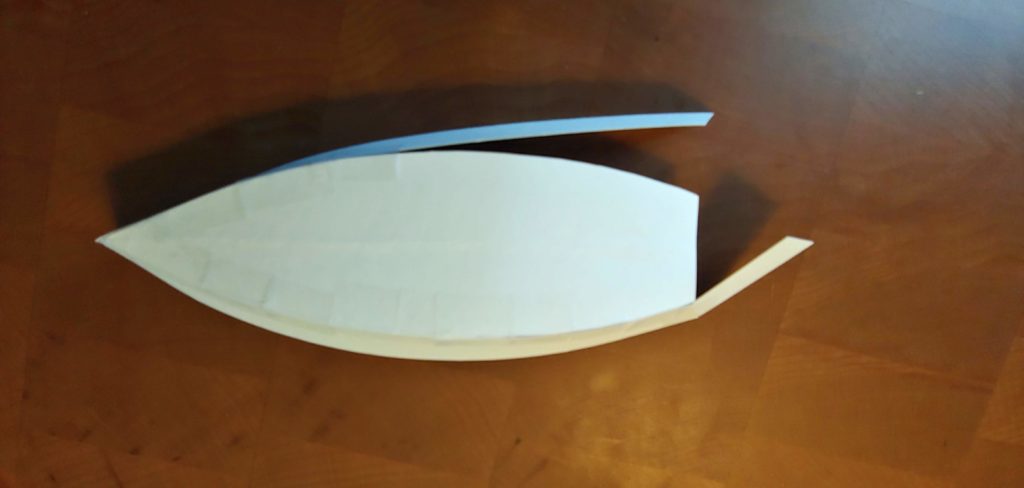
Step five: tape the bottom to the sides and transom. The finished hull will have some rocker so work for the bow aft to attach the bottom a little at a time with small overlapping pieces of tape.
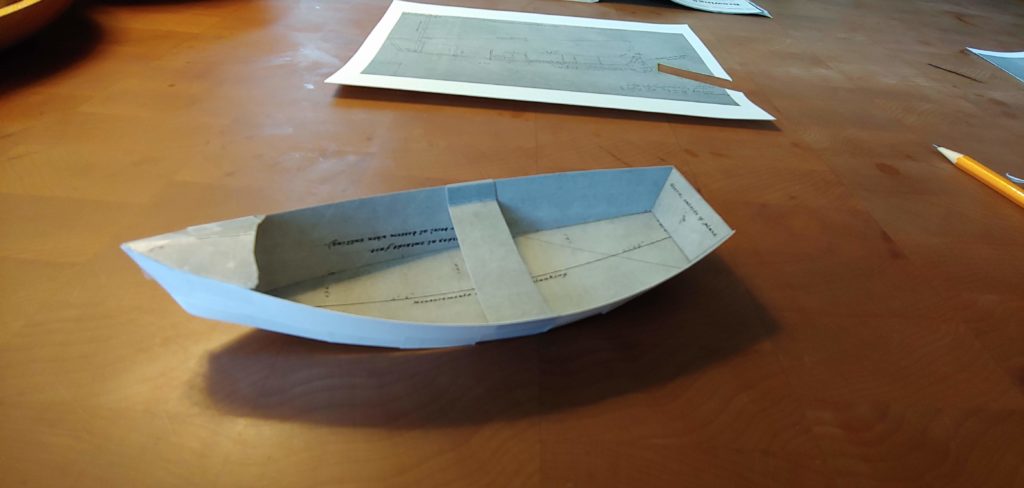
Step six: if you zoom in on the plans on MIT’s site you can see that there is a small foredeck that supports the mast, as well as a seat (thwart) at midship. You can cut a small triangle out of paper and attach it to the bow of the boat for the foredeck, and cut a rectangular strip for the thwart and attach it at midship.
Step seven: If you want to go the extra distance, you can cut out the rudder and hang it on the transom, cut a centerboard trunk and centerboard, and make spars and design a sail. Take a look at the MIT plan for the rig to see what the sail would have looked like. You can make the spars by cutting out long strips of paper about an inch wide and rolling them on the diagonal to make a hollow tube. I used a toothpick to help get it started rolling and a sharp pencil to pierce a hole in the foredeck for the mast to go through. Tape the boom to the sail and the sail to the mast, and you're ready for a bathtub christening! Good luck, and have fun!